
| 
| |
|
|
This page contains photographs of British Columbia's Highway 97 (Cariboo Highway), arranged by location from Cache Creek
northerly to the Highway 24 Junction near 100 Mile House. All photographs displayed on this page were taken by the Webmaster (Cameron Bevers). To view photos of other
British Columbia Highways, please select a highway number listed on the
British Columbia Photograph Index Page. Click on any
thumbnail to see a larger image!
Please note that all photographs displayed on this website are protected by copyright. These photographs must not be
reproduced, published, electronically stored or copied, distributed, or posted onto other websites without my written permission. If you want to use photos from this
website, please email me first for permission. Thank-you!
|
|---|
|
Page 8: BC Highway 97 (Cariboo Highway) Photographs: Cache Creek to Highway 24
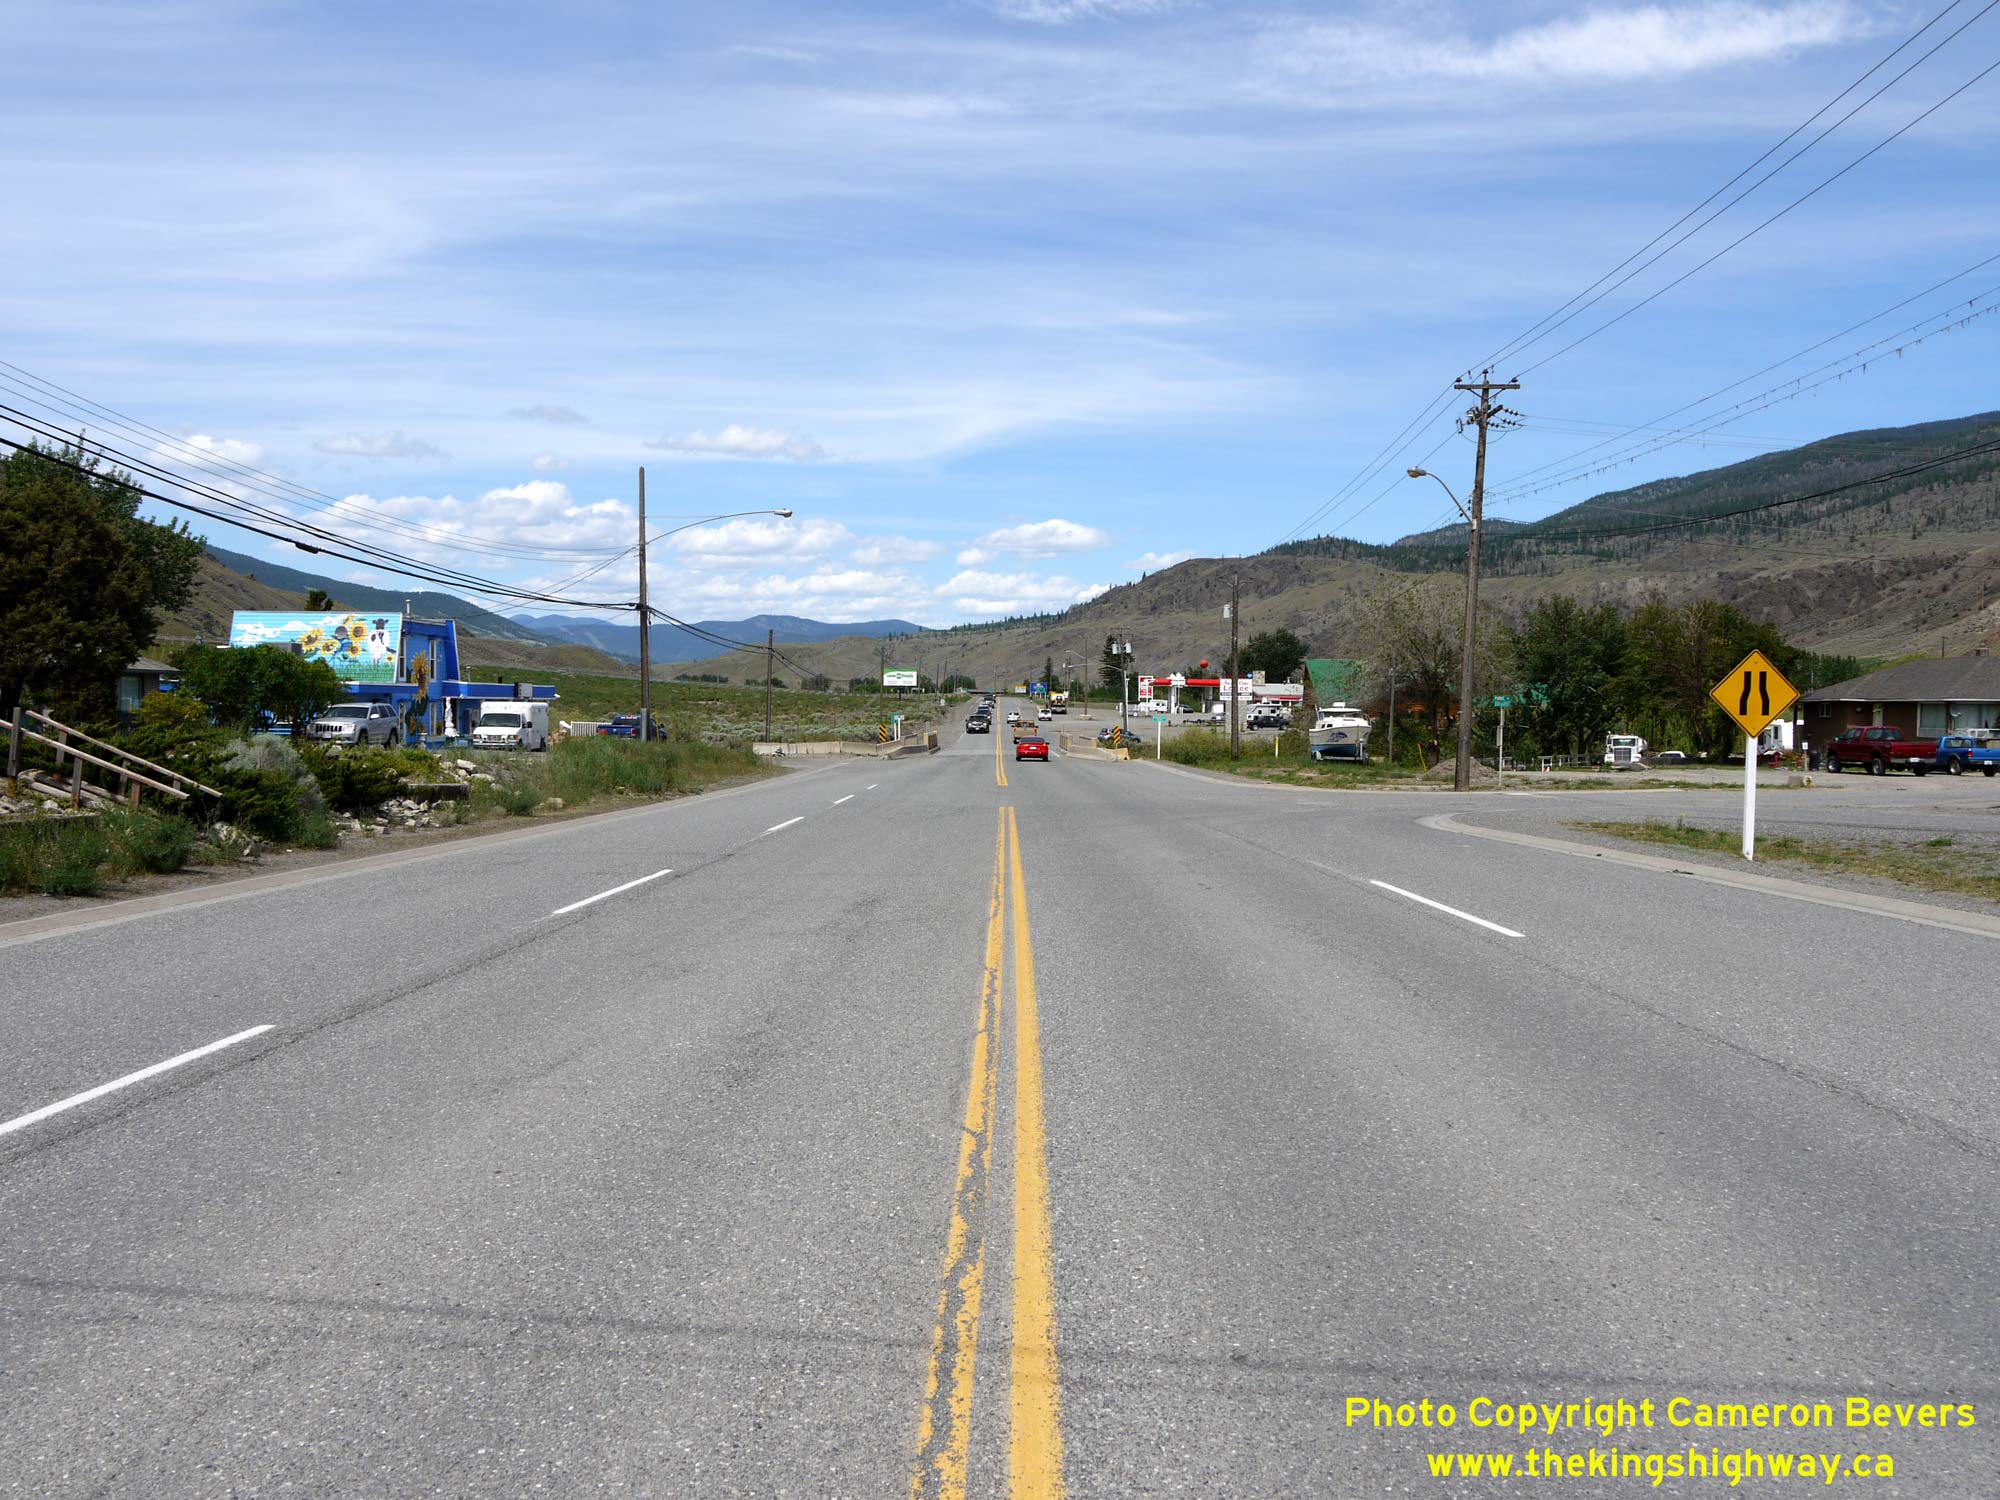

Left - Facing north along Hwy 97 approaching the end of the four-lane highway through Cache Creek. See an
Enlarged Photo Here. (Photograph taken on May 31, 2015 - © Cameron Bevers) Right - Bonaparte River Bridge on Hwy 97 at the north entrance to Cache Creek. See an Enlarged Photo Here. (Photograph taken on May 31, 2015 - © Cameron Bevers) 
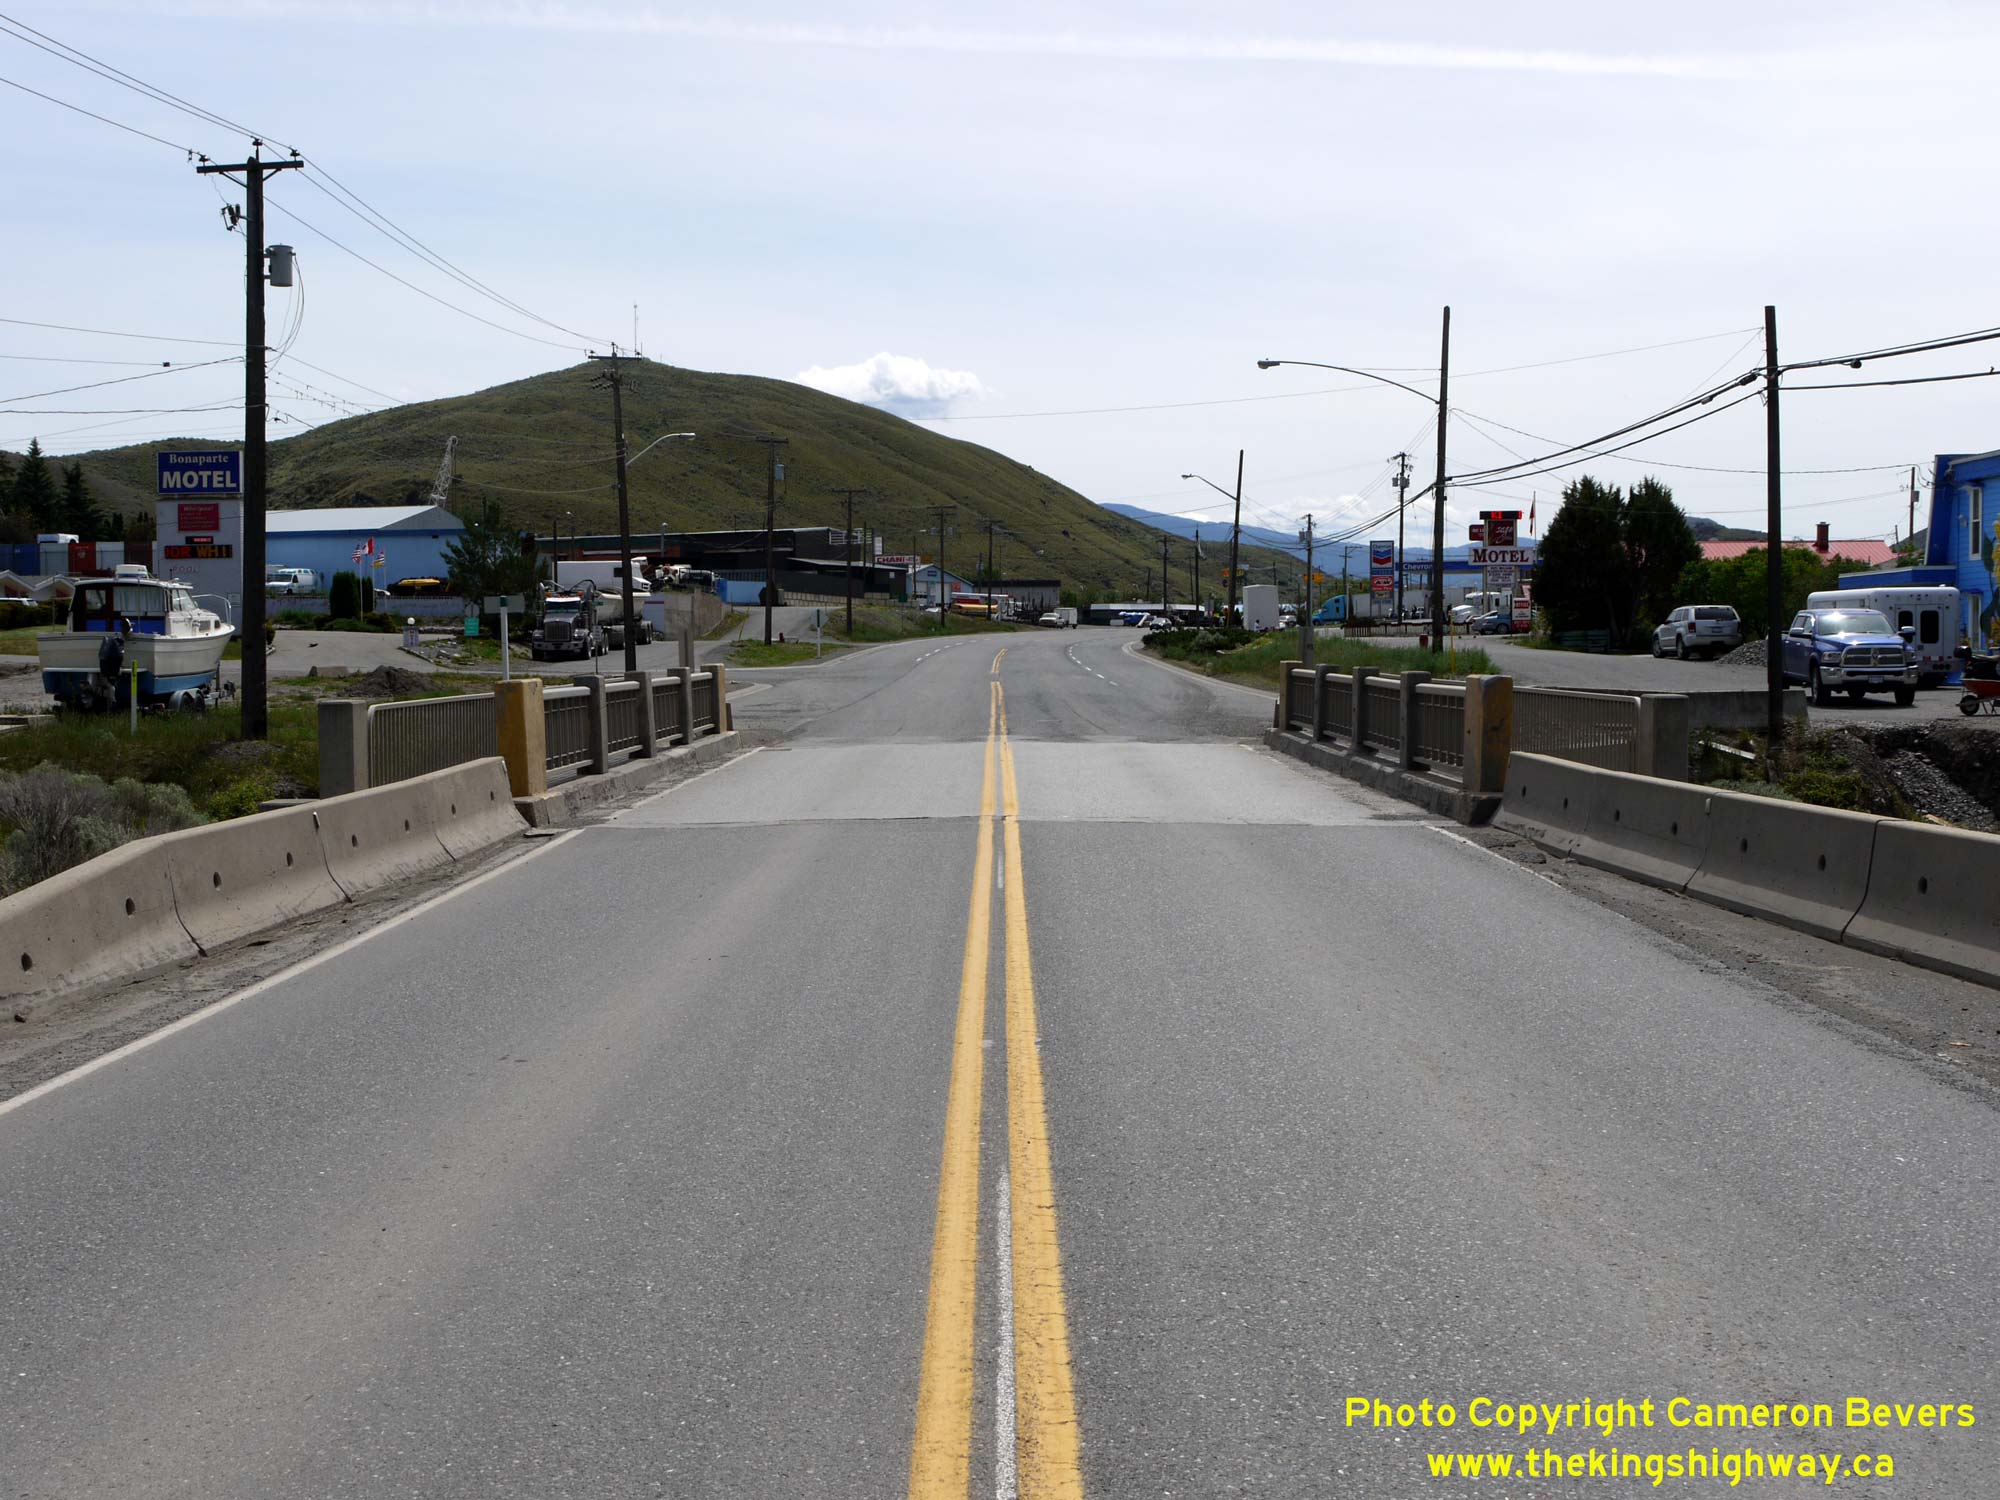
Left - Facing south along Hwy 97 at the start of the four-lane highway through Cache Creek. See an
Enlarged Photo Here. (Photograph taken on May 31, 2015 - © Cameron Bevers) Right - Bonaparte River Bridge on Hwy 97, facing south. This narrow two-lane structure likely dates from the 1950s. It has a pair of sidewalks on either side of the bridge which were clearly retrofitted after the original bridge was built. See an Enlarged Photo Here. (Photograph taken on May 31, 2015 - © Cameron Bevers) 

Left - Cariboo Connector sign on northbound Hwy 97 near Cache Creek. Sections of Hwy 97 have been widened to four lanes in recent years as part of multi-year
improvement program along Hwy 97. The existing highway between Cache Creek and Prince George now has a mix of both two-lane and four-lane sections. See an
Enlarged Photo Here. (Photograph taken on May 31, 2015 - © Cameron Bevers) Right - Distance guide sign on northbound Hwy 97 departing Cache Creek. The Hwy 99 Junction is signed as a destination along northbound Hwy 97, as Hwy 99 serves as a scenic alternate route between BC's Interior and the Pacific Coast. See an Enlarged Photo Here. (Photograph taken on May 31, 2015 - © Cameron Bevers) 

Left - Sign marking the entrance to Cache Creek on Hwy 97. See an
Enlarged Photo Here. (Photograph taken on May 31, 2015 - © Cameron Bevers) Right - Facing south along Hwy 97 about 2 km north of Cache Creek. See an Enlarged Photo Here. (Photograph taken on May 31, 2015 - © Cameron Bevers) 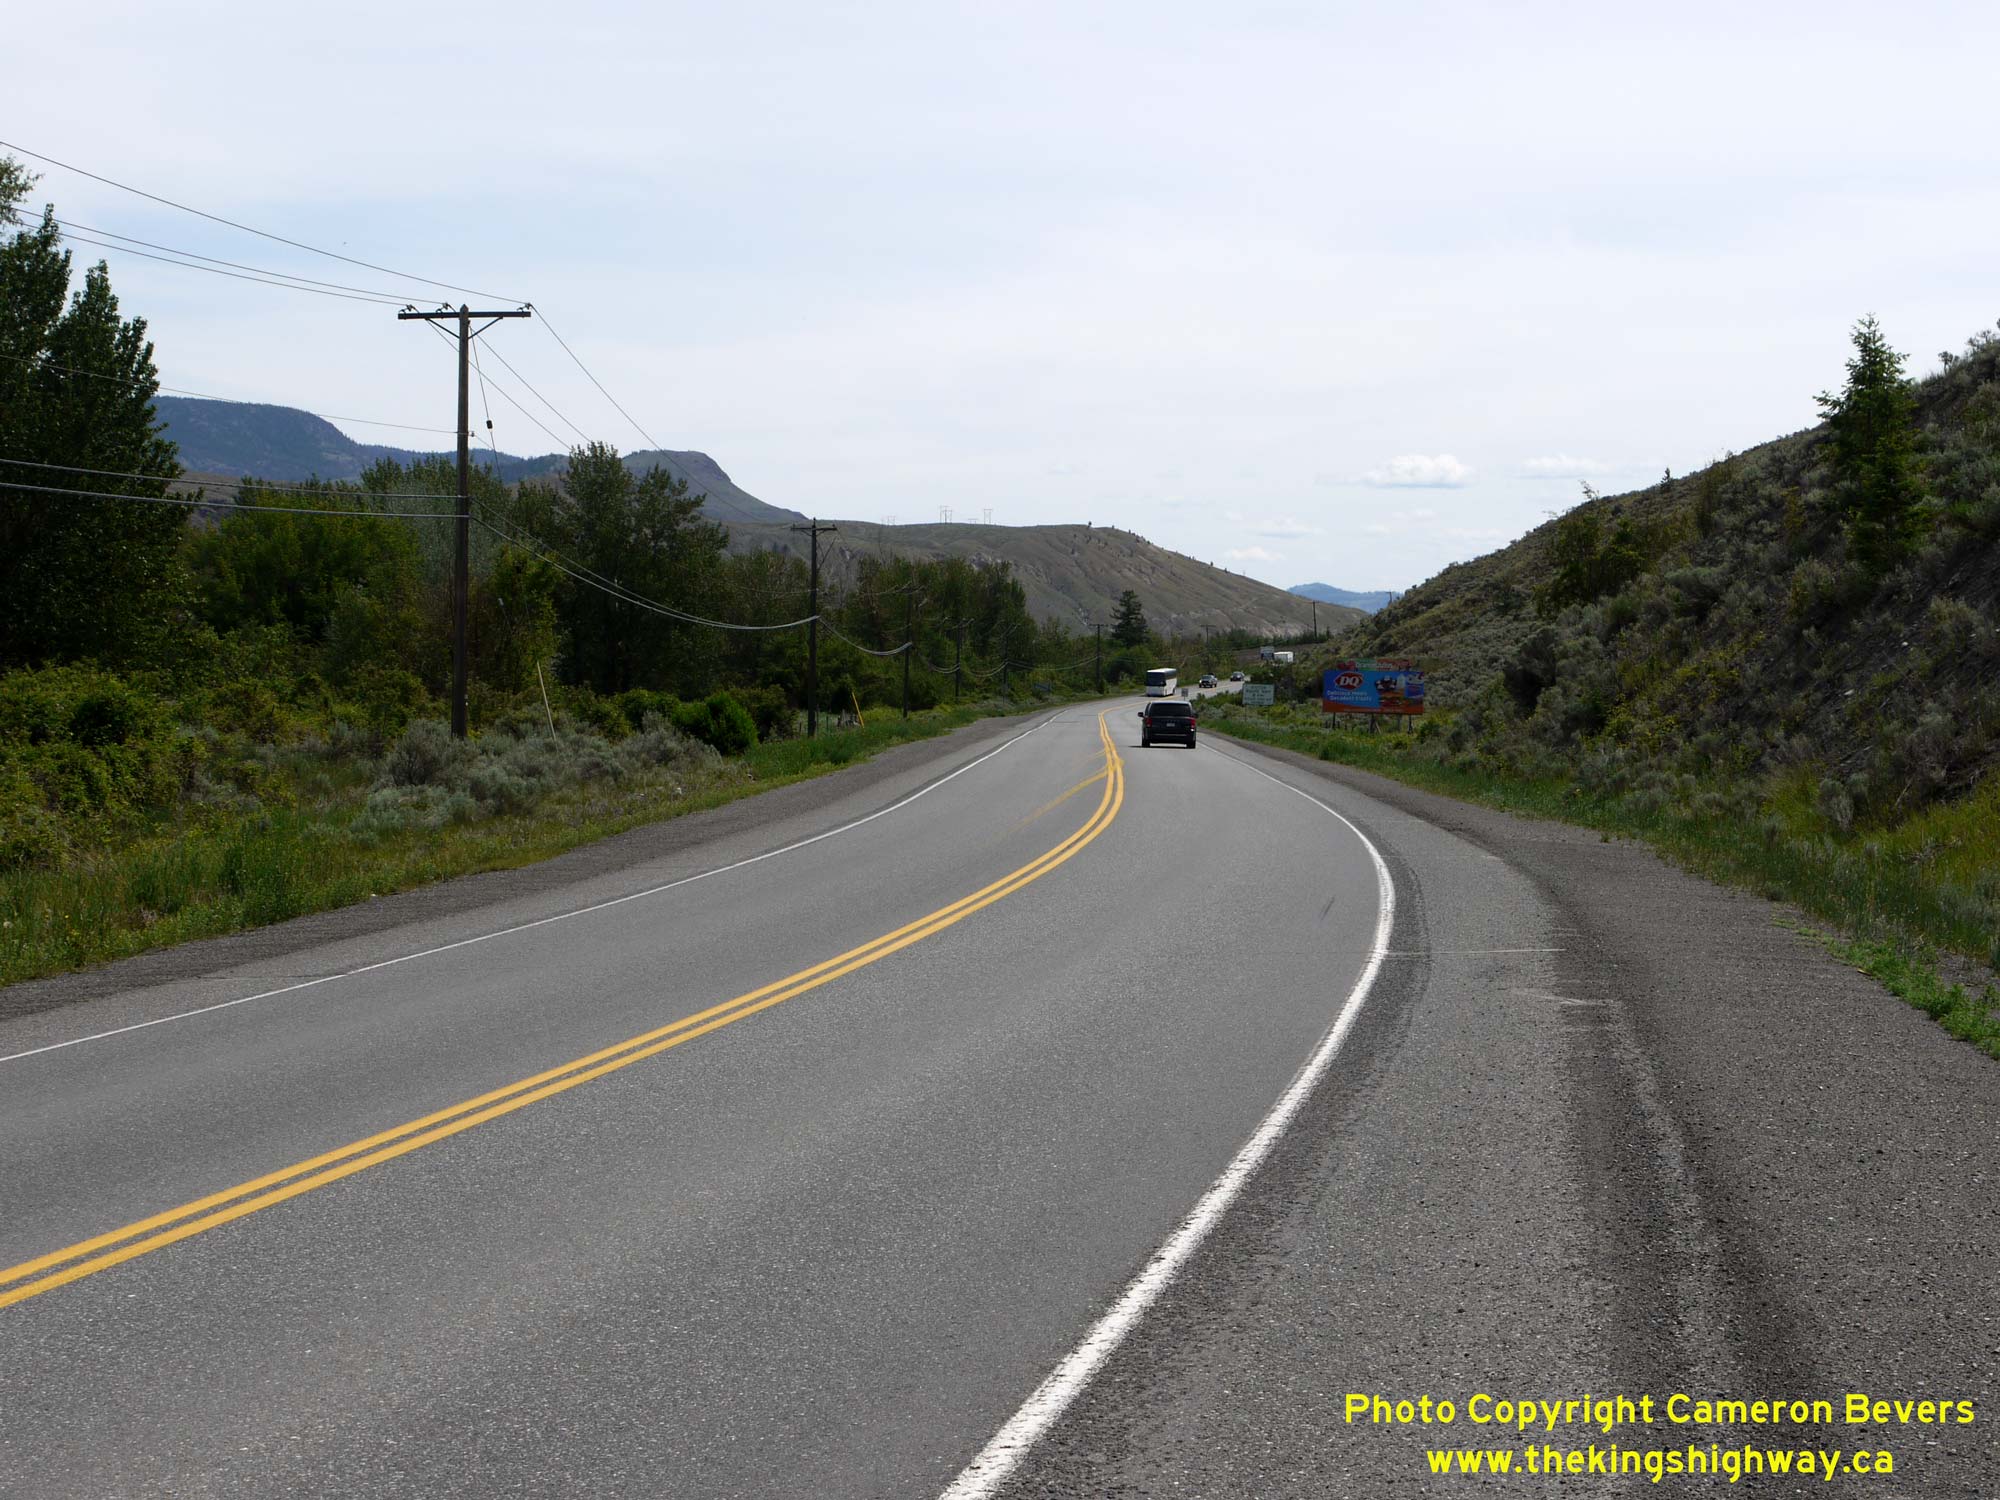

Left - Facing south along Hwy 97 about 4 km north of Cache Creek. See an
Enlarged Photo Here. (Photograph taken on May 31, 2015 - © Cameron Bevers) Right - Facing north along Hwy 97 approaching Bonaparte. See an Enlarged Photo Here. (Photograph taken on May 31, 2015 - © Cameron Bevers) 
Left - Facing south along Hwy 97 at Bonaparte, located about 5 km north of Cache Creek. See an
Enlarged Photo Here. (Photograph taken on May 31, 2015 - © Cameron Bevers) Right - Western side of the Bonaparte River Bridge on Hwy 97 north of Cache Creek, facing south. See an Enlarged Photo Here. (Photograph taken on May 31, 2015 - © Cameron Bevers) 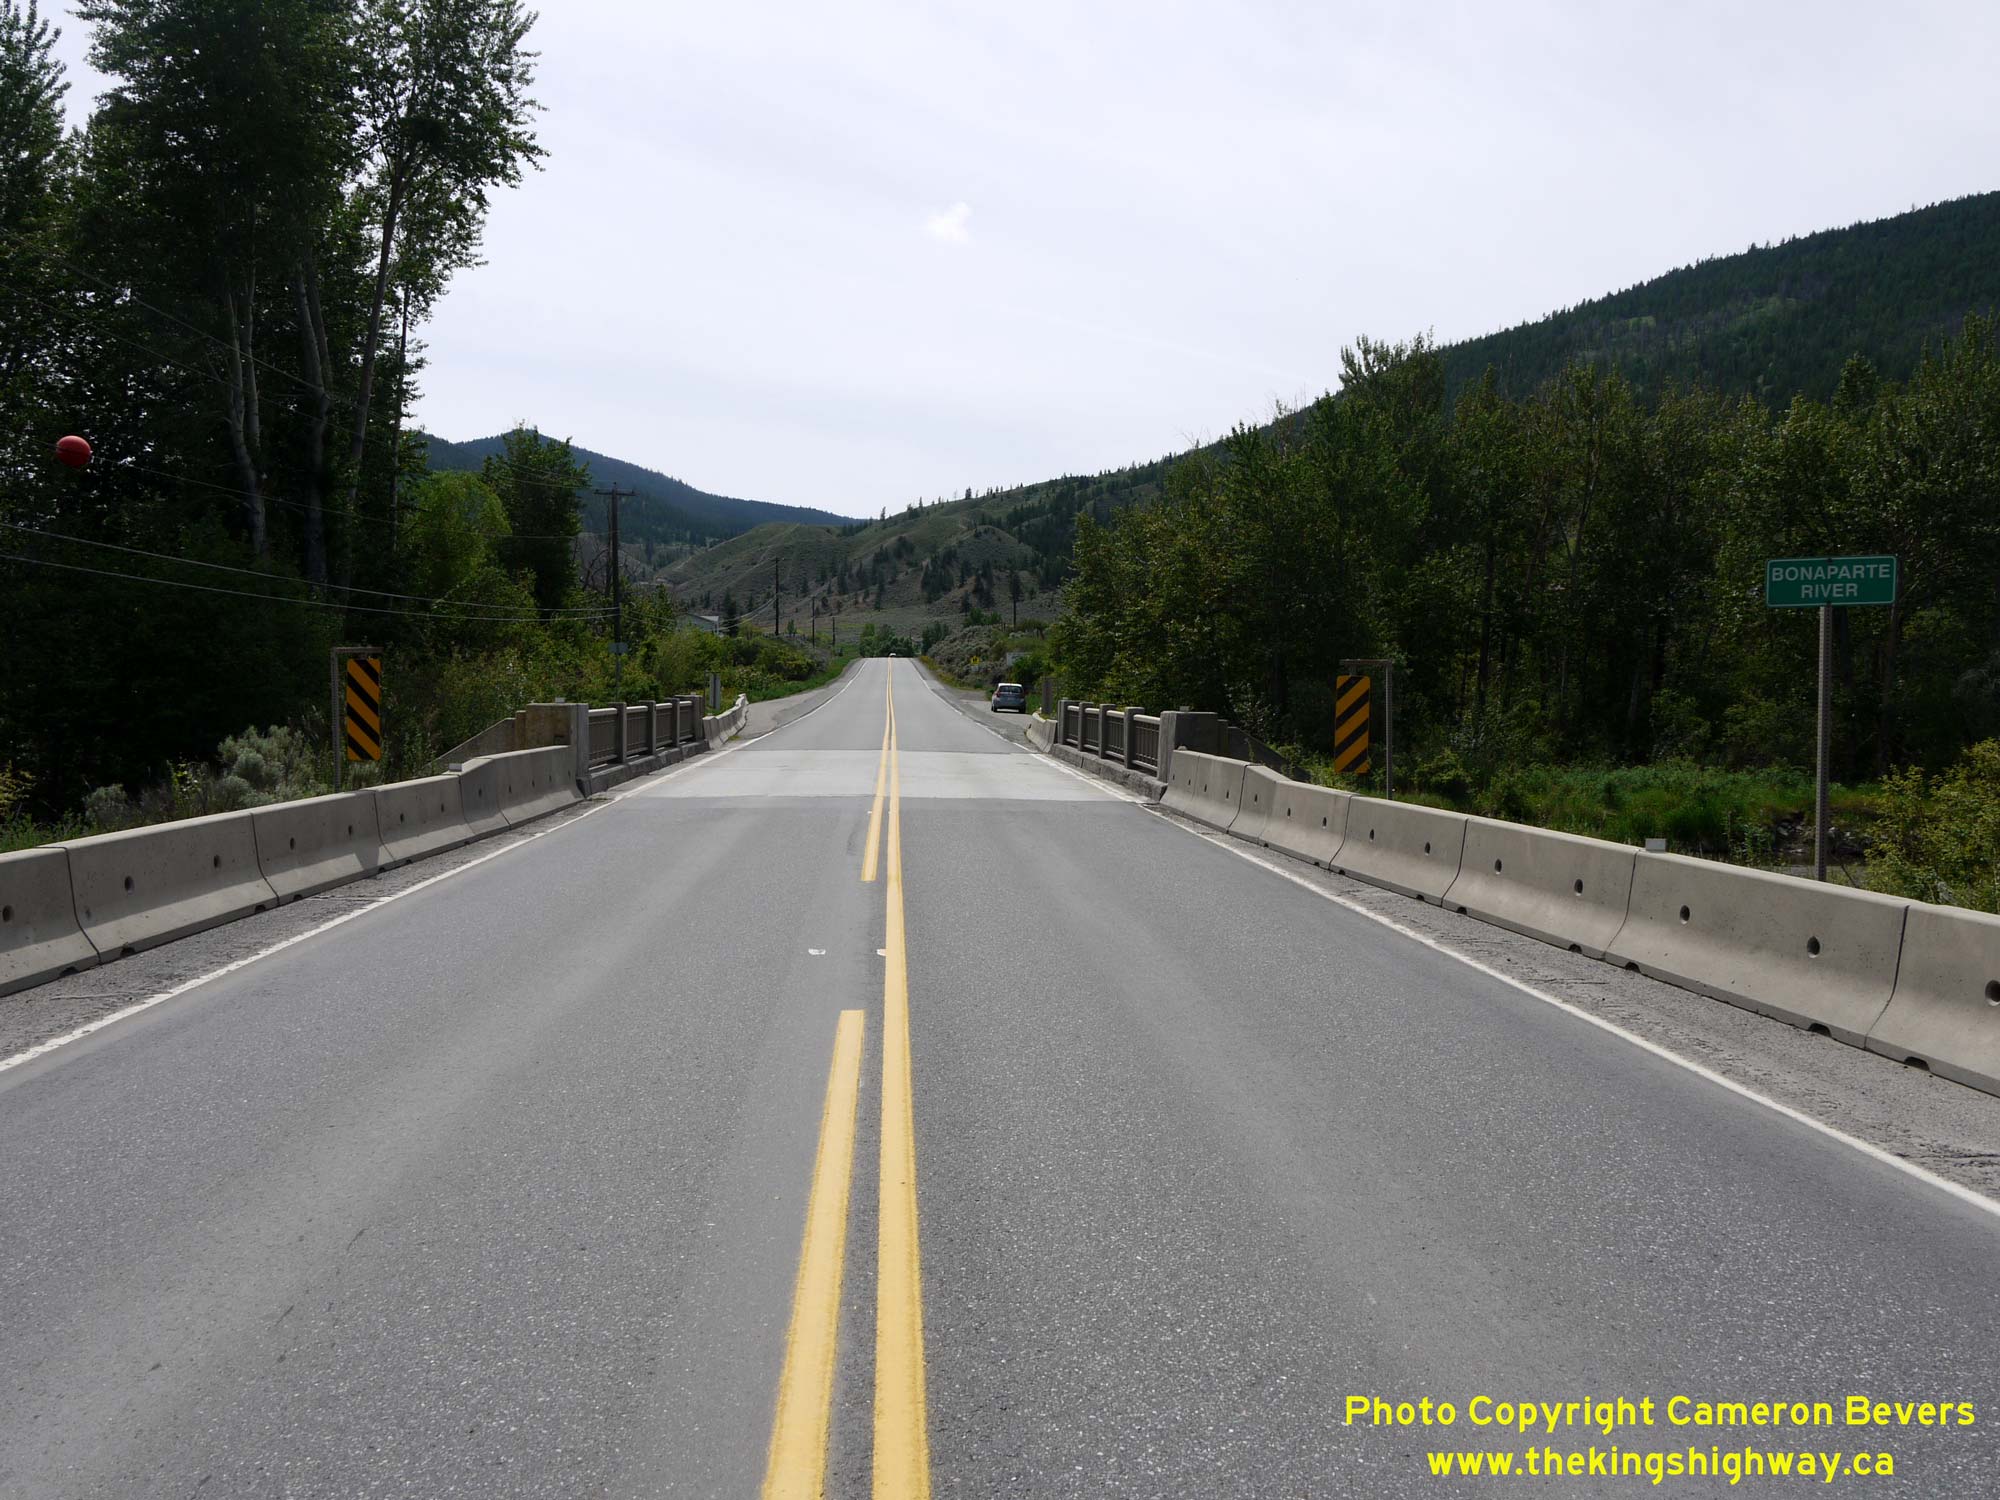
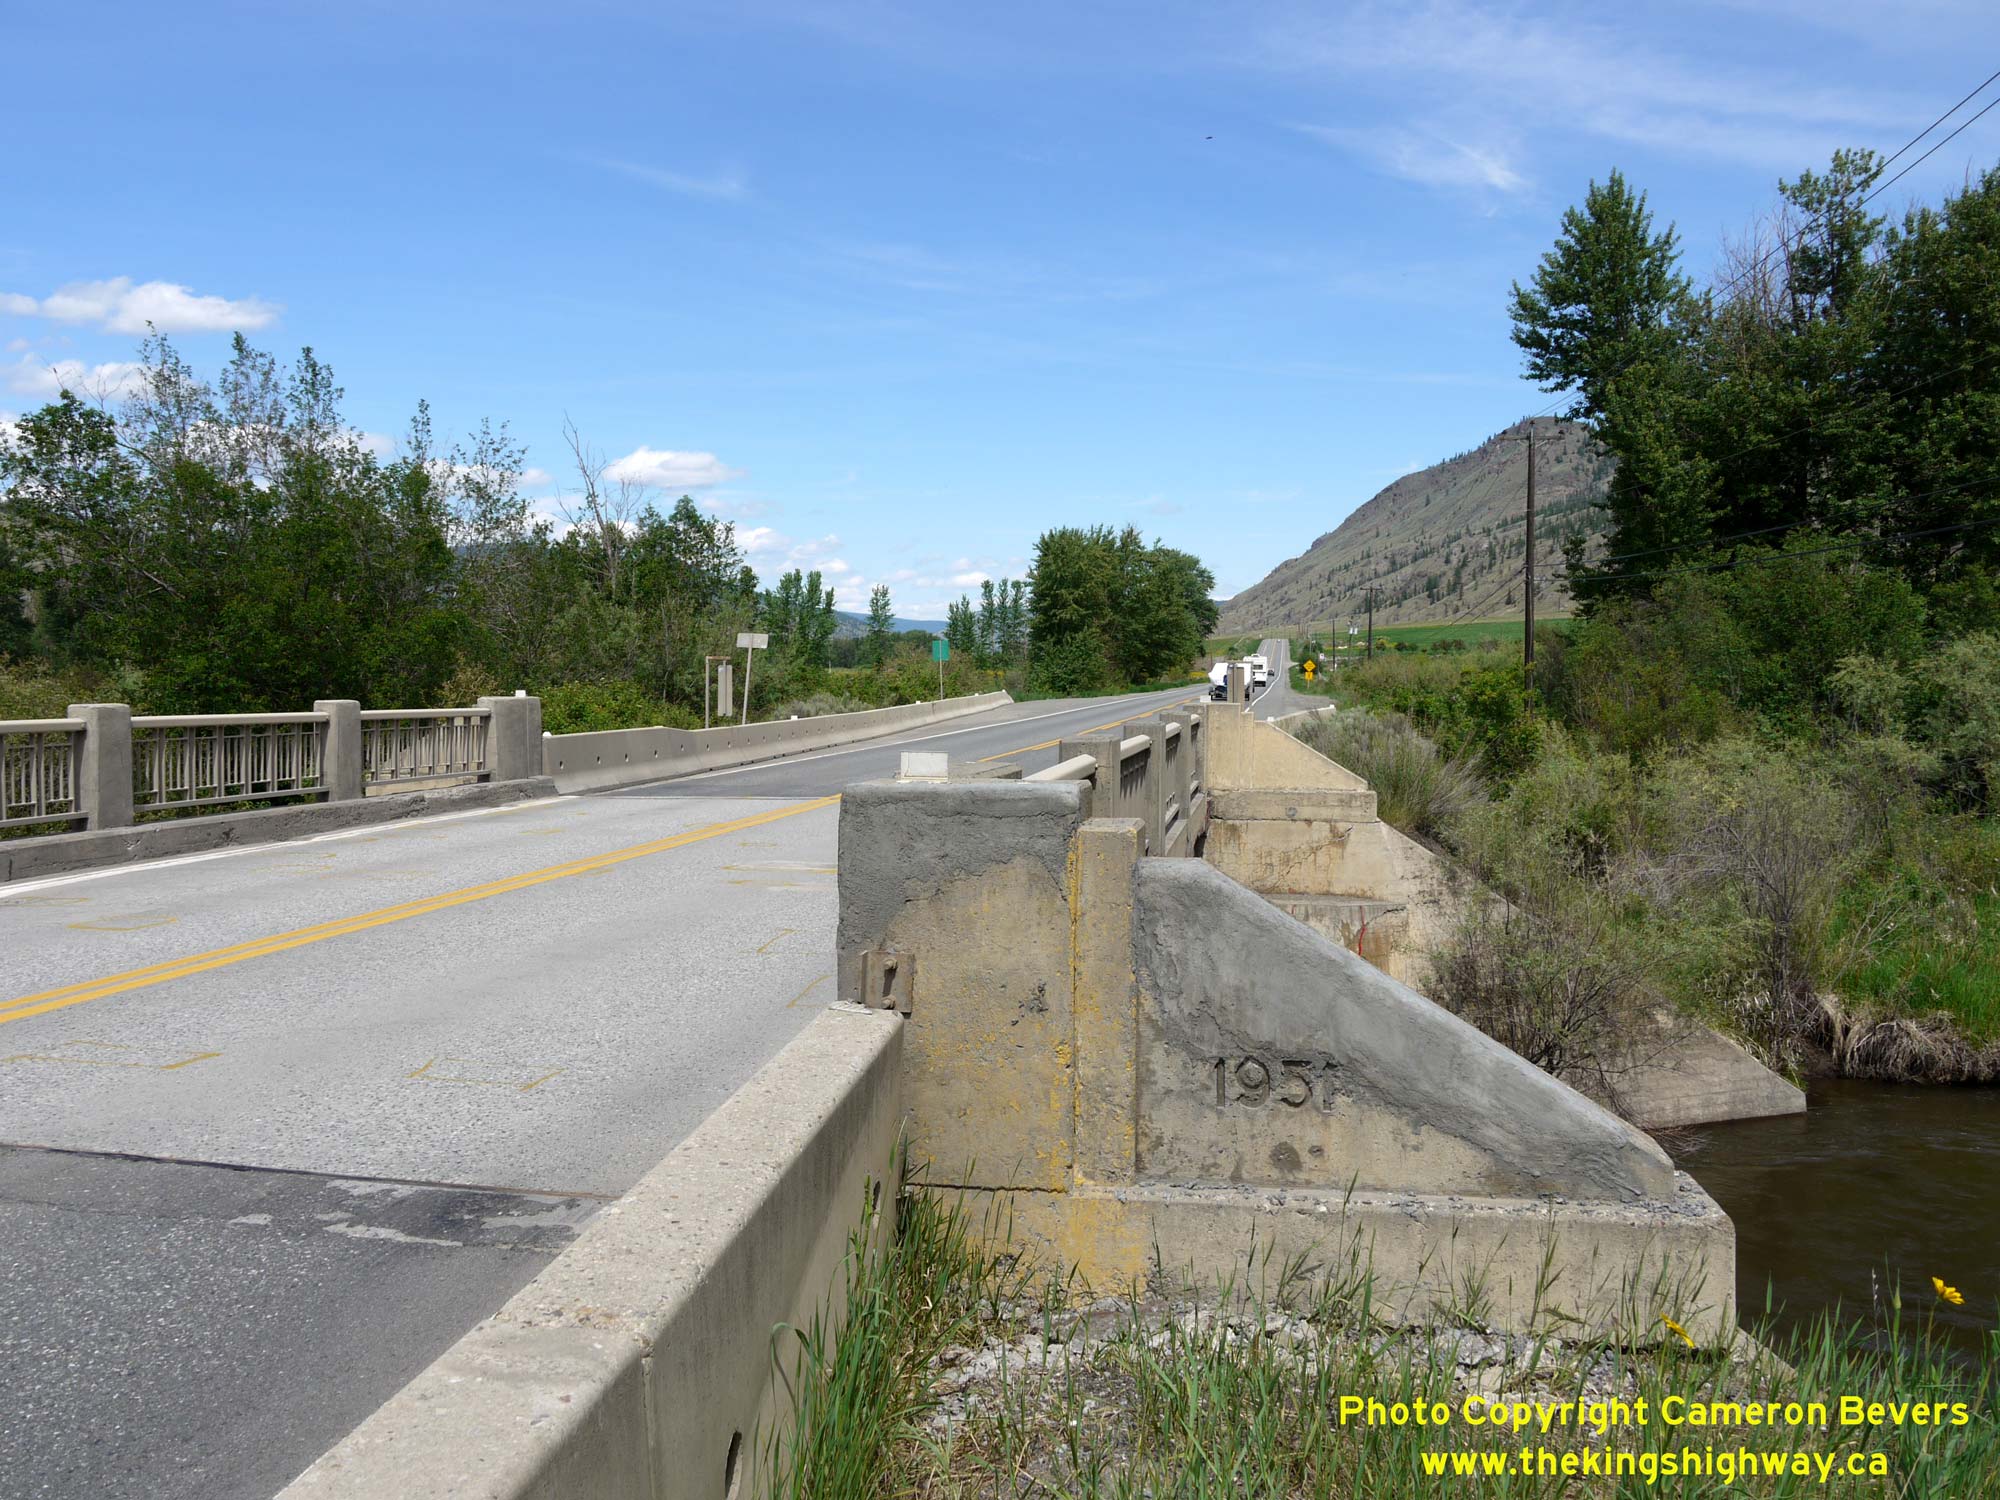
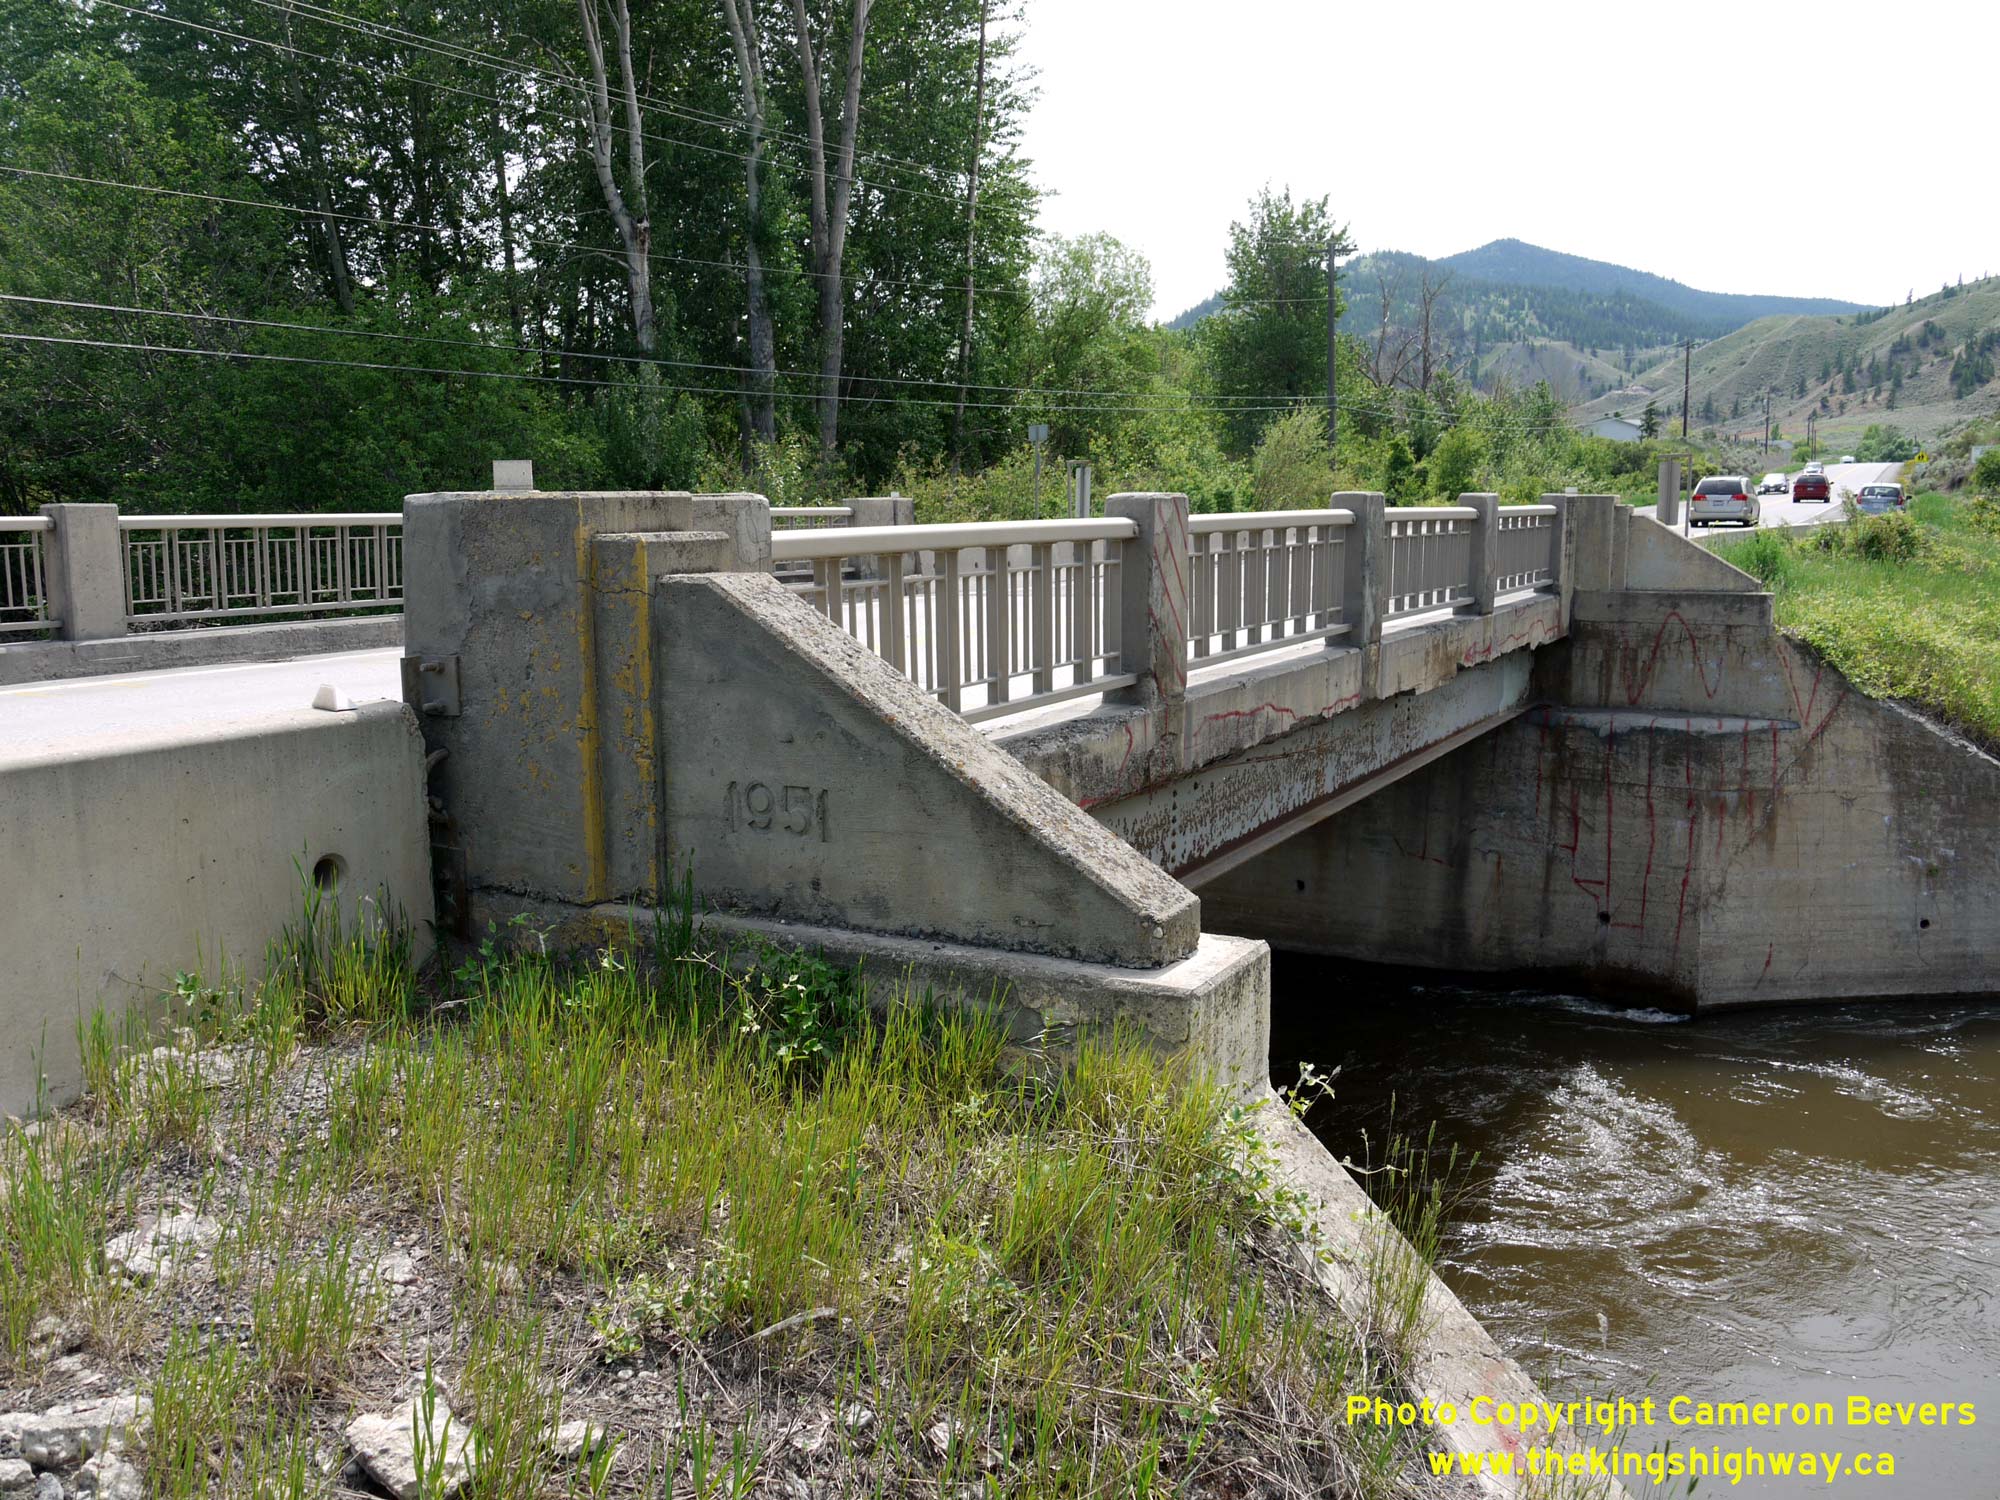
Left - Facing south along Hwy 97 towards Cache Creek at the Bonaparte River Bridge. See an
Enlarged Photo Here. (Photograph taken on May 31, 2015 - © Cameron Bevers) Right - The Bonaparte River Bridge on Hwy 97 north of Cache Creek was built in 1951. See an Enlarged Photo Here. (Photograph taken on May 31, 2015 - © Cameron Bevers) 

Left - Bonaparte River Bridge on Hwy 97, facing north towards Hat Creek. See an
Enlarged Photo Here. (Photograph taken on May 31, 2015 - © Cameron Bevers) Right - Between Cache Creek and the Hwy 99 Junction at Hat Creek, Hwy 97 passes through a mixture of cultivated farmland and mountainside grasslands. See an Enlarged Photo Here. (Photograph taken on May 31, 2015 - © Cameron Bevers) 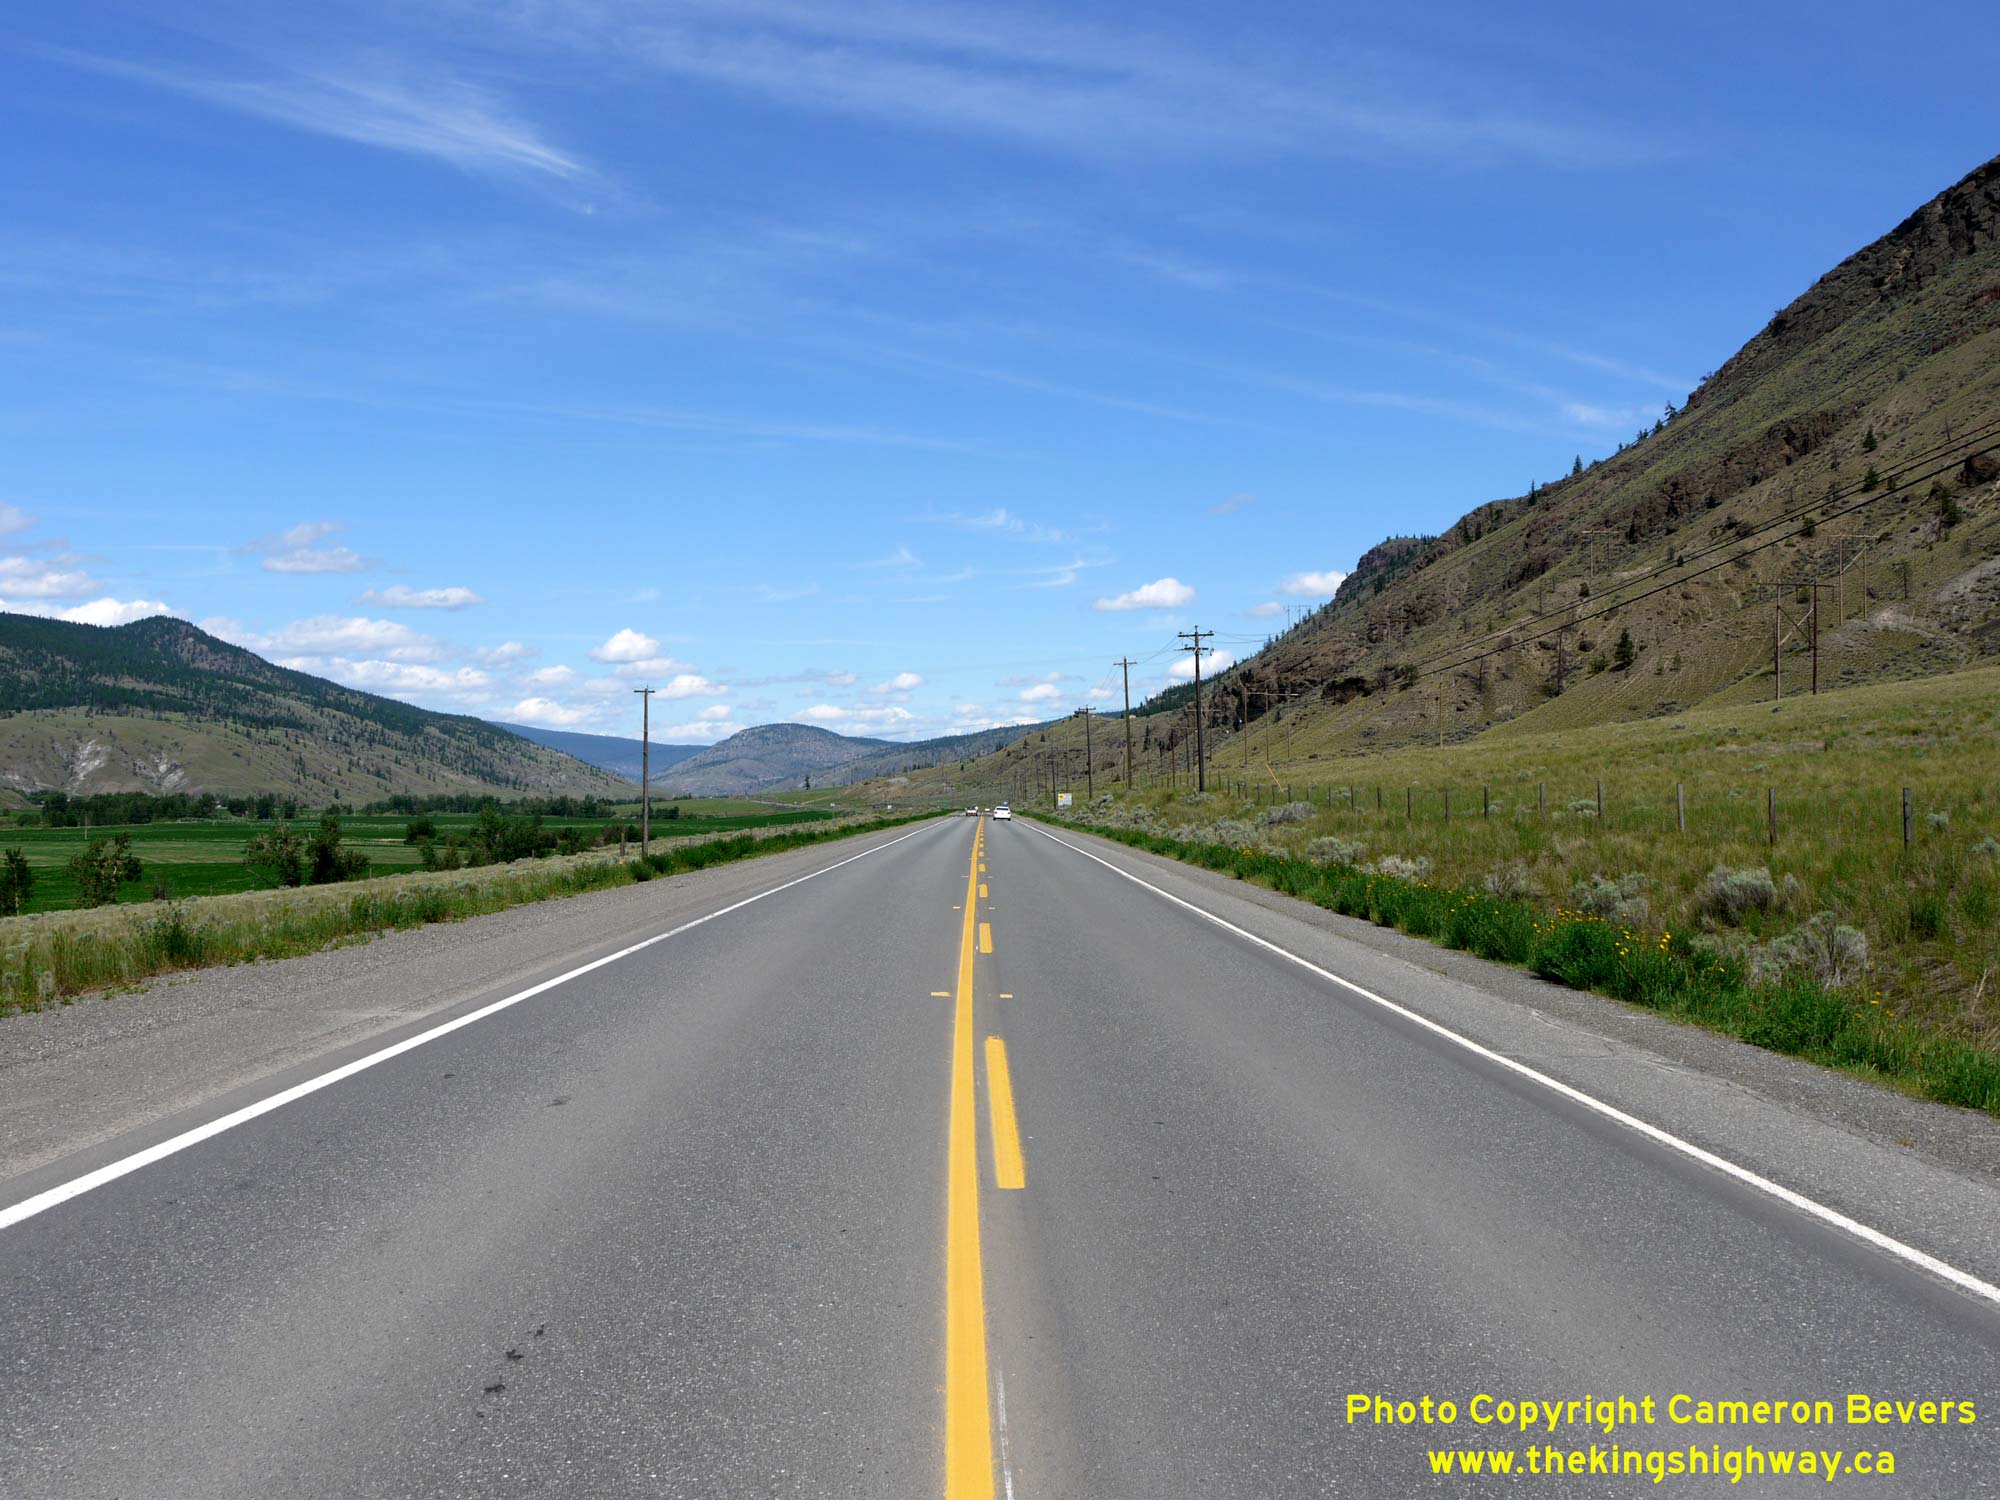

Left - Facing north along Hwy 97 about 3 km south of the Hwy 99 Junction. See an
Enlarged Photo Here. (Photograph taken on May 31, 2015 - © Cameron Bevers) Right - The dry landscapes of the Cache Creek area extend north along Hwy 97 to beyond the Hwy 99 Junction. Apart from areas which have been irrigated for agriculture, these valleys are extremely dry. See an Enlarged Photo Here. (Photograph taken on May 31, 2015 - © Cameron Bevers) 

Left - Green guide sign marking the upcoming Hwy 99 Junction on northbound Hwy 97. See an
Enlarged Photo Here. (Photograph taken on May 31, 2015 - © Cameron Bevers) Right - Distance guide sign on southbound Hwy 97 near the Hwy 99 Junction at Hat Creek. See an Enlarged Photo Here. (Photograph taken on May 31, 2015 - © Cameron Bevers) 

Left - View of Hwy 97 facing north towards the Hwy 99 Junction at Hat Creek. This is one of only four provincial highway junctions along Hwy 97 between Cache
Creek and Prince George. The others are Hwy 24 which connects to Hwy 97 at 70-Mile House, Hwy 20 which connects to Hwy 97 in Williams Lake and Hwy 26 which connects
to Hwy 97 near Quesnel. See an Enlarged Photo Here. (Photograph taken on May 31, 2015 - © Cameron Bevers) Right - Hwy 97 & Hwy 99 Junction at Hat Creek, facing north towards Williams Lake. There are no services for motorists at this highway junction, but the historical Hat Creek Ranch lies a short distance west of the Hwy 97 & Hwy 99 Junction. See an Enlarged Photo Here. (Photograph taken on May 31, 2015 - © Cameron Bevers) 

Left - Junction sign assembly at the northern terminus of Hwy 99 at Hat Creek. From here, motorists can either turn left and head north along Hwy 97 to Prince
George, Dawson Creek and ultimately Yukon & Alaska, or turn right and head south on Hwy 97 towards Cache Creek, Kamloops and the cities of the Okanagan Valley.
See an Enlarged Photo Here. (Photograph taken on May 31, 2015 - © Cameron Bevers) Right - Route markers at the Hwy 97 & Hwy 99 Junction at Hat Creek. See an Enlarged Photo Here. (Photograph taken on May 31, 2015 - © Cameron Bevers) 

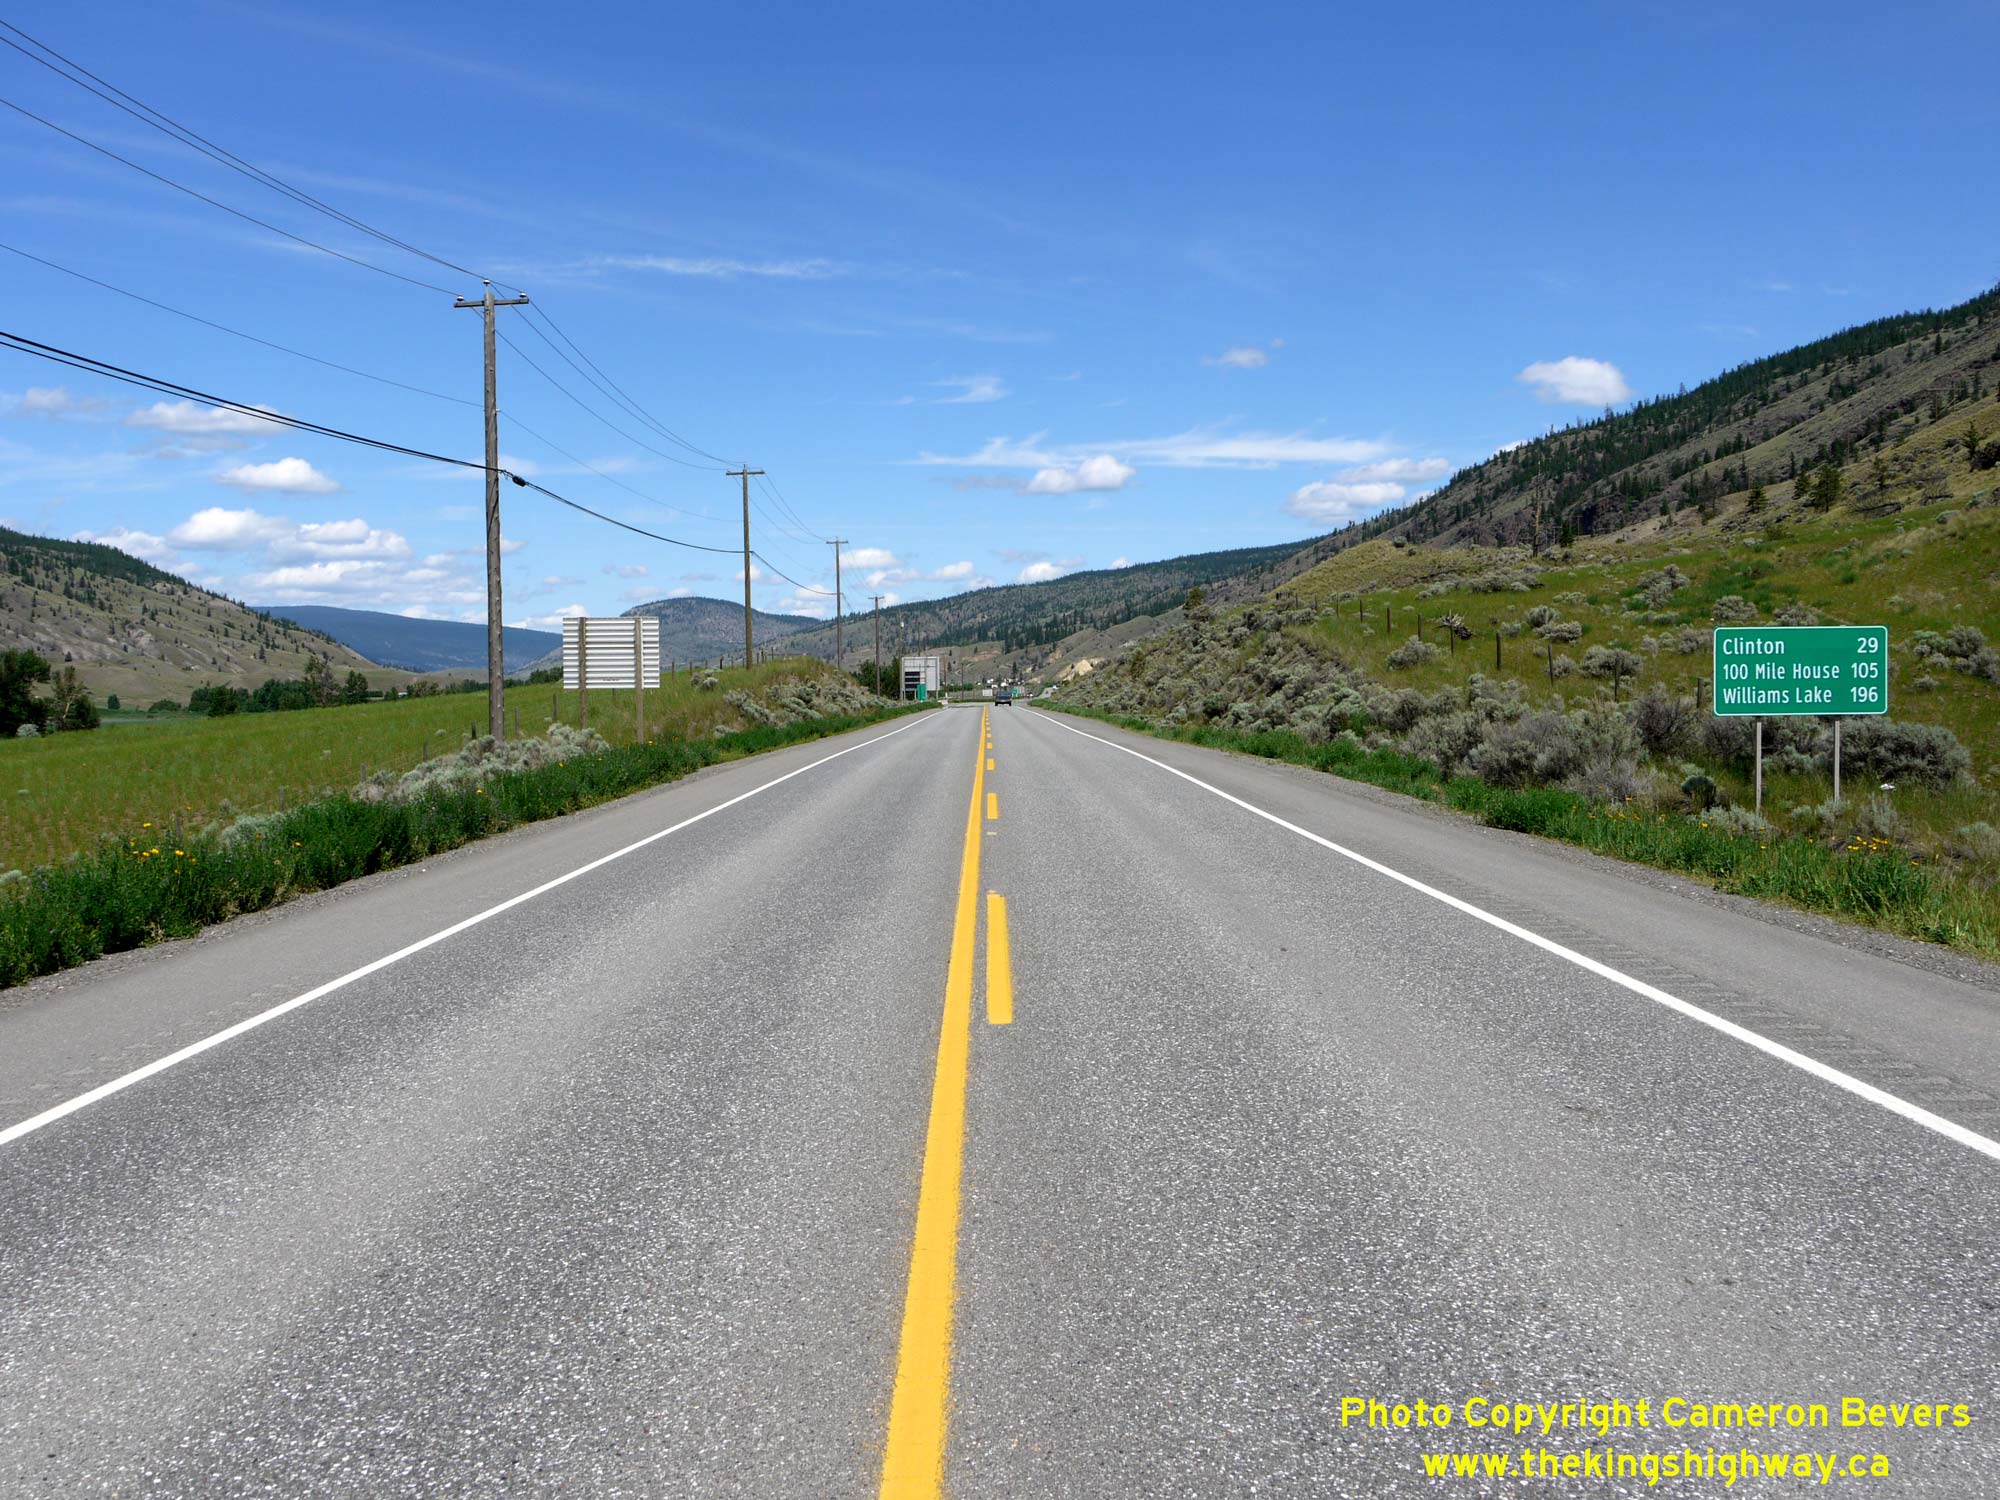
Left - Facing south along Hwy 97 towards Cache Creek from the Hwy 99 Junction at Hat Creek. See an
Enlarged Photo Here. (Photograph taken on May 31, 2015 - © Cameron Bevers) Right - Destination guide sign approaching the northern terminus of Hwy 99 at Hat Creek showing various control cities along Hwy 97. See an Enlarged Photo Here. (Photograph taken on May 31, 2015 - © Cameron Bevers) 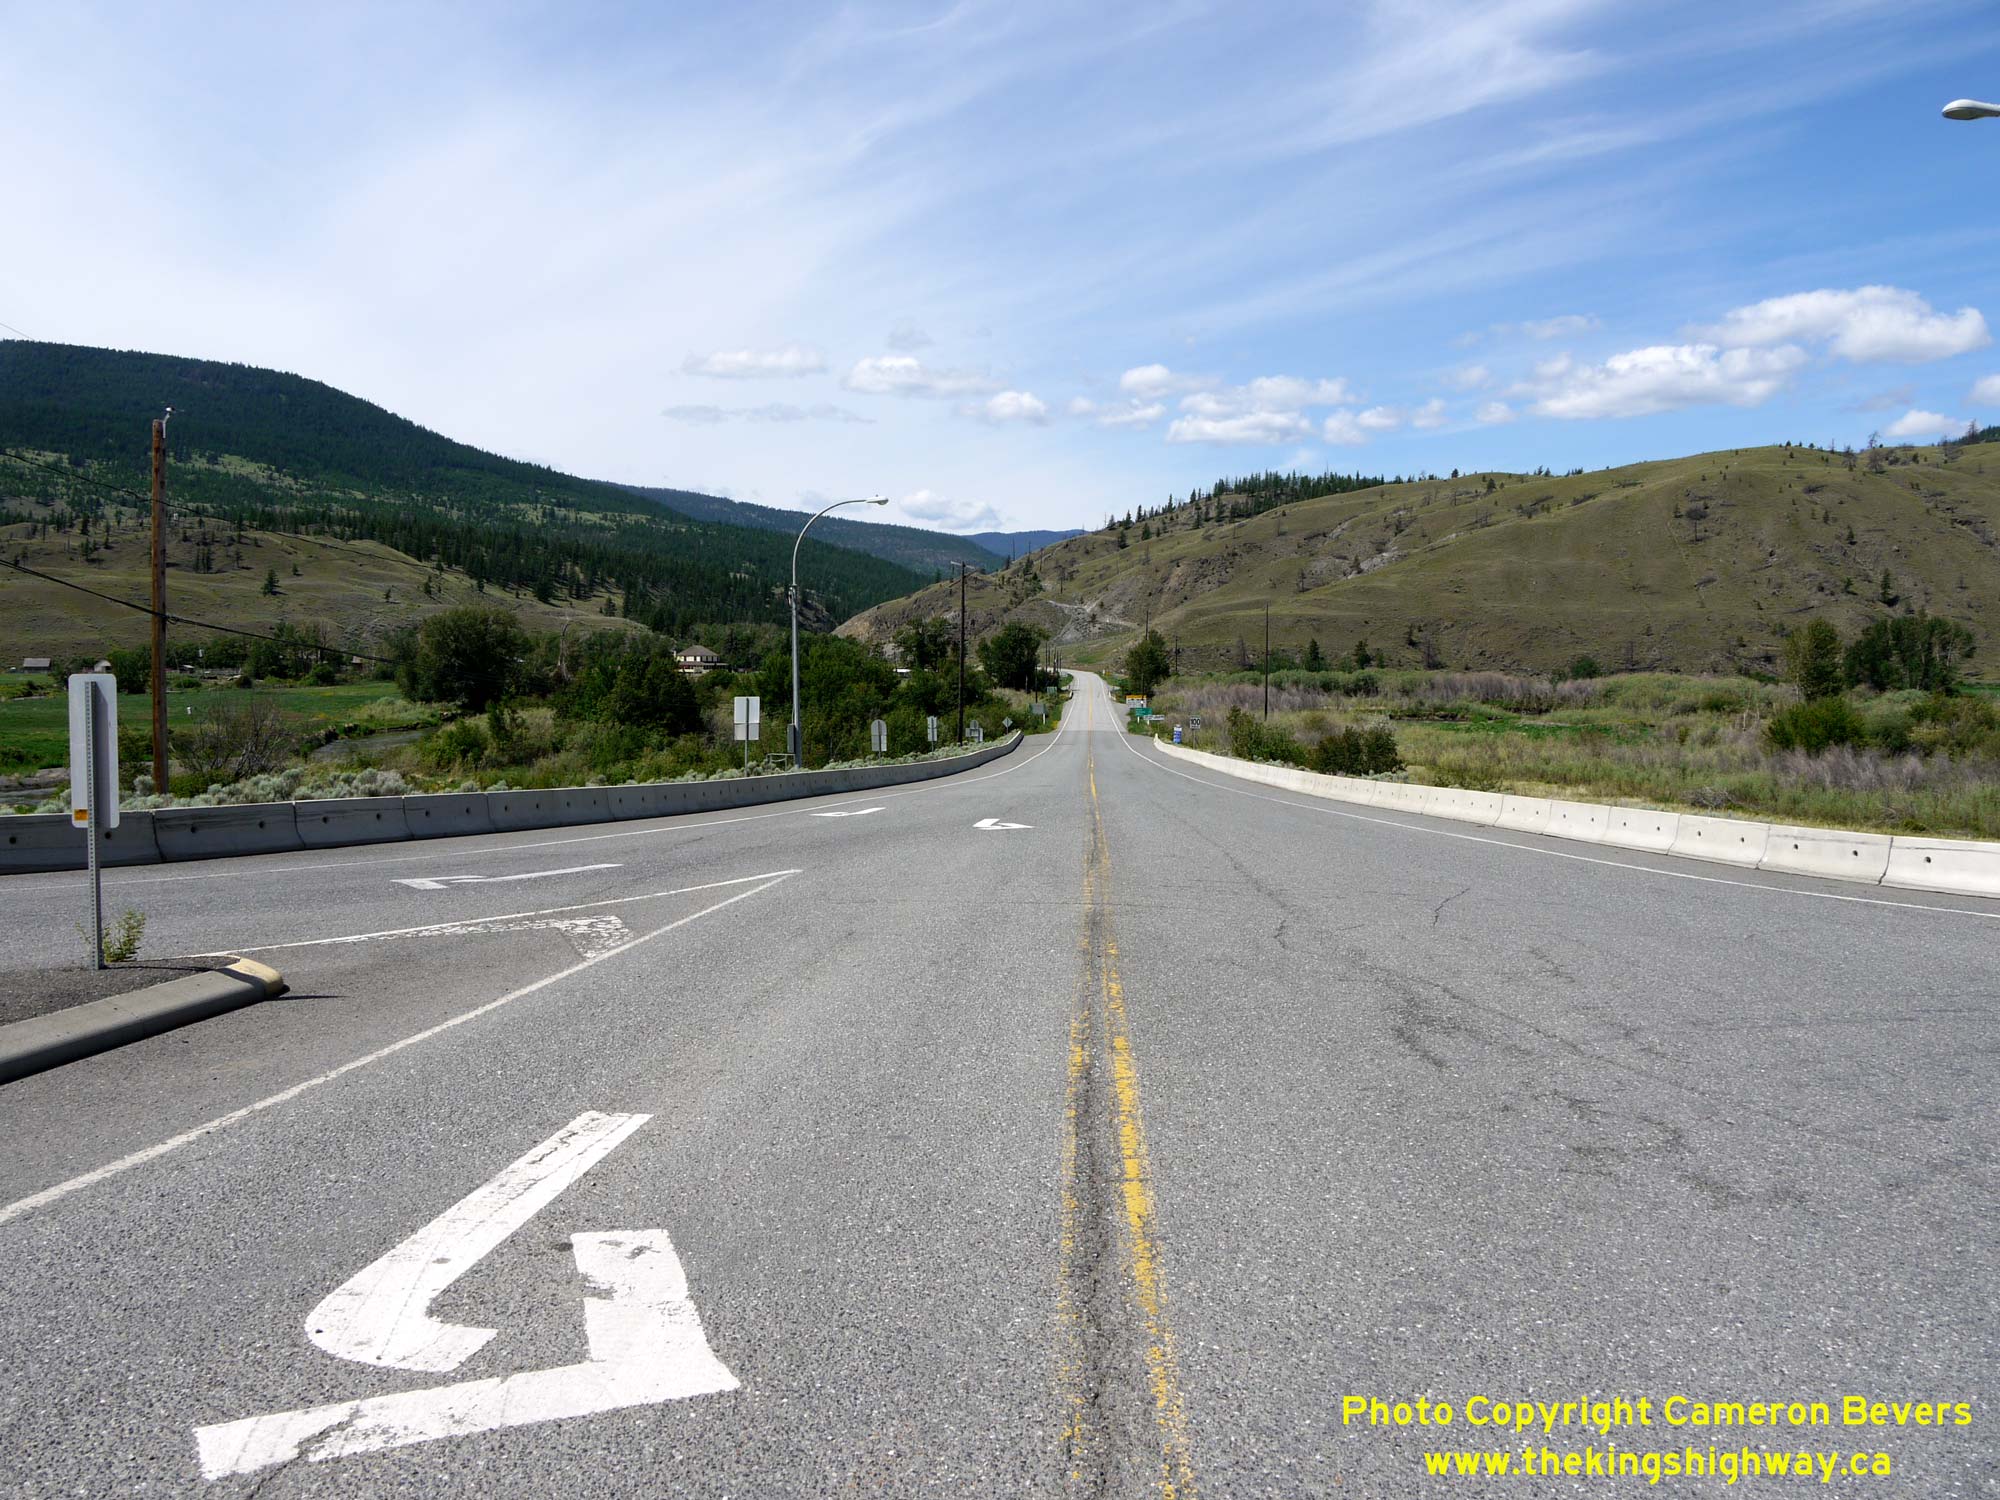

Left - Facing south along Hwy 99 towards Lillooet from the Hwy 97 Junction at Hat Creek. The historical Hat Creek Ranch can be seen beside Hwy 99 at left. See
an Enlarged Photo Here. (Photograph taken on May 31, 2015 - © Cameron Bevers) Right - First route marker on southbound Hwy 99 at the Hwy 97 Junction at Hat Creek. From Hat Creek, Hwy 99 heads in a general southwesterly direction towards Lillooet, Whistler and Vancouver. South of Vancouver, Hwy 99 crosses the border into the United States and becomes Interstate 5 to Seattle, Washington. See an Enlarged Photo Here. (Photograph taken on May 31, 2015 - © Cameron Bevers) 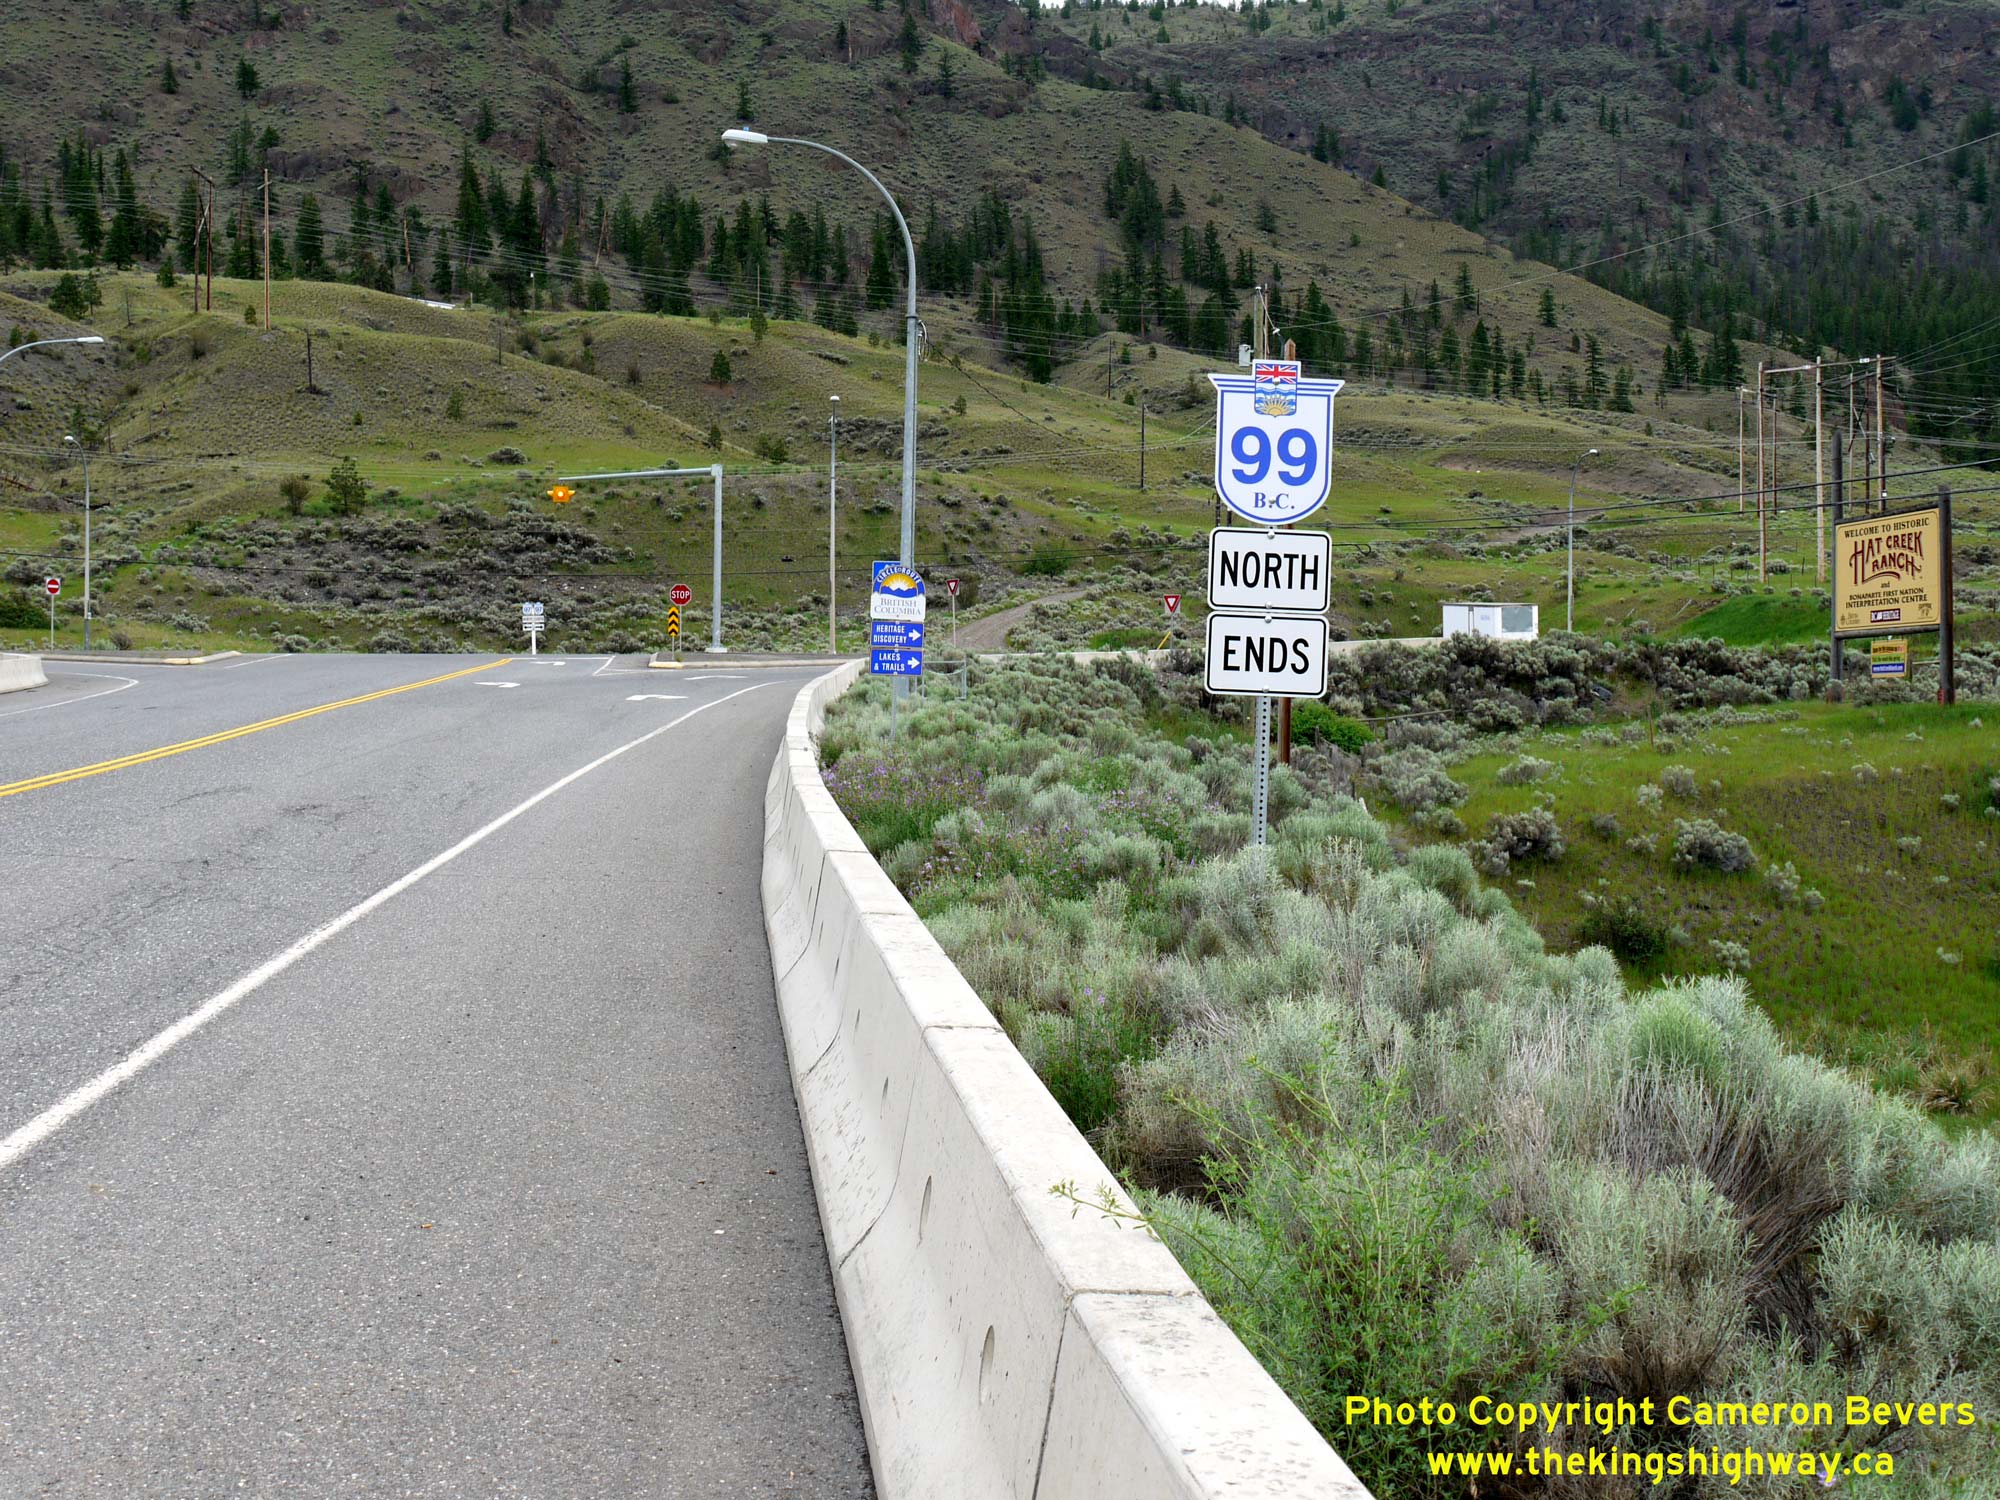

Left - Route marker denoting the end of British Columbia's Hwy 99 approaching the Hwy 97 Junction at Hat Creek. Stretching for nearly 400 km north from the
Canada-US Border, Hwy 99 is arguably among the most diverse highways in the province. Some sections of Hwy 99 in the Metro Vancouver area are freeways, while the
sections of Hwy 99 north of Pemberton are mostly remote, high alpine routes. Like many of BC's major north-south highways, Hwy 99 was numbered based on a logical
continuation of the US Federal Highway System numbering which existed south of the border. Although it has now been supplanted by Interstate 5, US Route 99 was
historically a major arterial highway through the western US States of Washington, Oregon and California. See an
Enlarged Photo Here. (Photograph taken on May 31, 2015 - © Cameron Bevers) Right - Facing north towards 100 Mile House from the Hwy 99 Junction. See an Enlarged Photo Here. (Photograph taken on May 31, 2015 - © Cameron Bevers) 

Left - Approaching the Hwy 99 Junction on Hwy 97, facing south towards Cache Creek. See an
Enlarged Photo Here. (Photograph taken on May 31, 2015 - © Cameron Bevers) Right - Junction sign assembly on southbound Hwy 97 approaching the Hwy 99 Junction at Hat Creek. See an Enlarged Photo Here. (Photograph taken on May 31, 2015 - © Cameron Bevers) 

Left - Facing south along Hwy 97 north of Hat Creek. See an
Enlarged Photo Here. (Photograph taken on May 31, 2015 - © Cameron Bevers) Right - Green guide sign on southbound Hwy 97 marking the upcoming Hwy 99 Junction. See an Enlarged Photo Here. (Photograph taken on May 31, 2015 - © Cameron Bevers) 
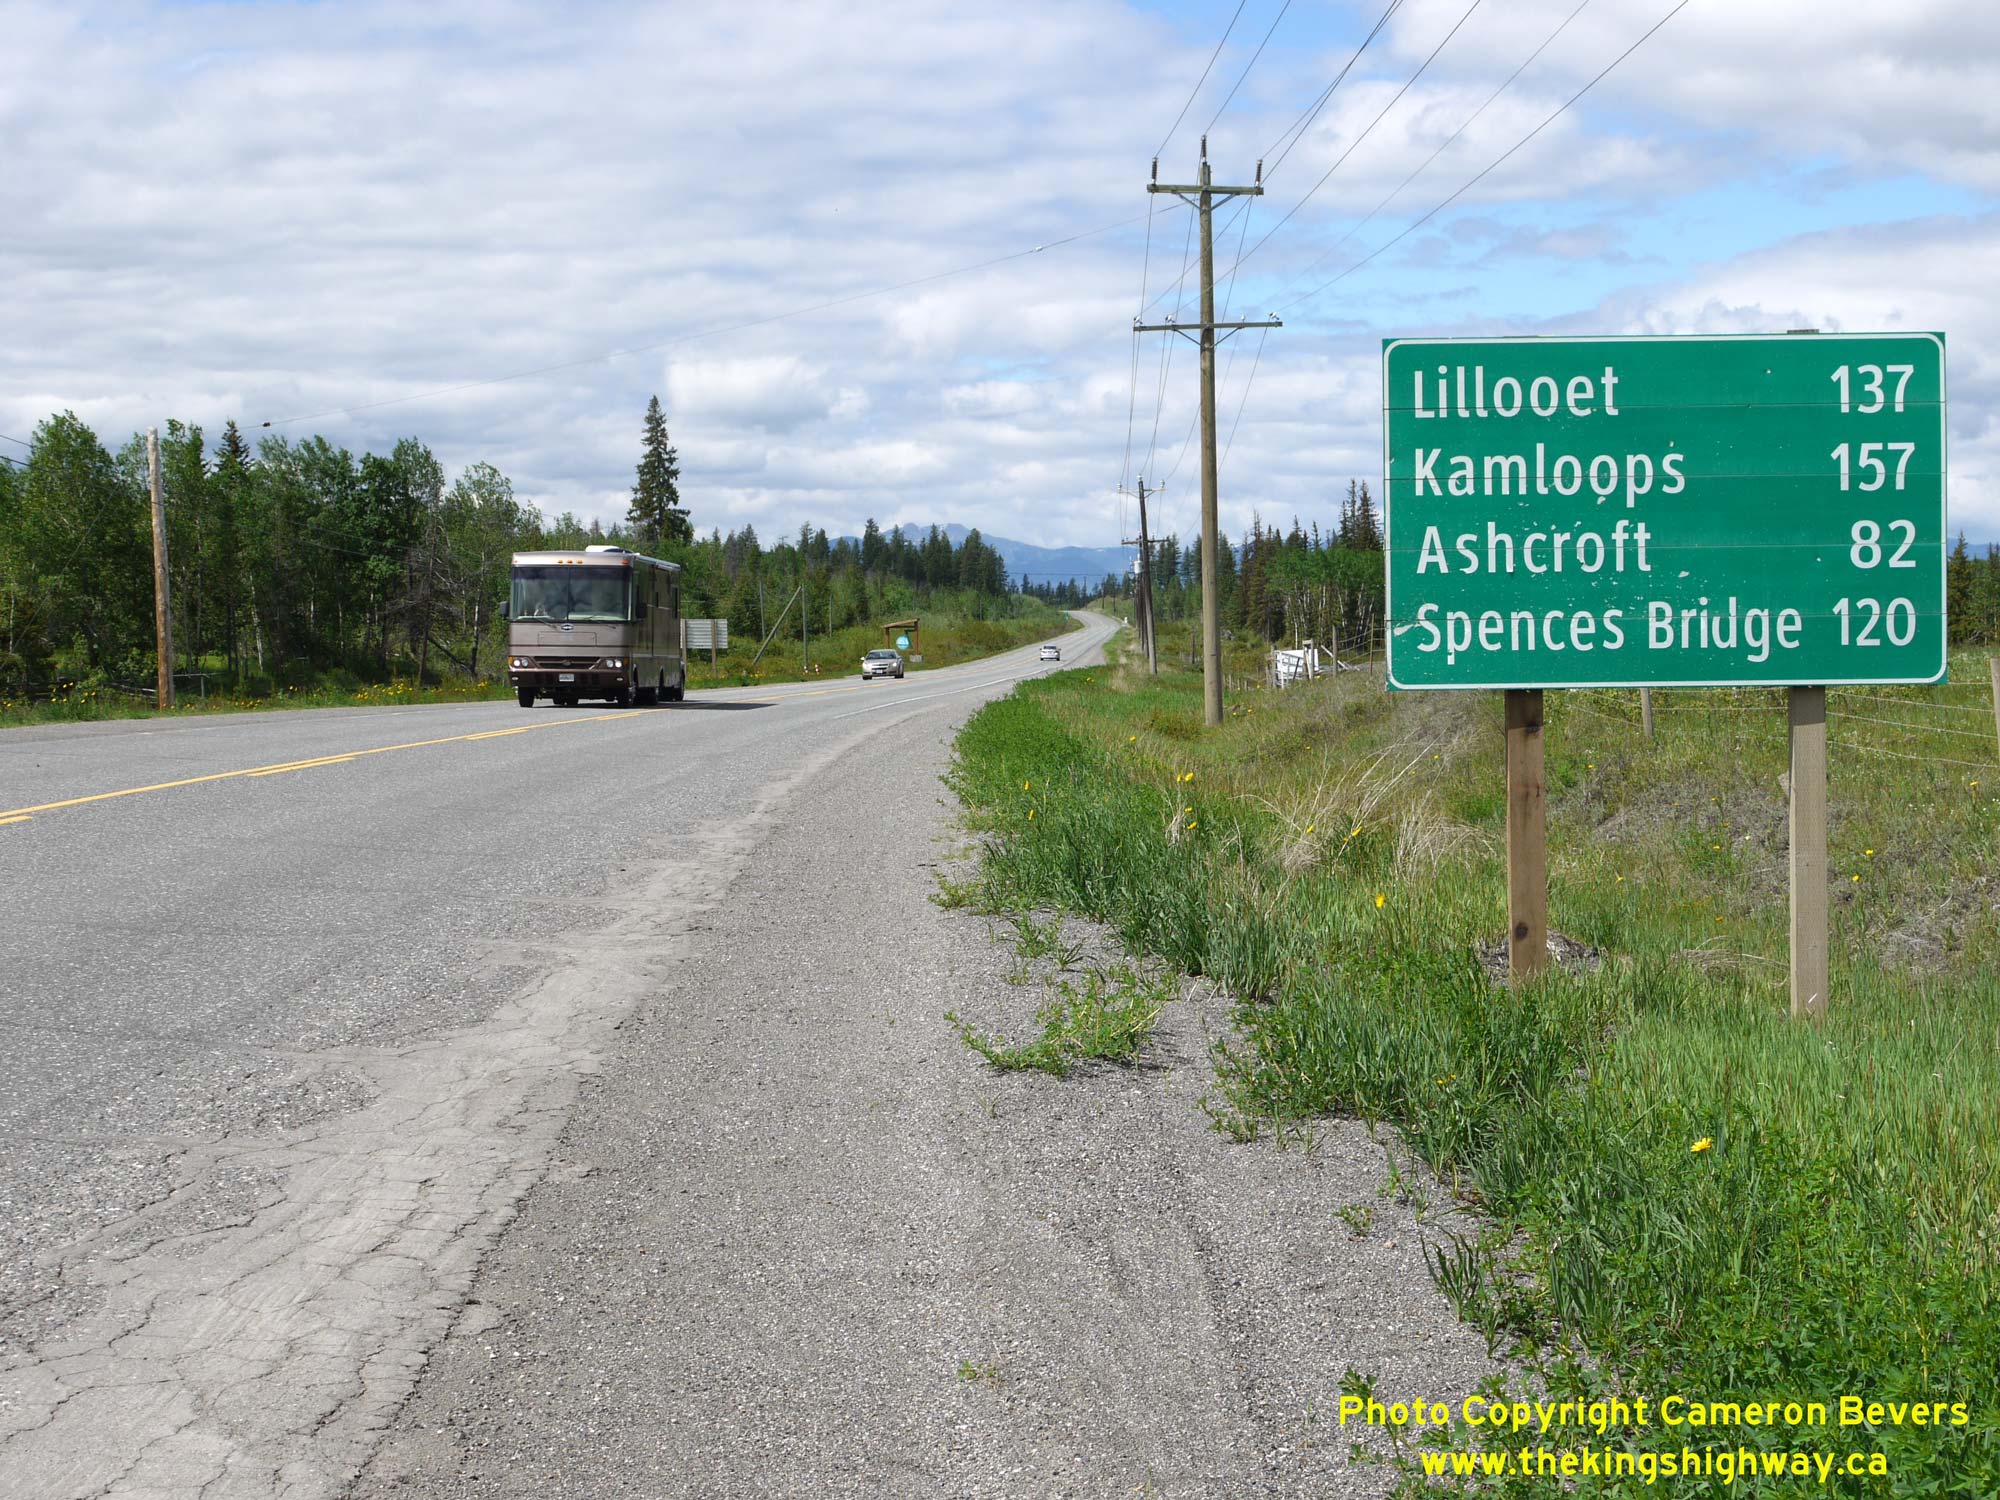
Left - Distance guide sign on northbound Hwy 97 at the Hwy 99 Junction showing the highway distances to Quesnel and Prince George. See an
Enlarged Photo Here. (Photograph taken on May 31, 2015 - © Cameron Bevers) Right - A secondary distance guide sign was required on northbound Hwy 97 to show the highway distance to some of the more closer destination centres. See an Enlarged Photo Here. (Photograph taken on May 31, 2015 - © Cameron Bevers) 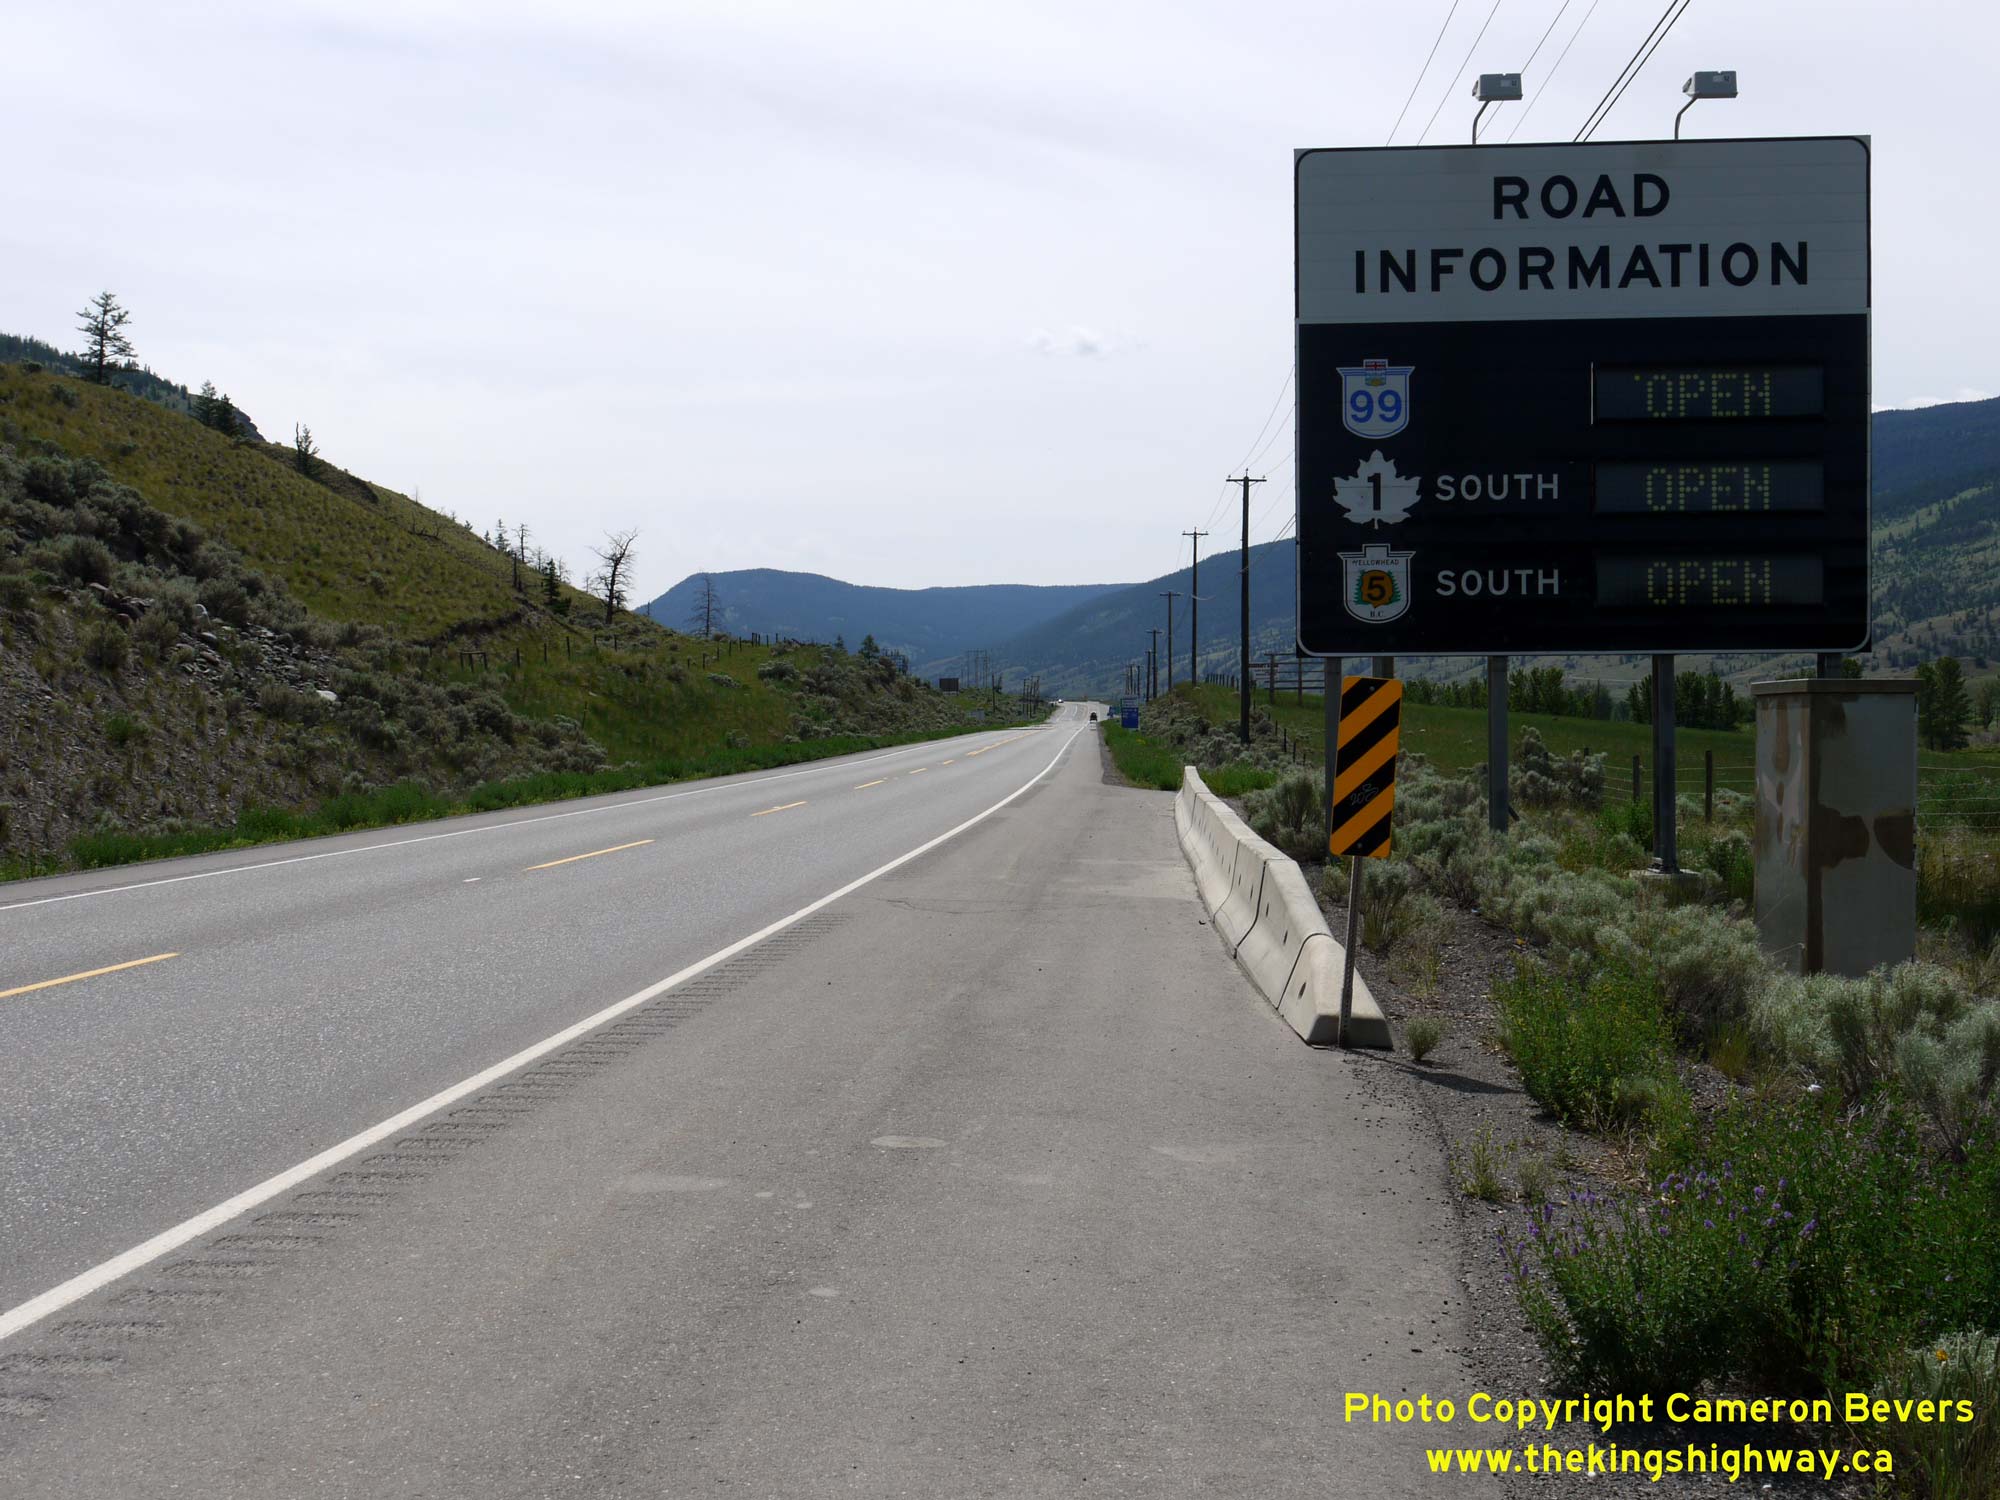

Left - Electronic sign showing the closure status of major highway routes to Vancouver from the Hwy 97 and Hwy 99 Junction. Signs such as this are placed at
strategic points along the British Columbia highway system, so that motorists can plan their journey in the event of a highway closure. See an
Enlarged Photo Here. (Photograph taken on May 31, 2015 - © Cameron Bevers) Right - Facing north along Hwy 97 towards 100 Mile House, about 4 km north of the Hwy 99 Junction at Hat Creek. See an Enlarged Photo Here. (Photograph taken on May 31, 2015 - © Cameron Bevers) 

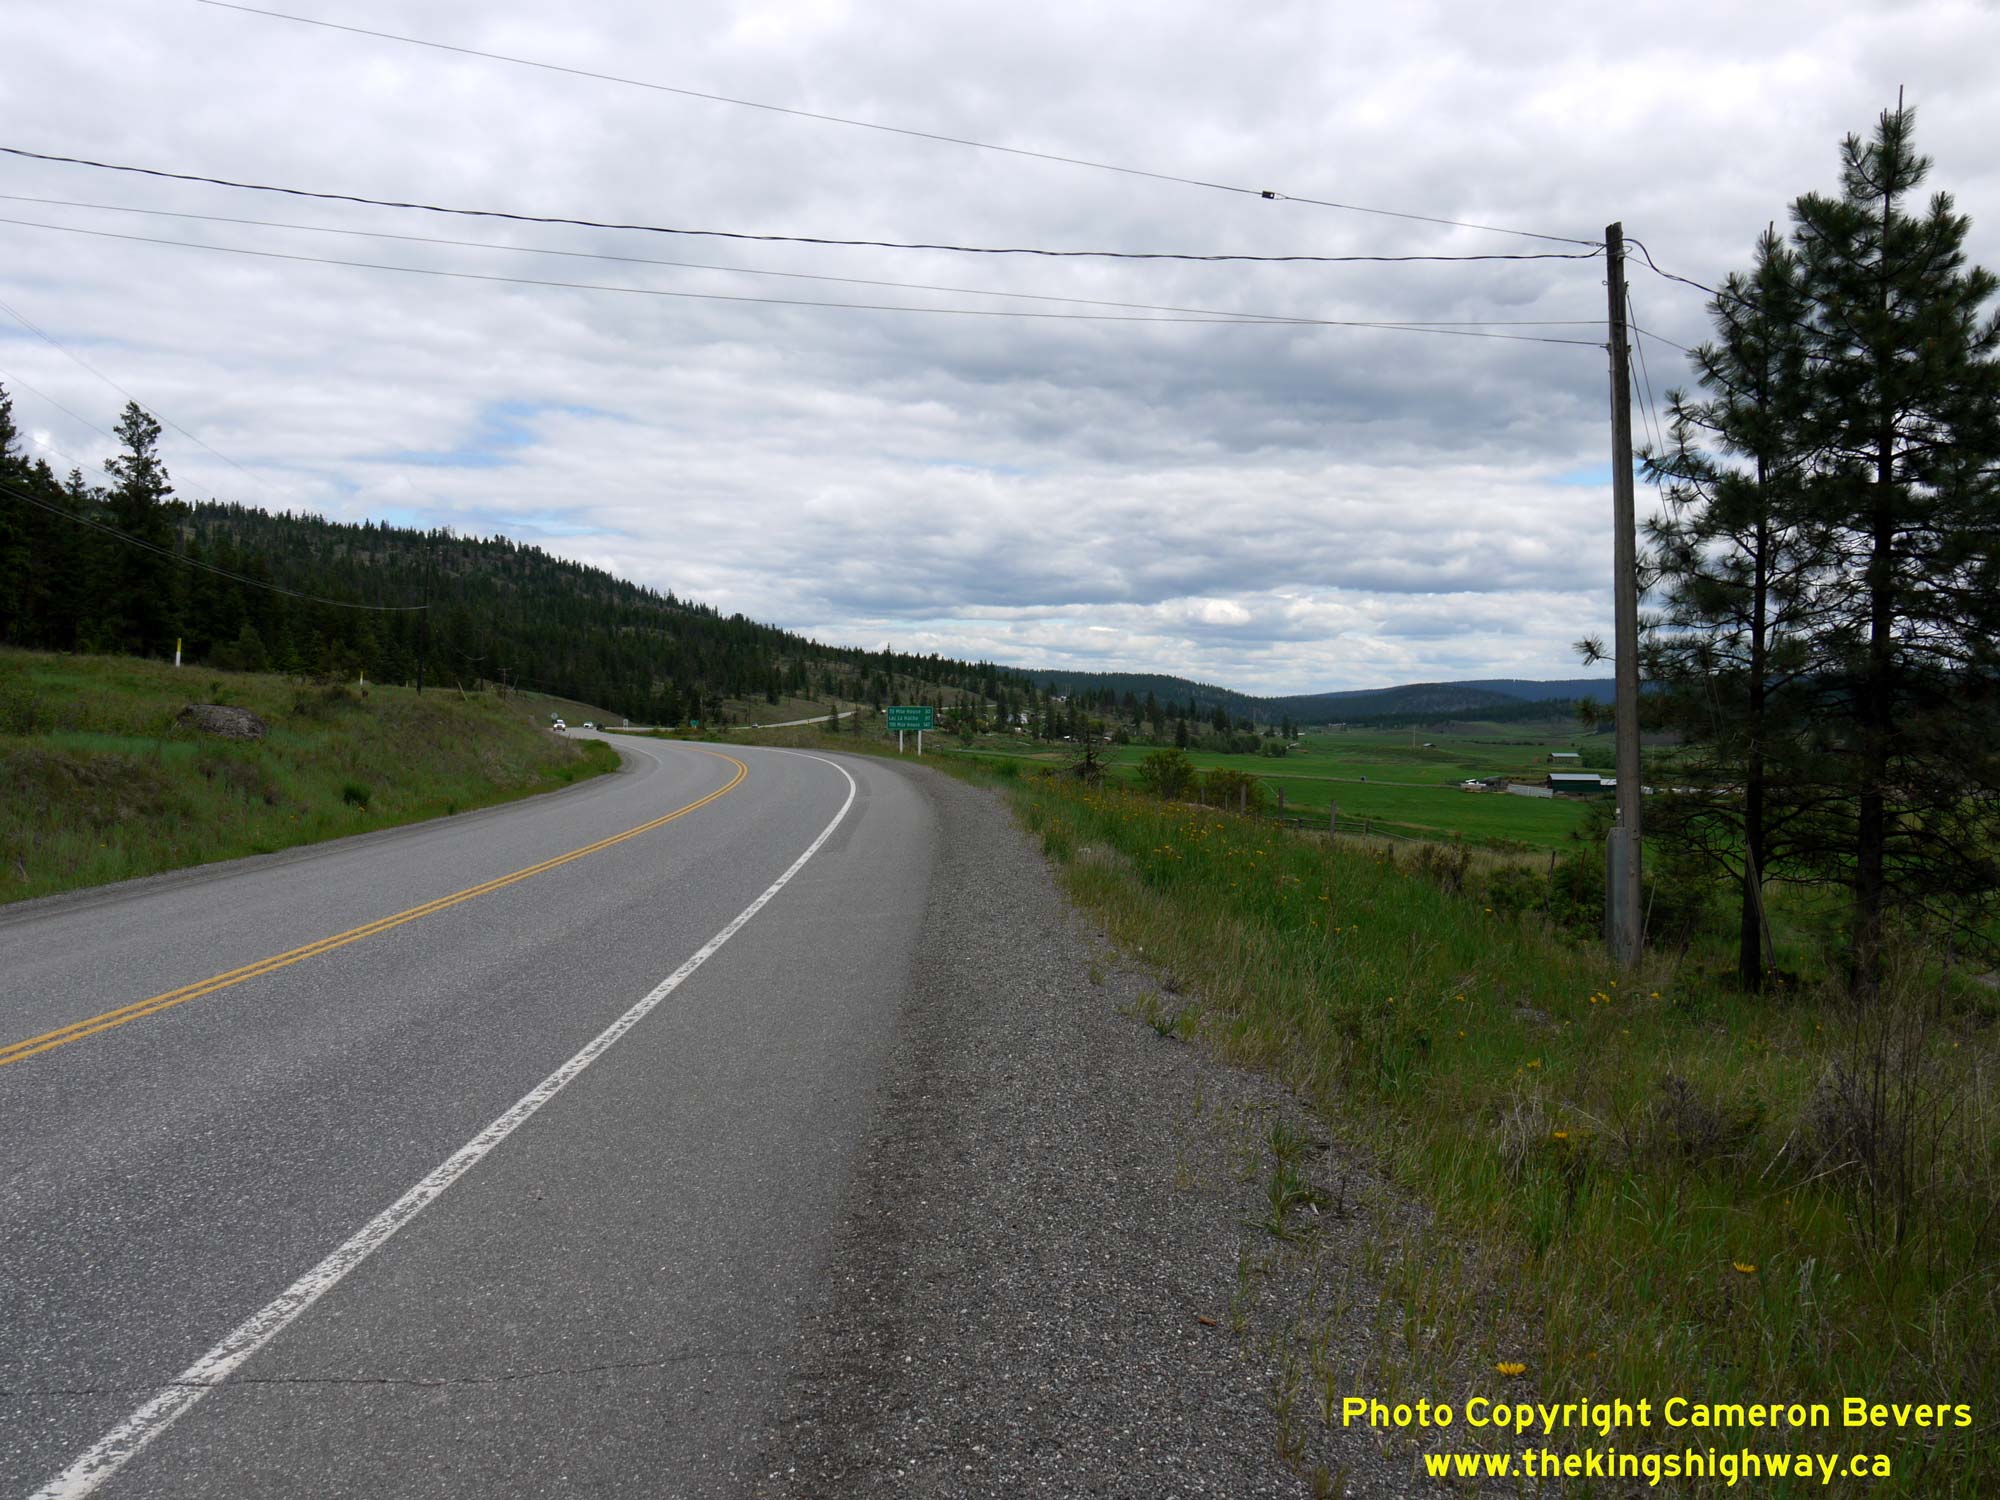
Left - Facing north along Hwy 97 towards 100 Mile House, about 5 km north of the Hwy 99 Junction at Hat Creek. See an
Enlarged Photo Here. (Photograph taken on June 4, 2015 - © Cameron Bevers) Right - Facing south along Hwy 97 towards Cache Creek about 6 km north of the Hwy 99 Junction at Hat Creek. See an Enlarged Photo Here. (Photograph taken on June 4, 2015 - © Cameron Bevers) 

Left - View of Hwy 97 about 3 km south of Loon Lake Road, facing north. See an
Enlarged Photo Here. (Photograph taken on June 4, 2015 - © Cameron Bevers) Right - Facing south along Hwy 97 from Goble Frontage Road. The dry, desert-like landscapes of the Cache Creek area quickly peter out as Hwy 97 climbs in elevation, and is mostly grasslands at this point. The change is scenery is quite dramatic, as it takes place rather quickly over a 2 km distance. See an Enlarged Photo Here. (Photograph taken on June 4, 2015 - © Cameron Bevers) 
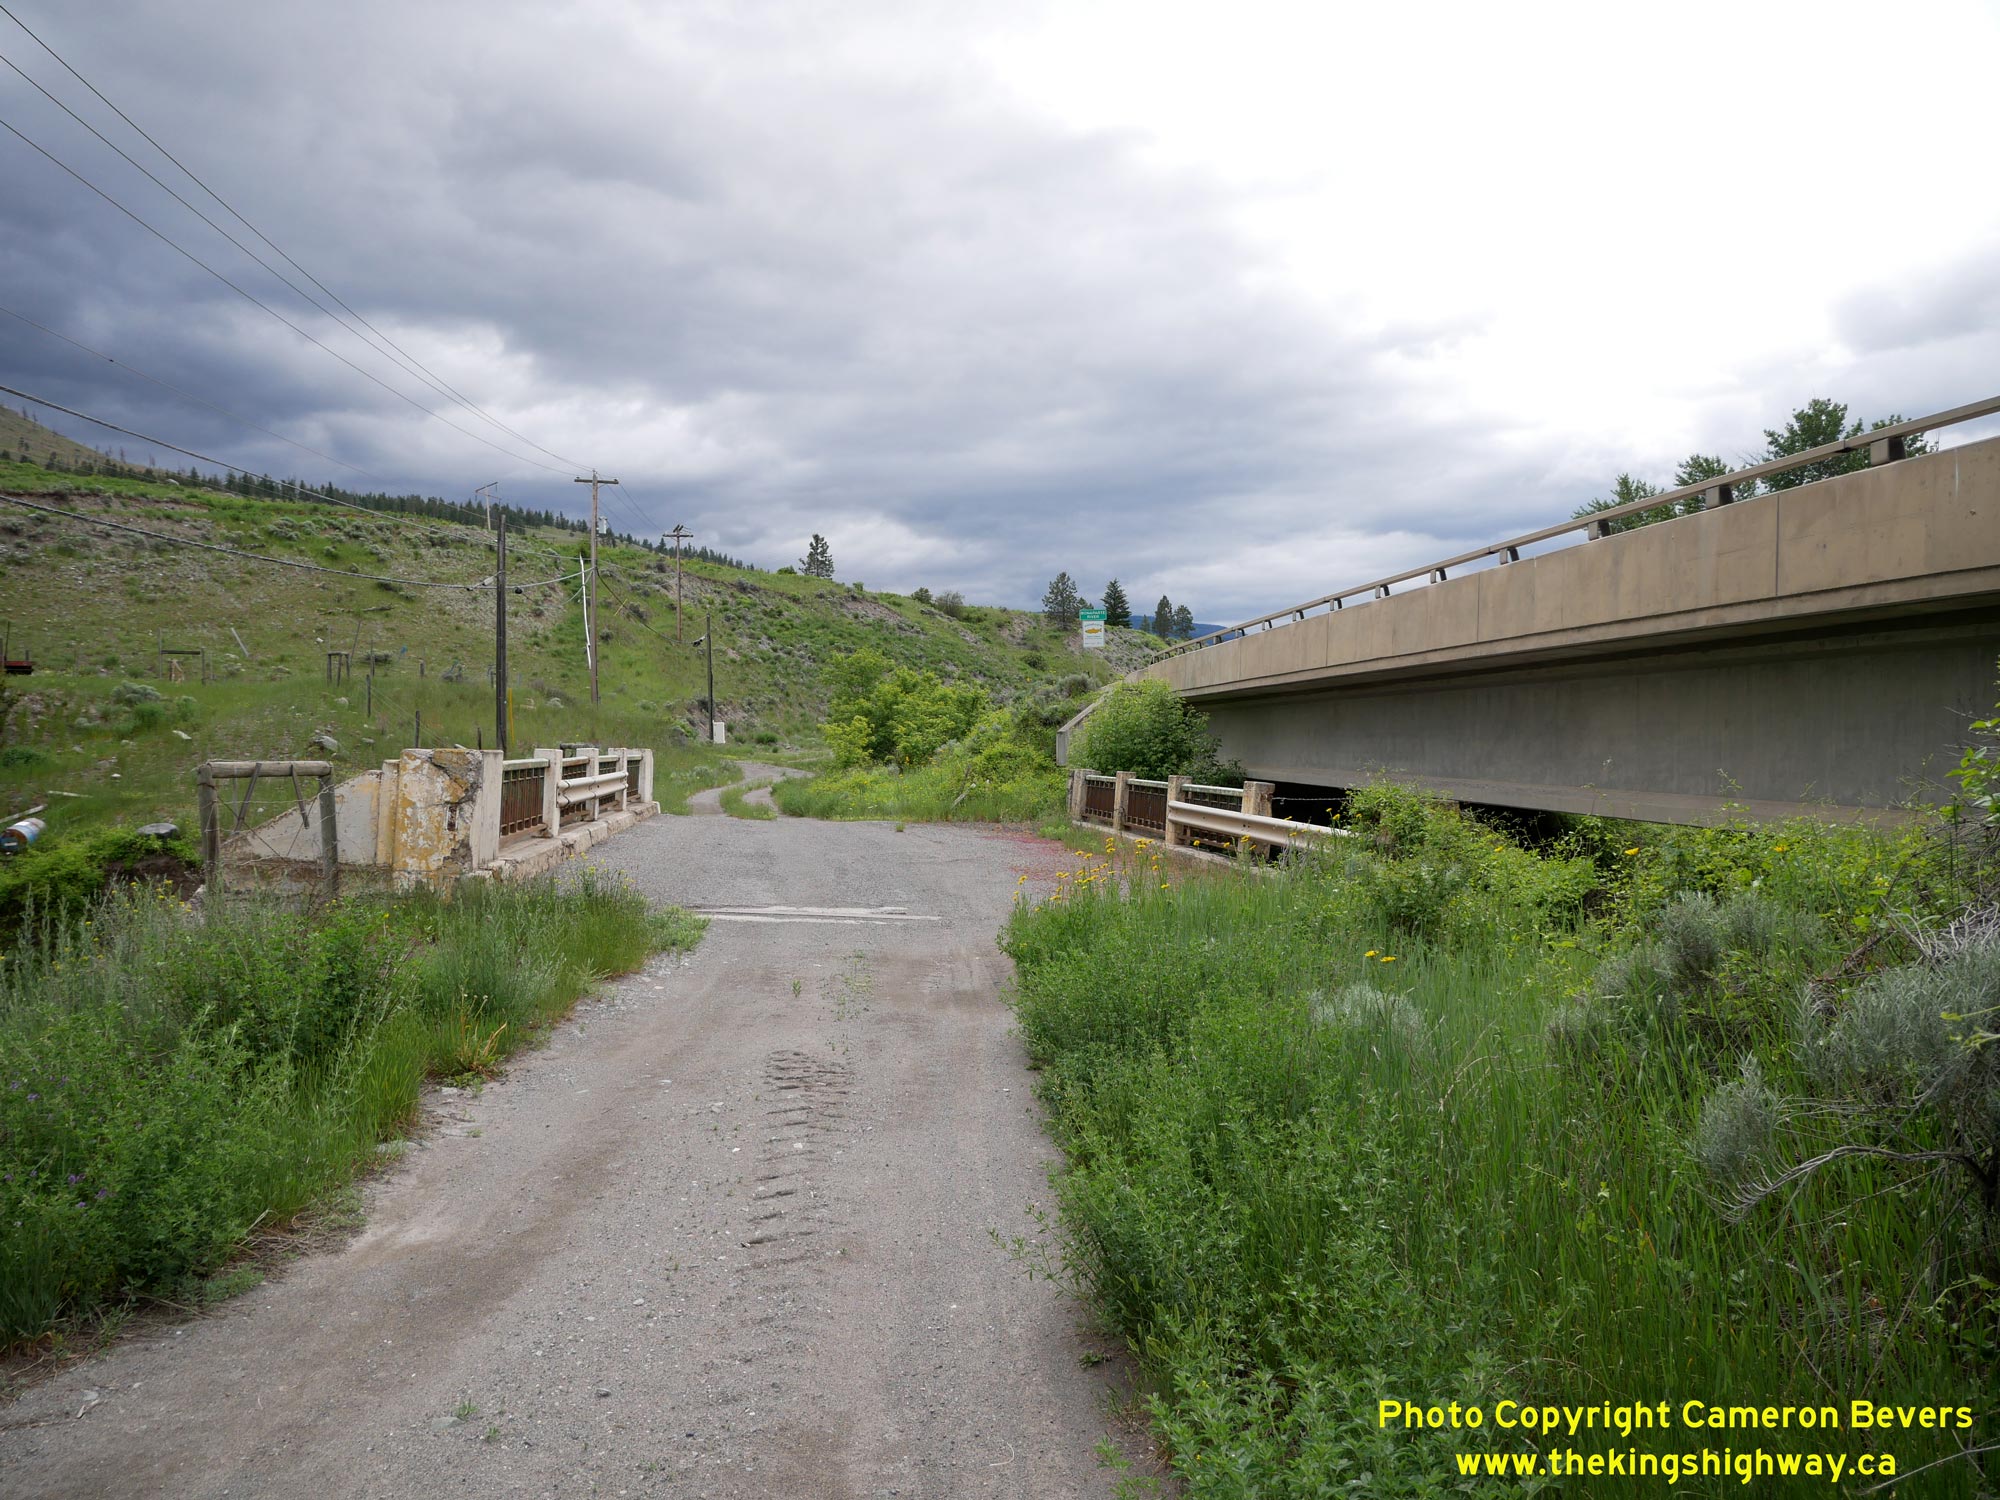
Left - Facing north towards the abandoned Bonaparte River Bridge at Loon Lake Road, located about 11 km north of the Hwy 99 Junction. See an
Enlarged Photo Here. (Photograph taken on June 4, 2015 - © Cameron Bevers) Right - An abandoned highway bridge lies immediately to the east of the current Bonaparte River Bridge. See an Enlarged Photo Here. (Photograph taken on June 13, 2022 - © Cameron Bevers) 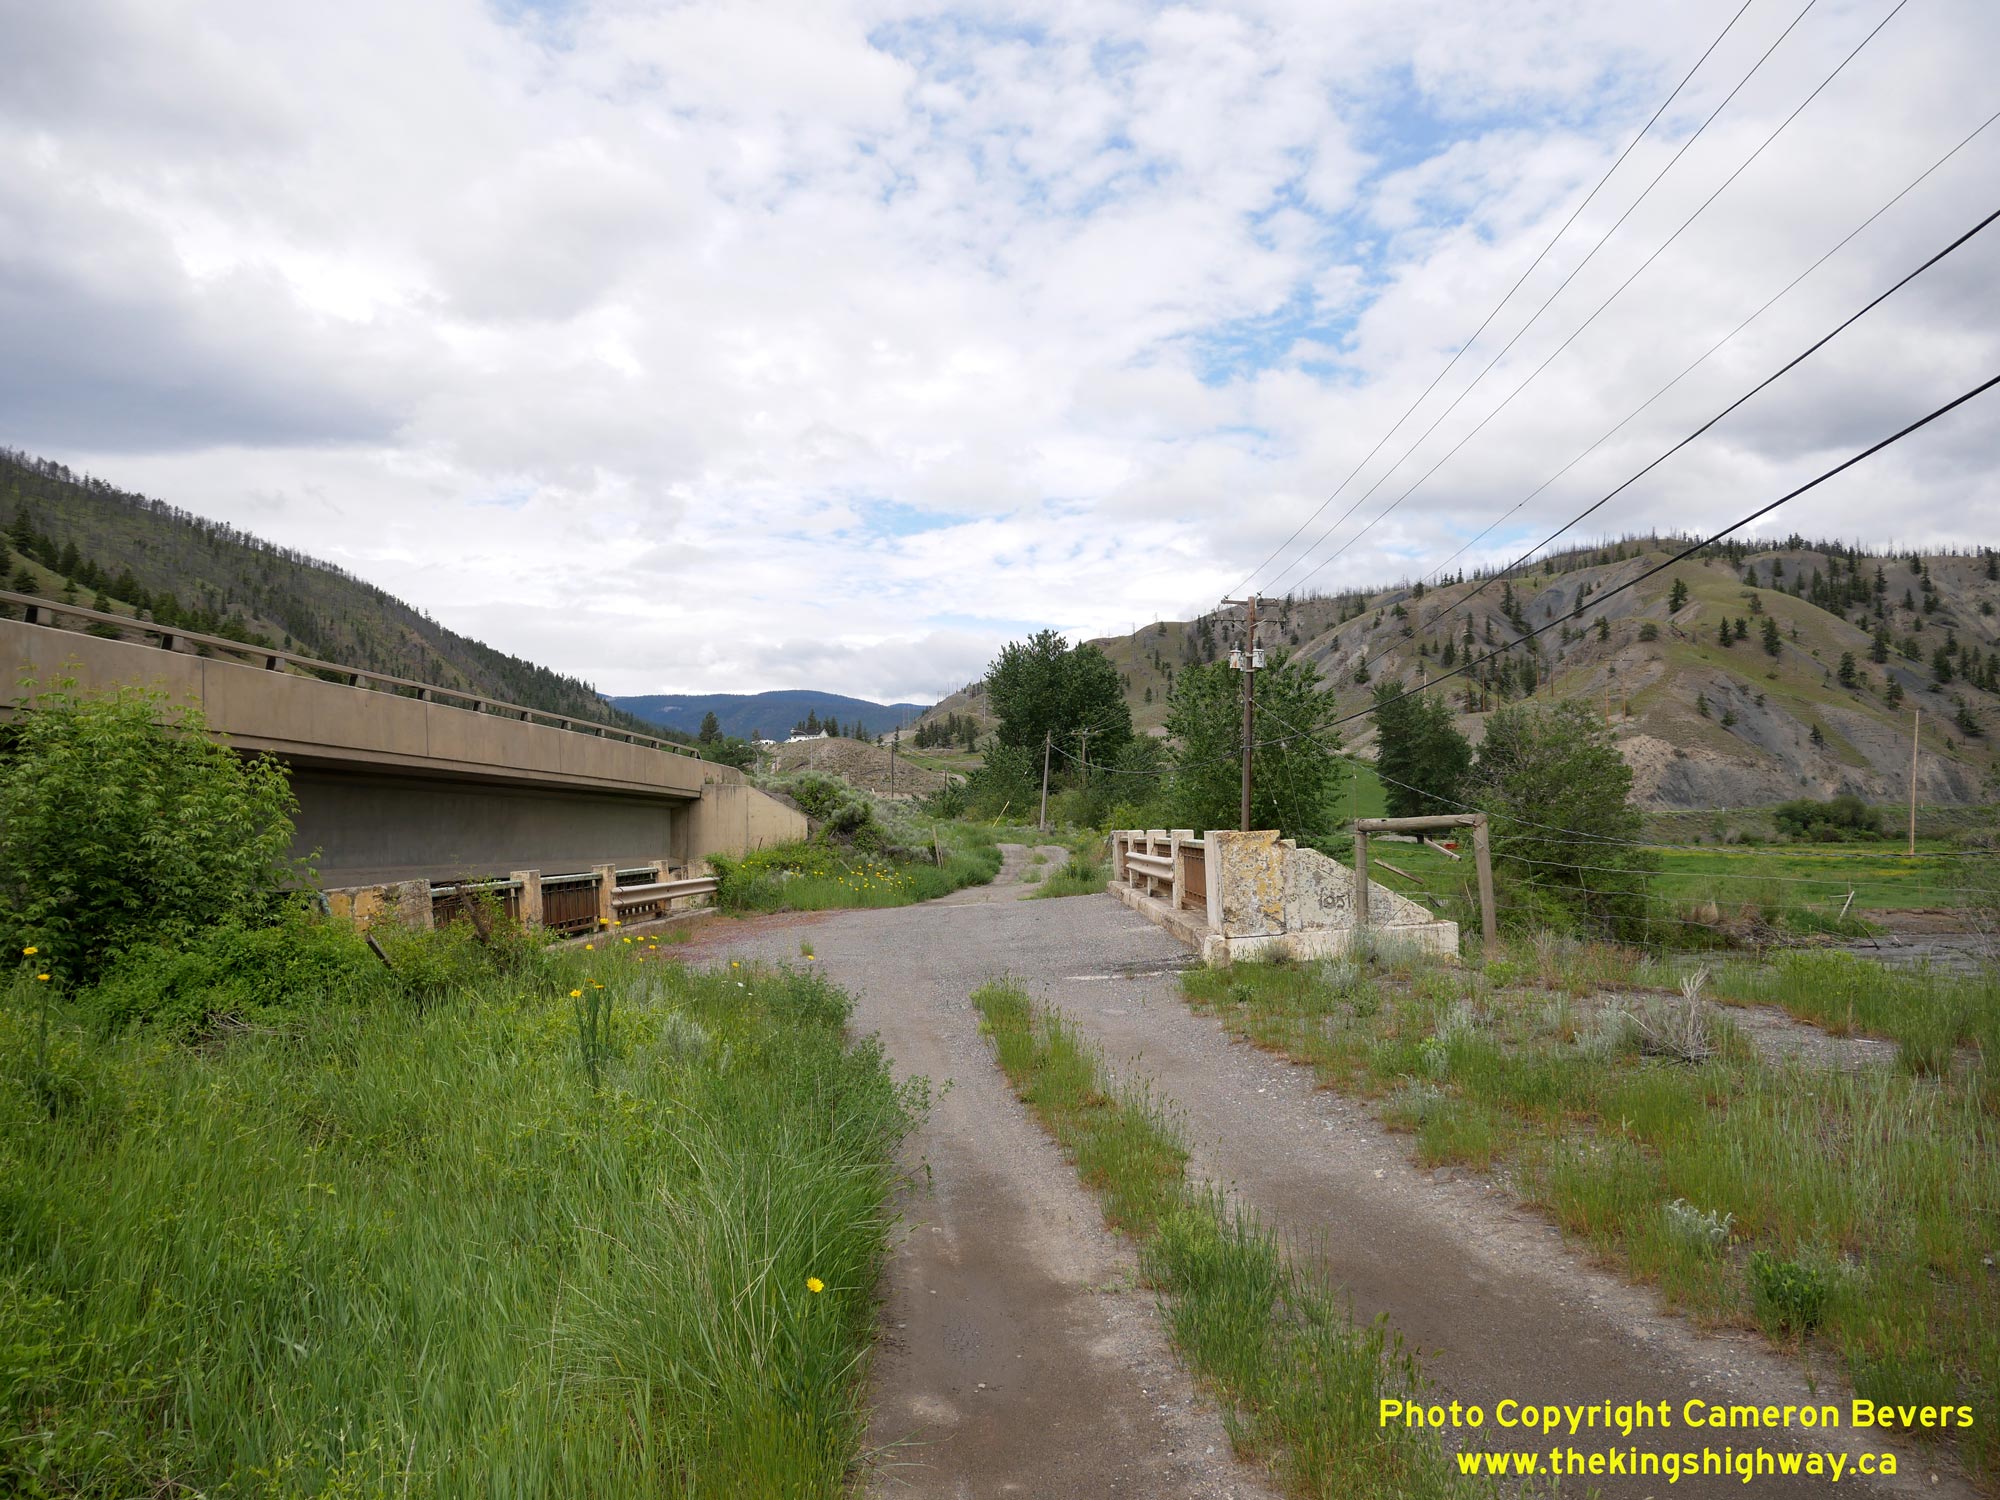

Left - Facing north towards the abandoned Bonaparte River Bridge at Loon Lake Road. See an
Enlarged Photo Here. (Photograph taken on June 13, 2022 - © Cameron Bevers) Right - Eastern side of the abandoned Bonaparte River Bridge on a bypassed alignment of Hwy 97. This single-span steel girder bridge was completed in 1951. See an Enlarged Photo Here. (Photograph taken on June 13, 2022 - © Cameron Bevers) 

Left - Bonaparte River Bridge on Hwy 97 at Loon Lake Road, facing south. The abandoned highway bridge is visible at left. See an
Enlarged Photo Here. (Photograph taken on June 13, 2022 - © Cameron Bevers) Right - Approaching the start of the four-lane highway section facing north, about 4 km north of Loon Lake Road. See an Enlarged Photo Here. (Photograph taken on June 4, 2015 - © Cameron Bevers) 

Left - View of Hwy 97 at the end of the four-lane highway section, located about 4 km north of Loon Lake Road. See an
Enlarged Photo Here. (Photograph taken on June 4, 2015 - © Cameron Bevers) Right - Facing north along the four-lane section of Hwy 97 about 4 km north of Loon Lake Road. See an Enlarged Photo Here. (Photograph taken on June 4, 2015 - © Cameron Bevers) 
Left - Undivided four-lane section of Hwy 97 about 12 km south of Clinton, facing south towards Cache Creek. See an
Enlarged Photo Here. (Photograph taken on June 4, 2015 - © Cameron Bevers) Right - Distance guide sign on northbound Hwy 97 at Six Mile Lake showing the highway distance to Clinton. See an Enlarged Photo Here. (Photograph taken on June 4, 2015 - © Cameron Bevers) 

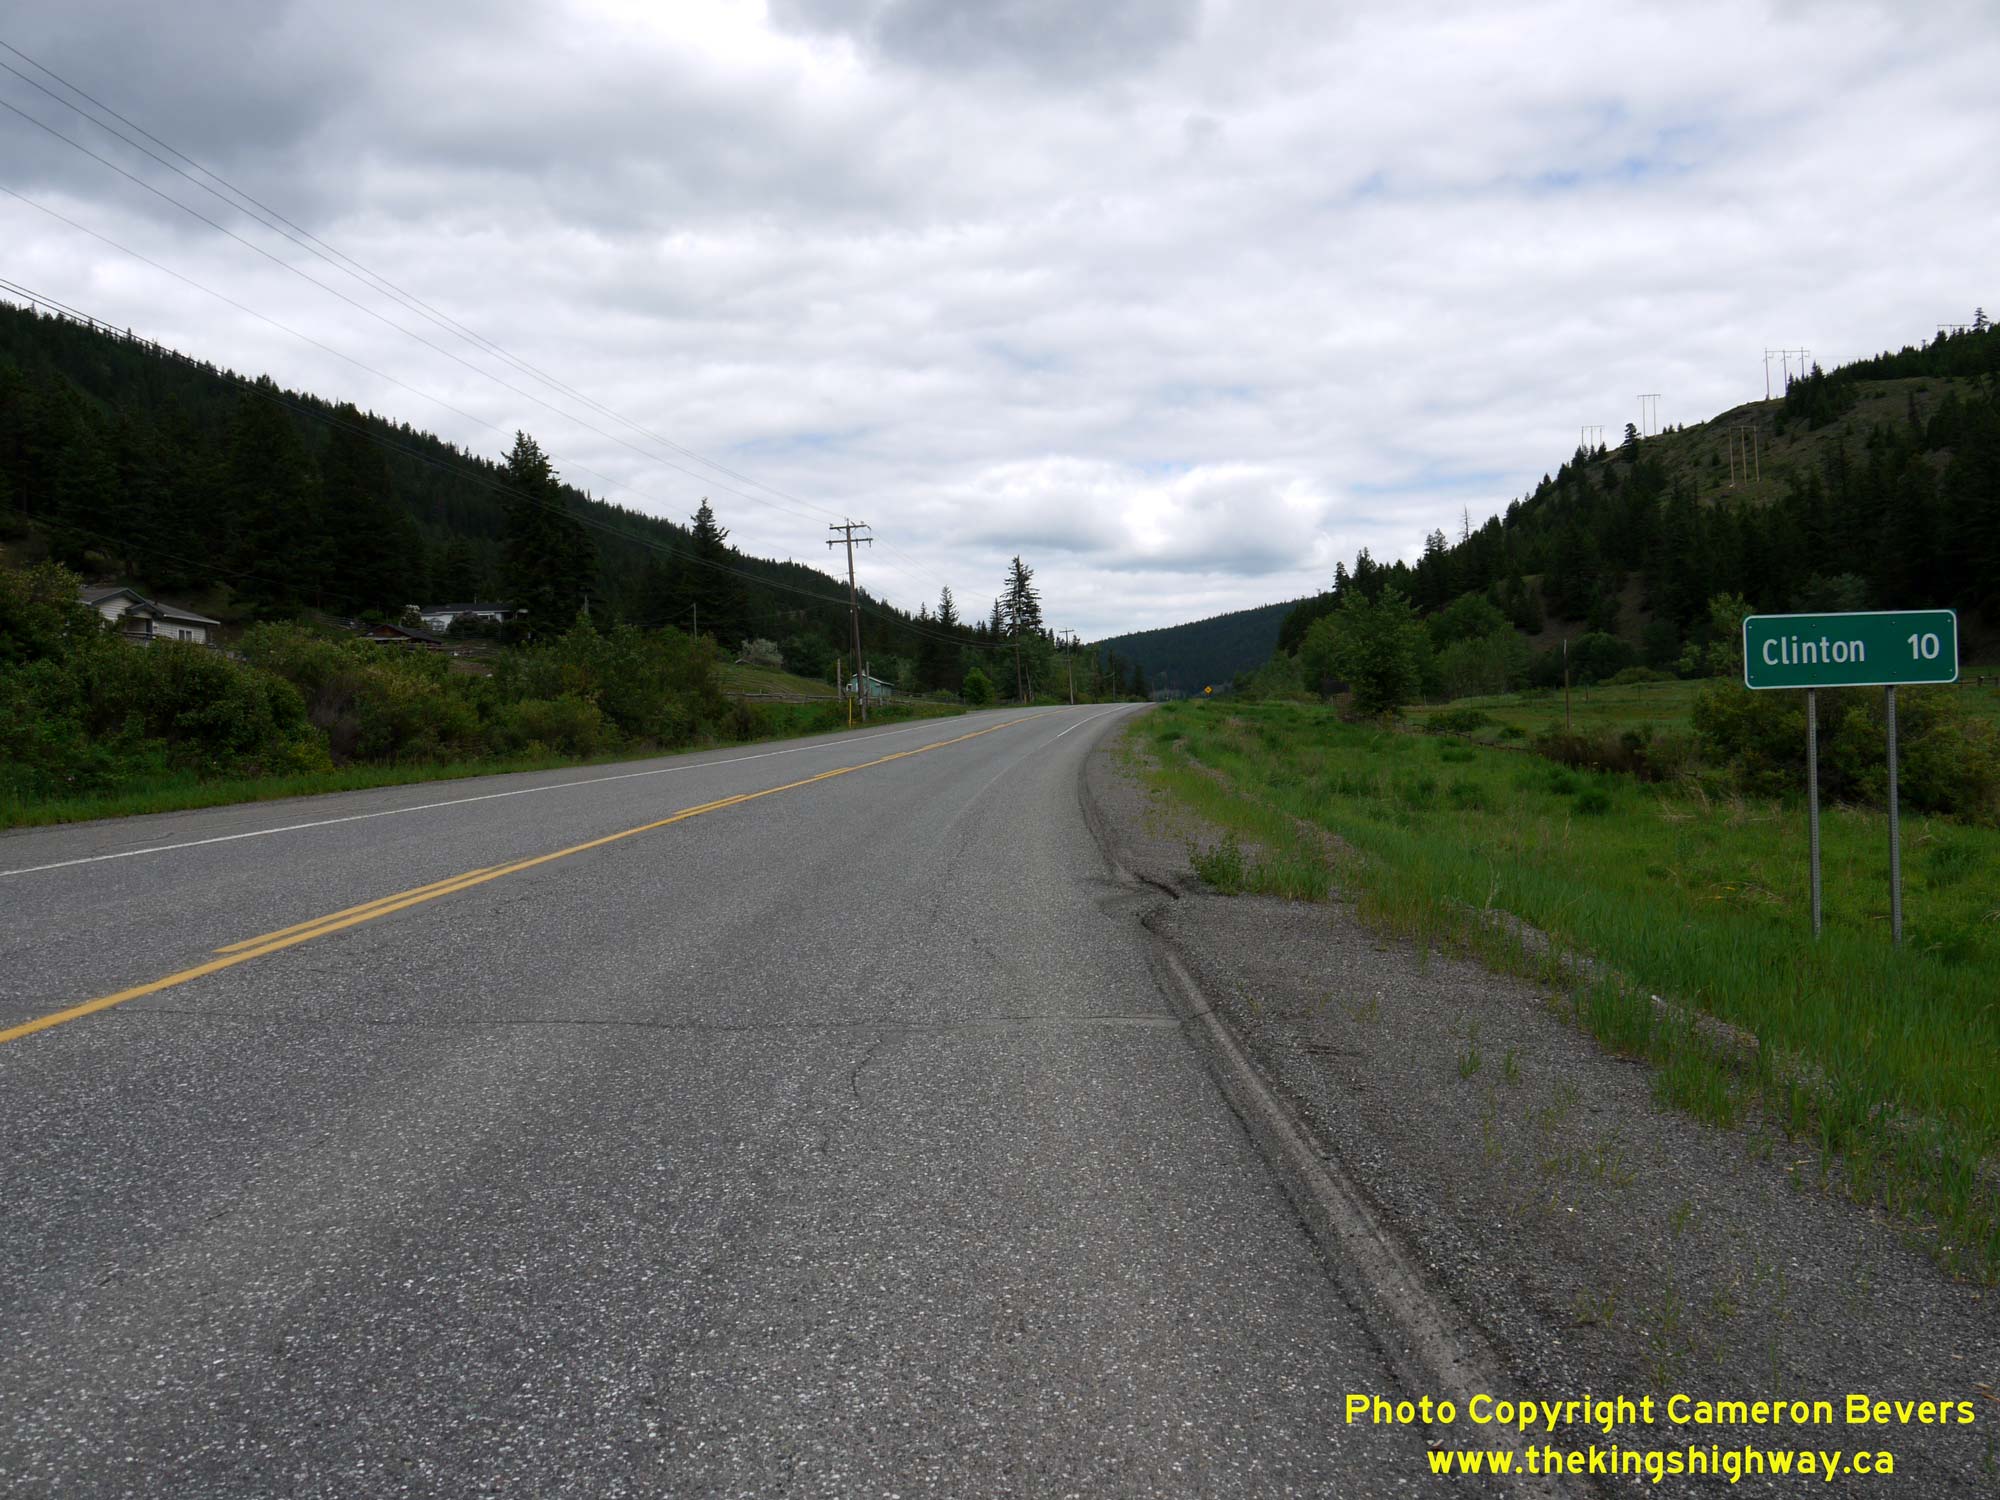
Left - Facing south along Hwy 97 at Six Mile Lake, located about 10 km south of Clinton. See an
Enlarged Photo Here. (Photograph taken on June 4, 2015 - © Cameron Bevers) Right - Distance guide sign on southbound Hwy 97 departing from Clinton. See an Enlarged Photo Here. (Photograph taken on June 4, 2015 - © Cameron Bevers) 
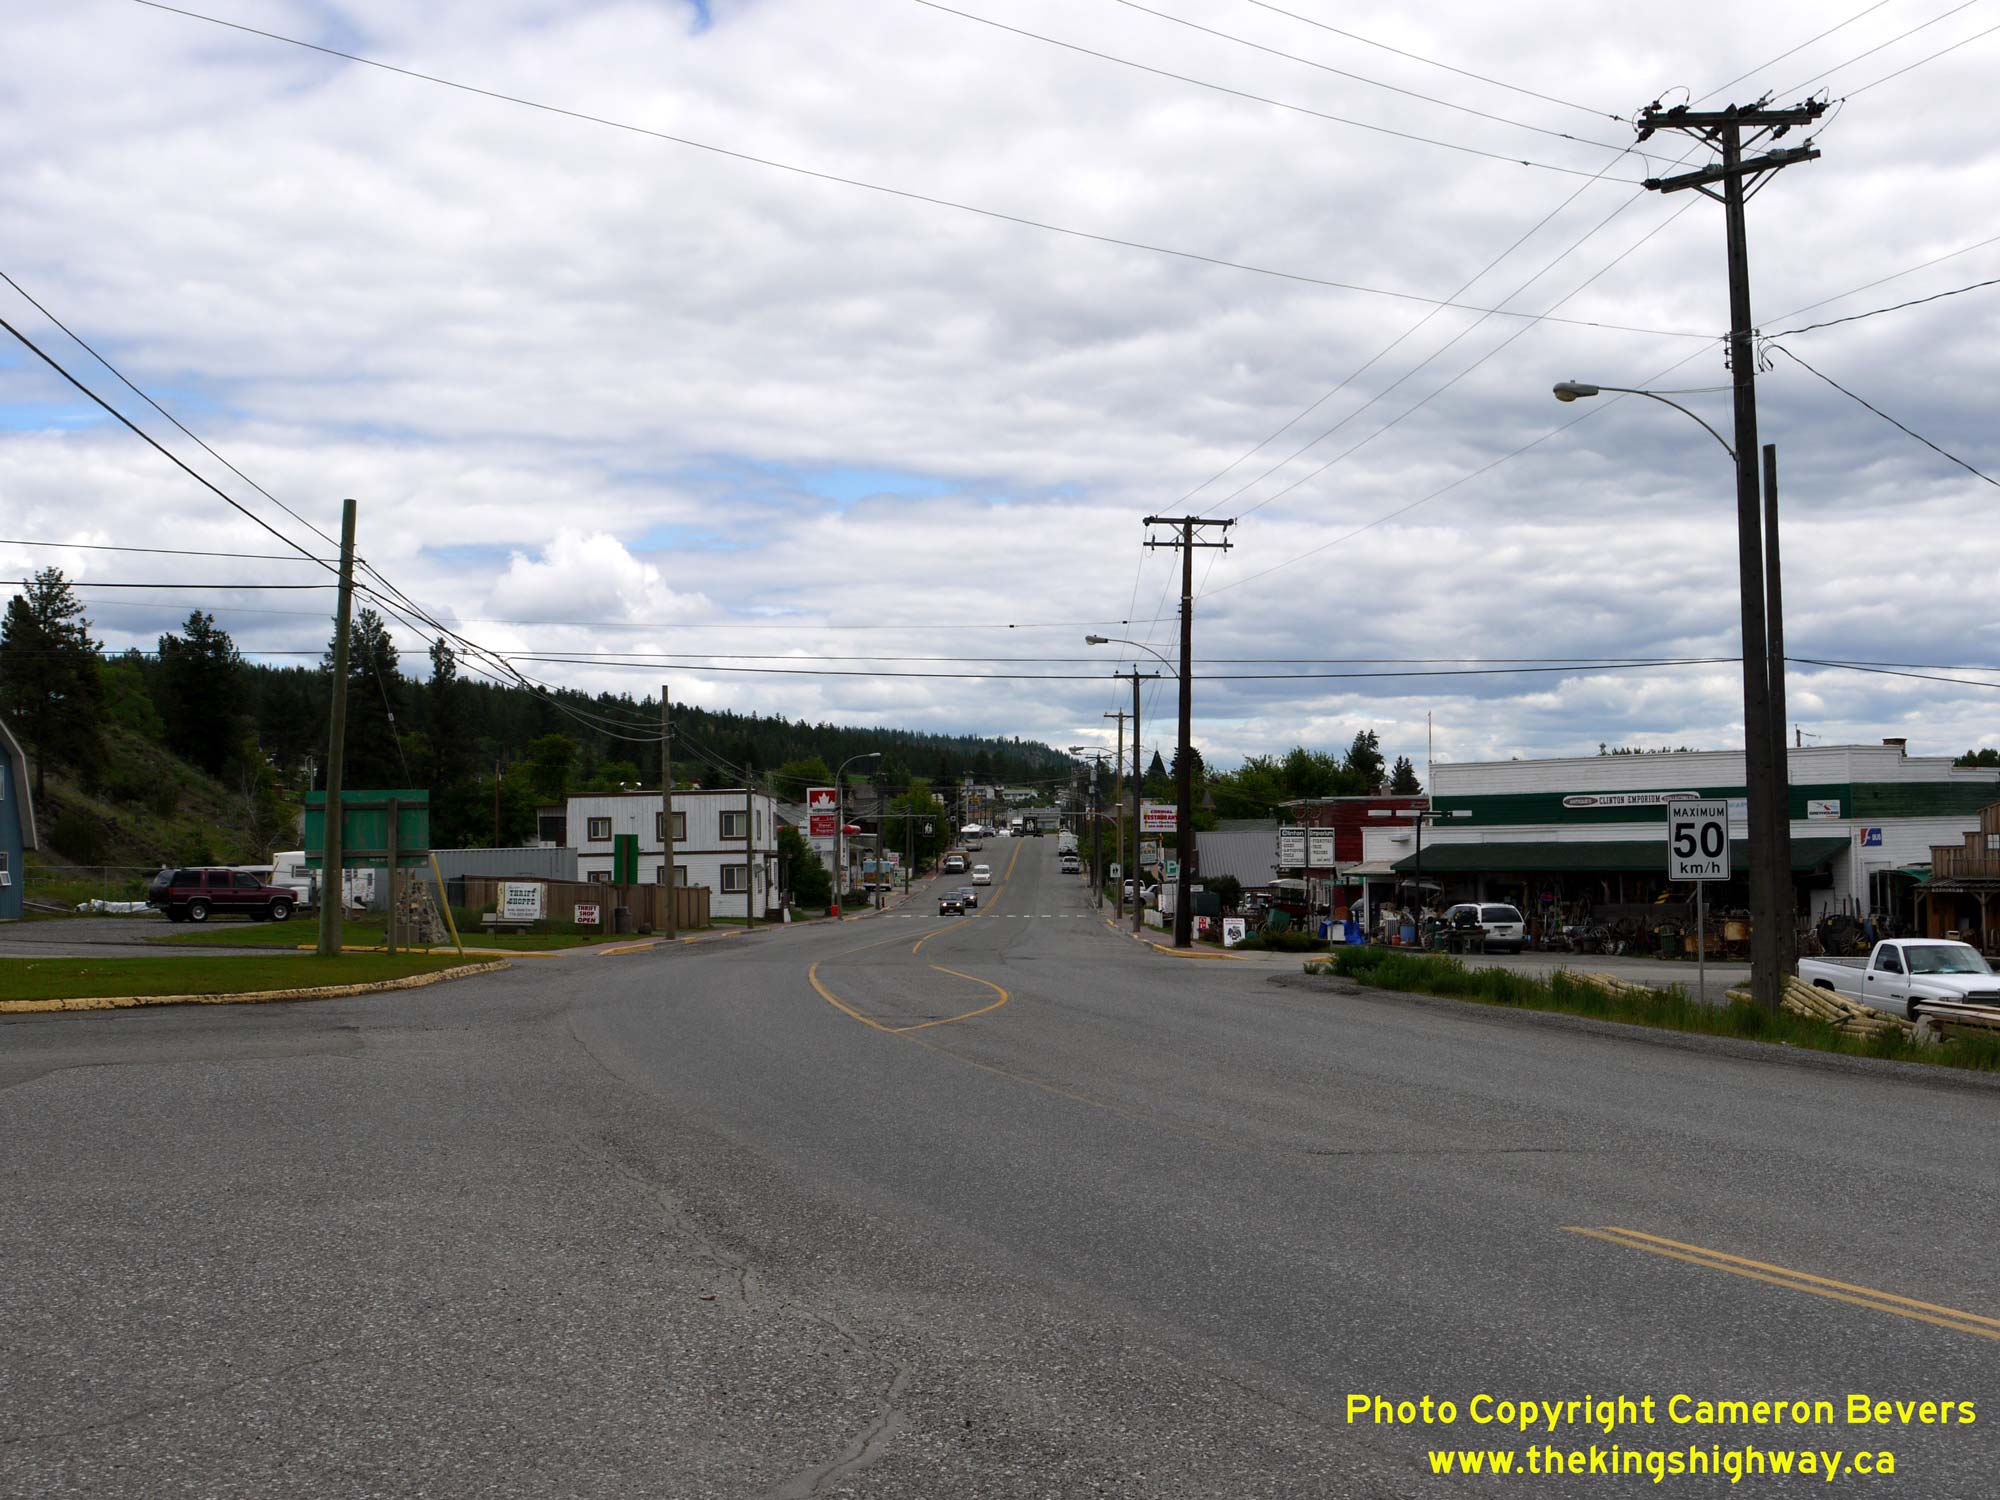
Left - Facing south along Hwy 97 towards Cache Creek from the southern entrance to Clinton. See an
Enlarged Photo Here. (Photograph taken on June 4, 2015 - © Cameron Bevers) Right - Facing north along Hwy 97 through Clinton. This is the only sizeable town located along Hwy 97 between Cache Creek and the Hwy 24 Junction. See an Enlarged Photo Here. (Photograph taken on June 4, 2015 - © Cameron Bevers) 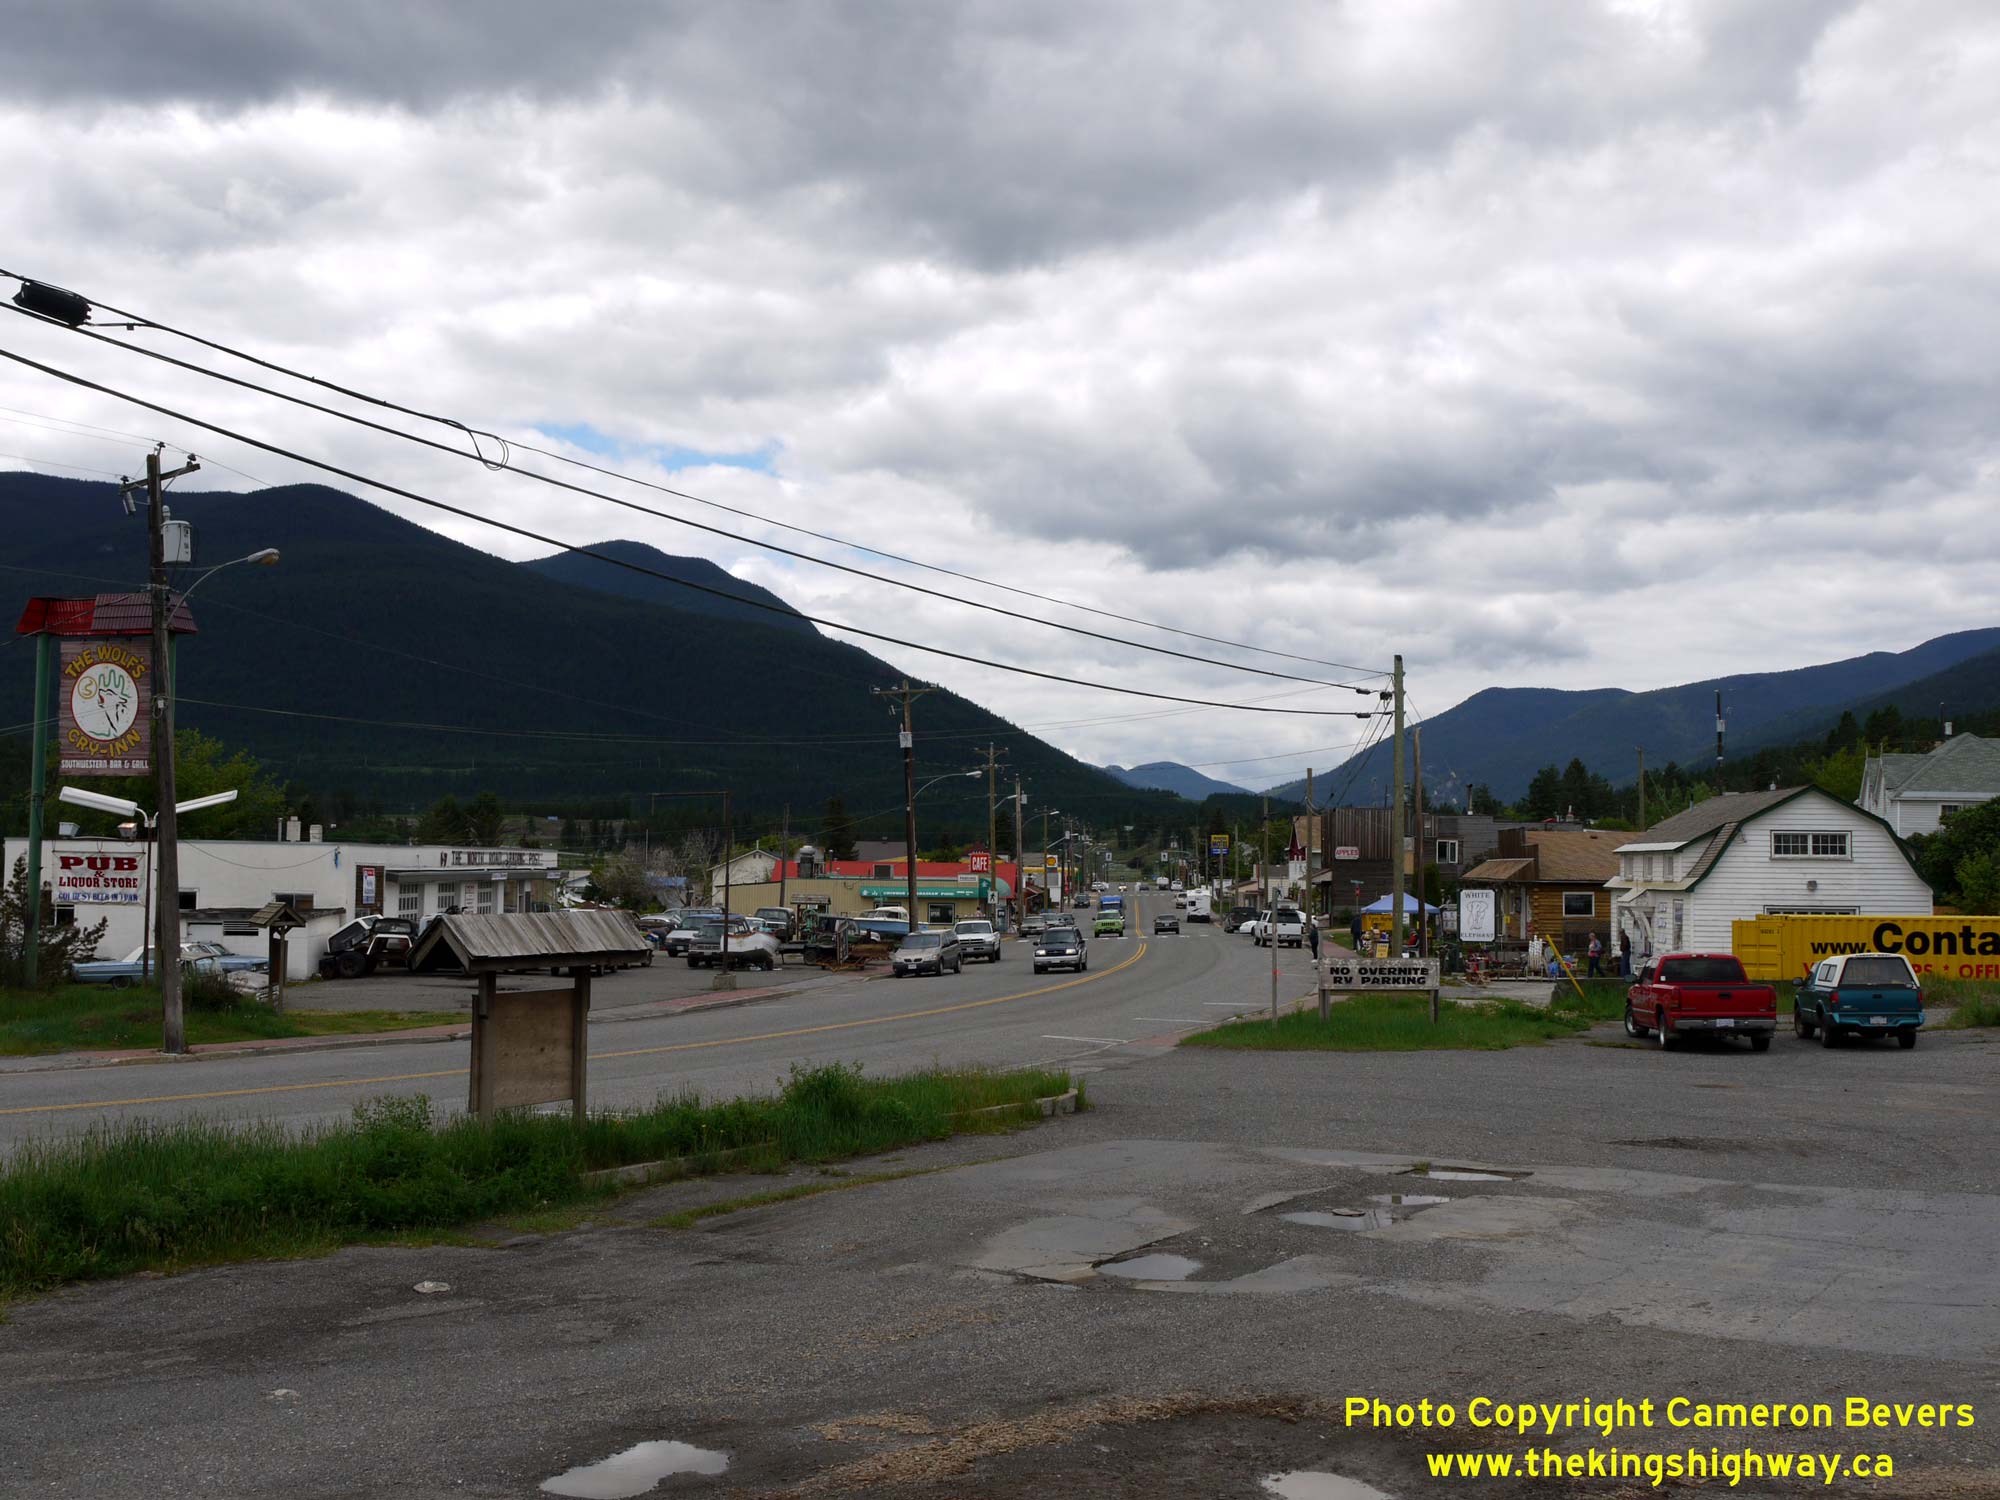
Left - View of Hwy 97 through Clinton, facing south towards Cache Creek. See an
Enlarged Photo Here. (Photograph taken on June 4, 2015 - © Cameron Bevers) Right - Facing north along Hwy 97 towards 100 Mile House from the northern entrance to Clinton. See an Enlarged Photo Here. (Photograph taken on June 4, 2015 - © Cameron Bevers) 

Left - Hwy 97 climbs quickly out of the mountain valley where Clinton is situated. See an
Enlarged Photo Here. (Photograph taken on June 4, 2015 - © Cameron Bevers) Right - Facing south along Hwy 97 from Liden Road north of Clinton, showing the end of the four-lane highway section. See an Enlarged Photo Here. (Photograph taken on June 4, 2015 - © Cameron Bevers) 
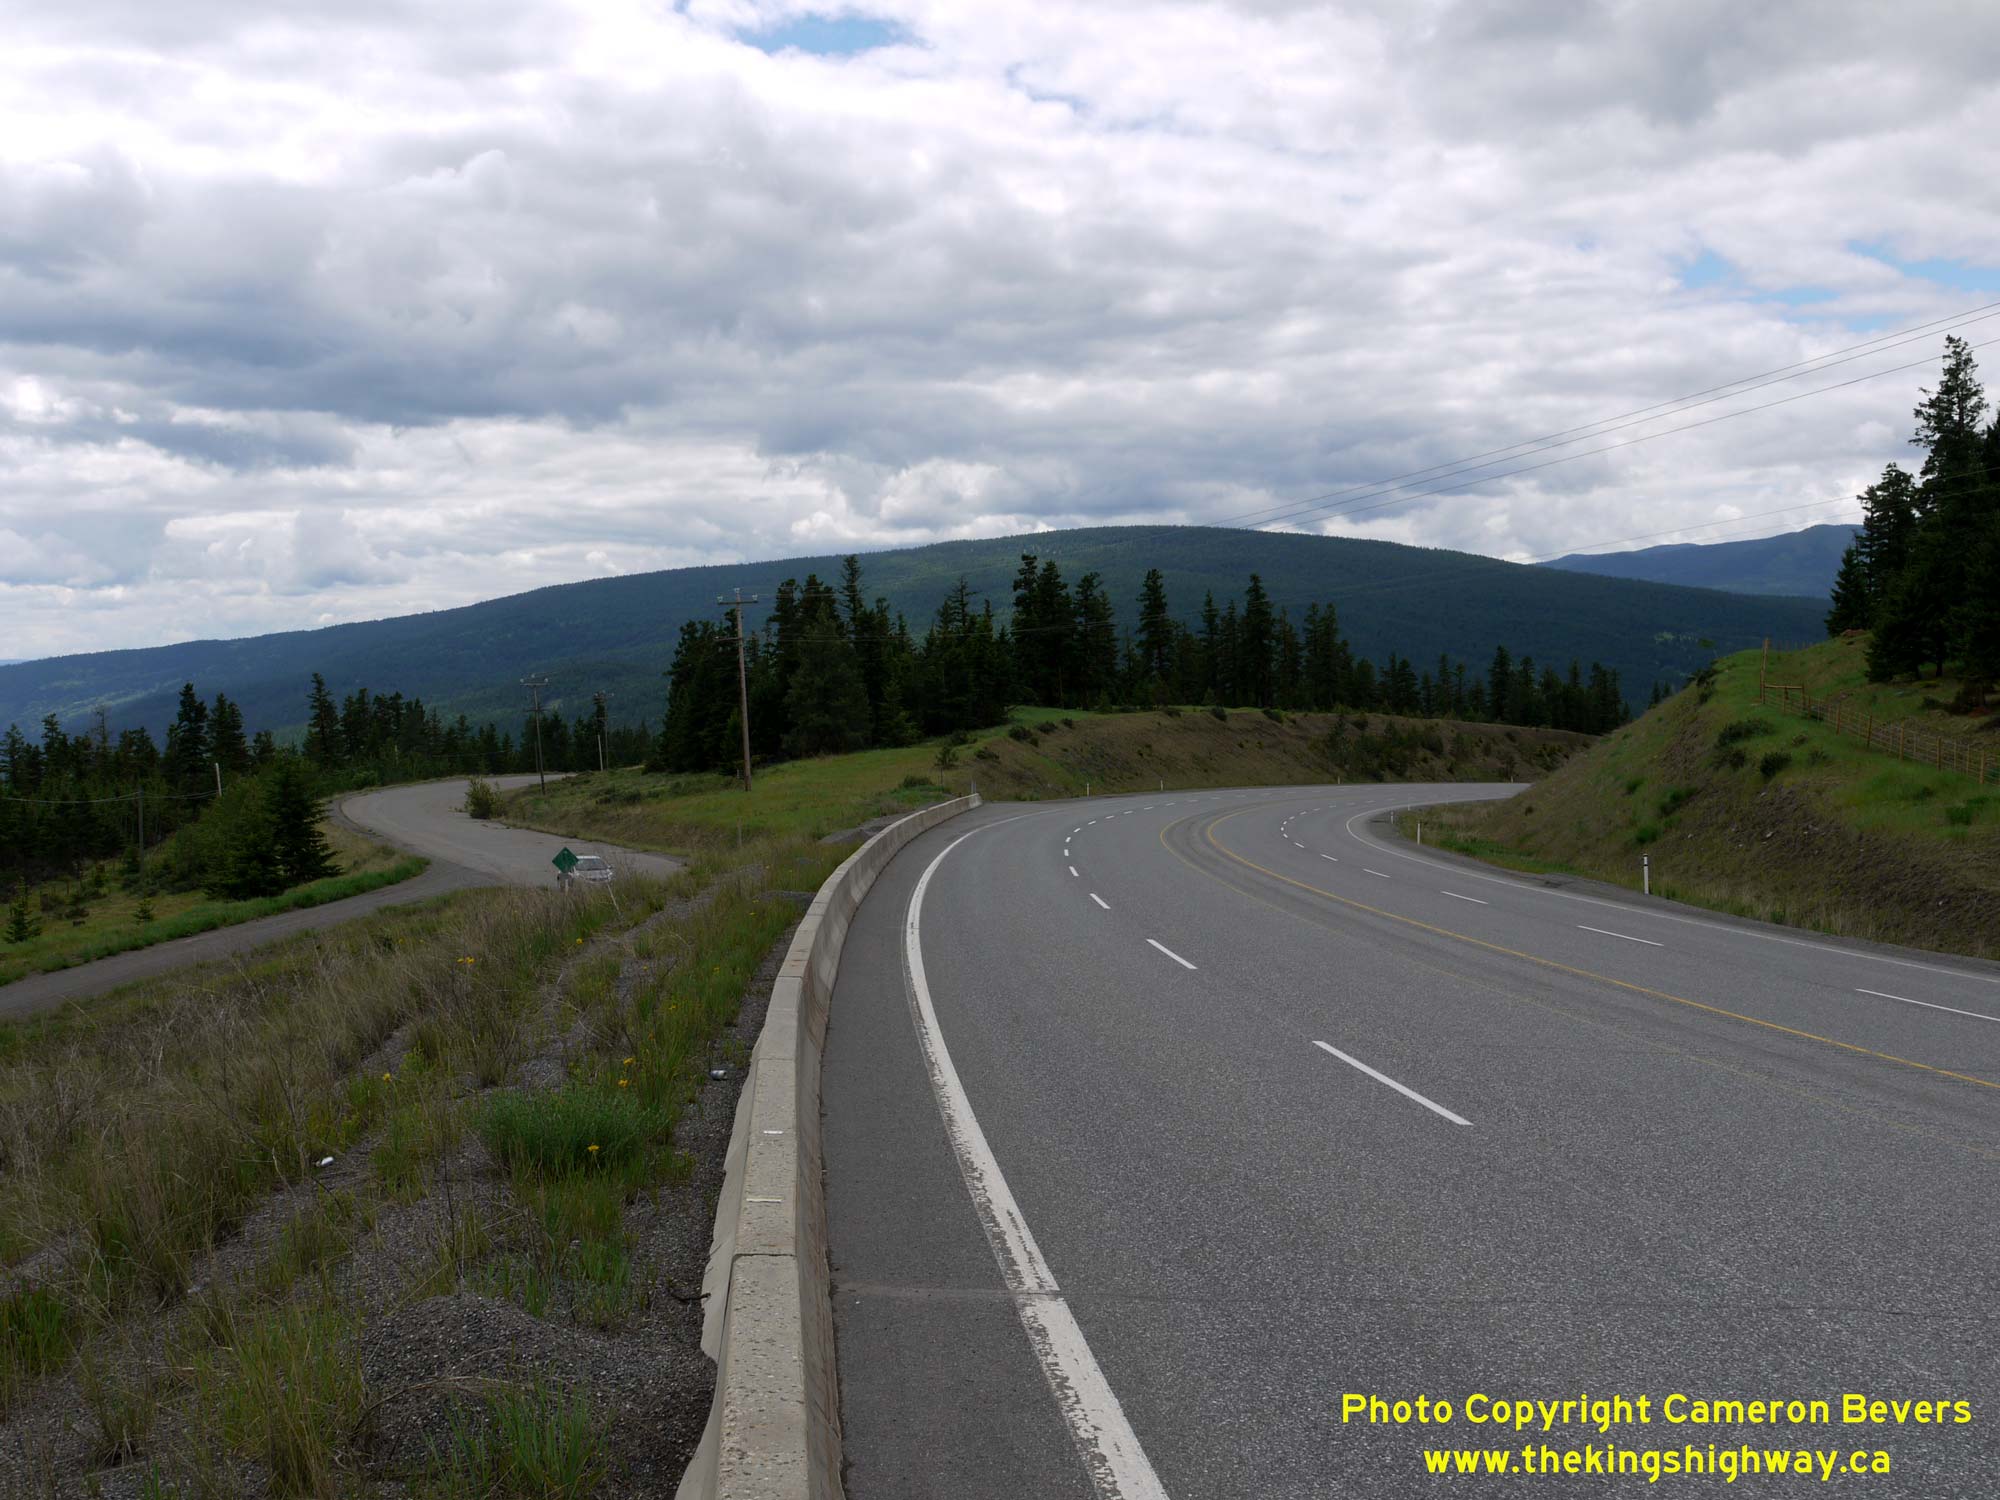
Left - Facing south along Hwy 97, about 7 km north of Clinton. See an
Enlarged Photo Here. (Photograph taken on June 4, 2015 - © Cameron Bevers) Right - This highway diversion was constructed north of Clinton many years ago in order to widen Hwy 97 to four lanes. Note the bypassed highway in the background. See an Enlarged Photo Here. (Photograph taken on June 4, 2015 - © Cameron Bevers) 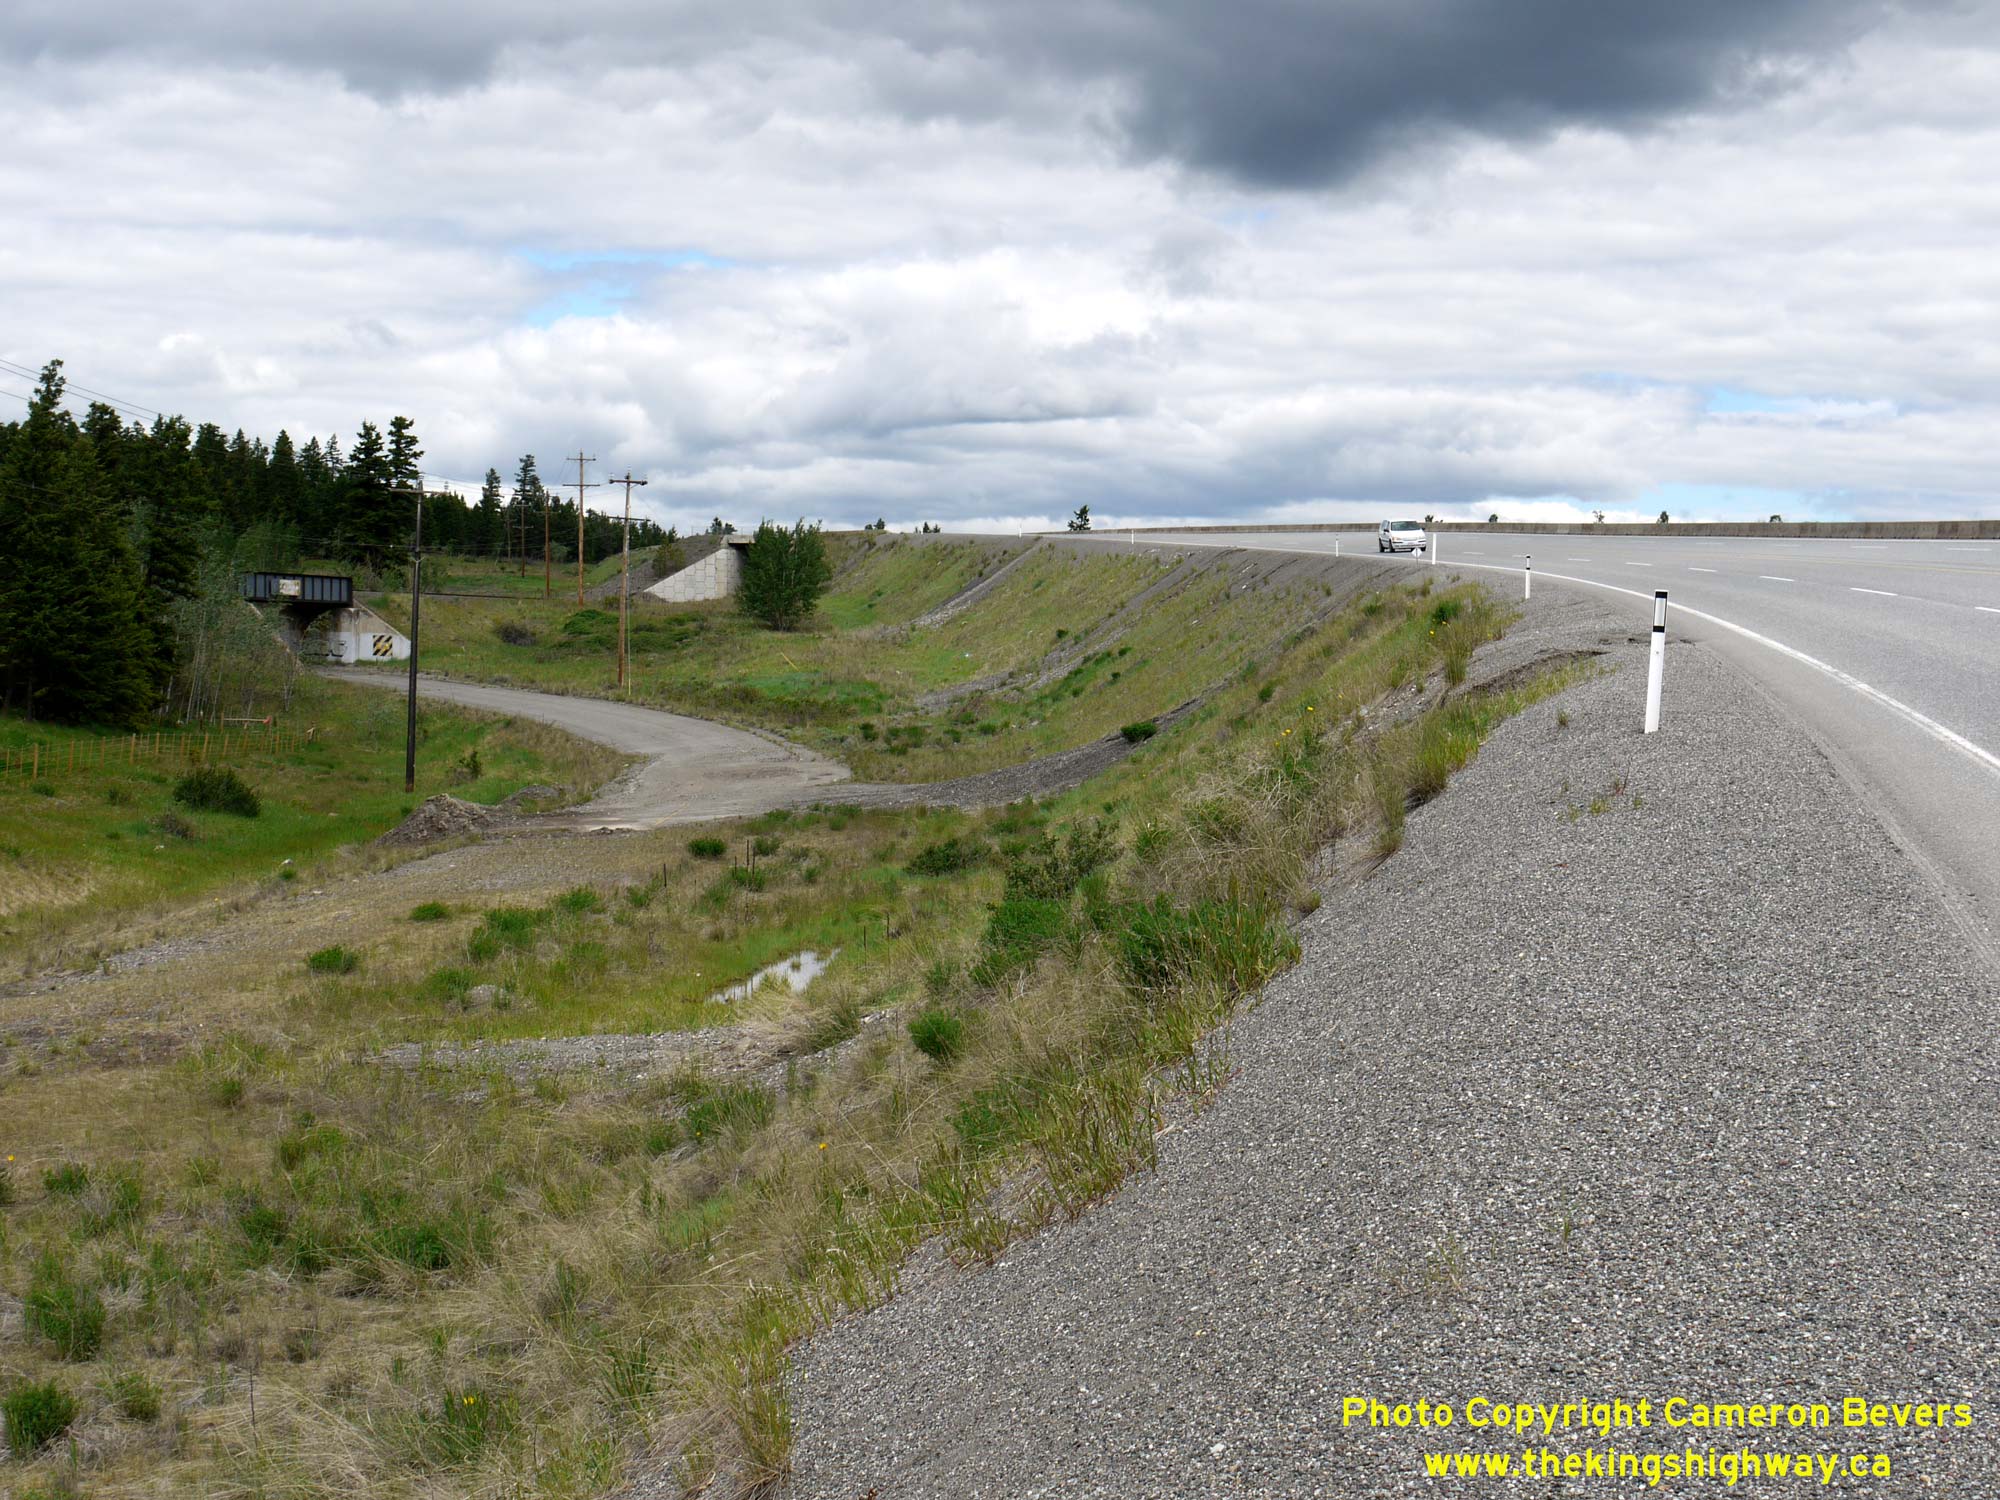
Left - The bypassed alignment of Hwy 97 passes through a narrow railway subway part-way up the grade. The new four-lane highway was taken across the railway
via an overhead crossing. The old railway subway at left was simply abandoned in place. See an
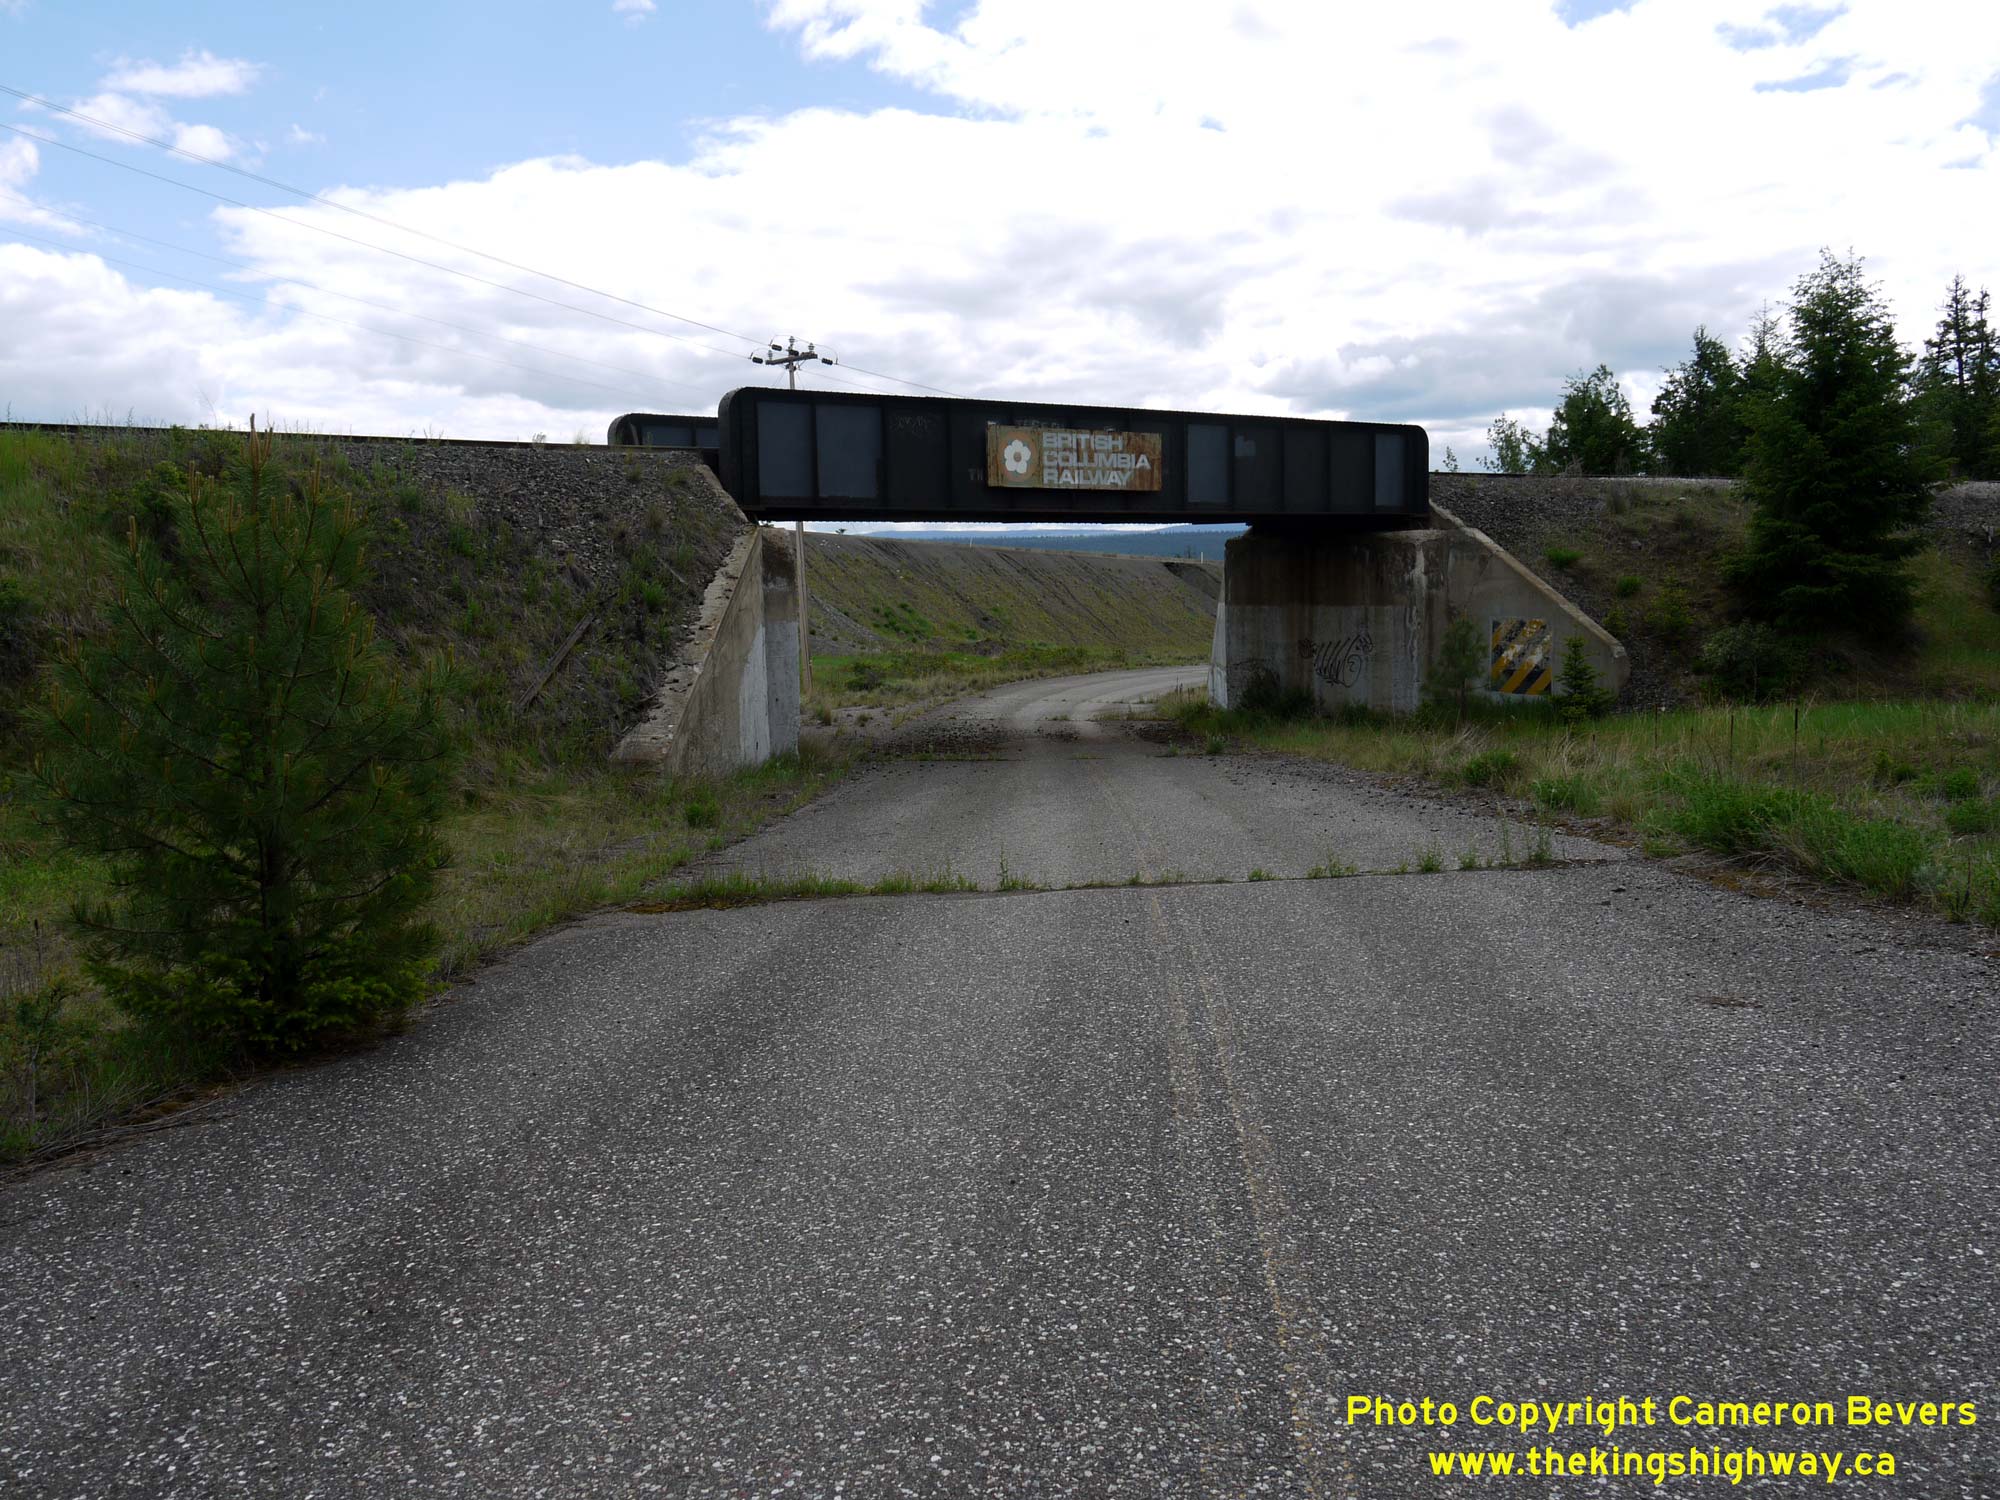
Enlarged Photo Here. (Photograph taken on June 4, 2015 - © Cameron Bevers) Right - Northern side of the abandoned railway subway on Hwy 97 near Clinton. See an Enlarged Photo Here. (Photograph taken on June 4, 2015 - © Cameron Bevers) 
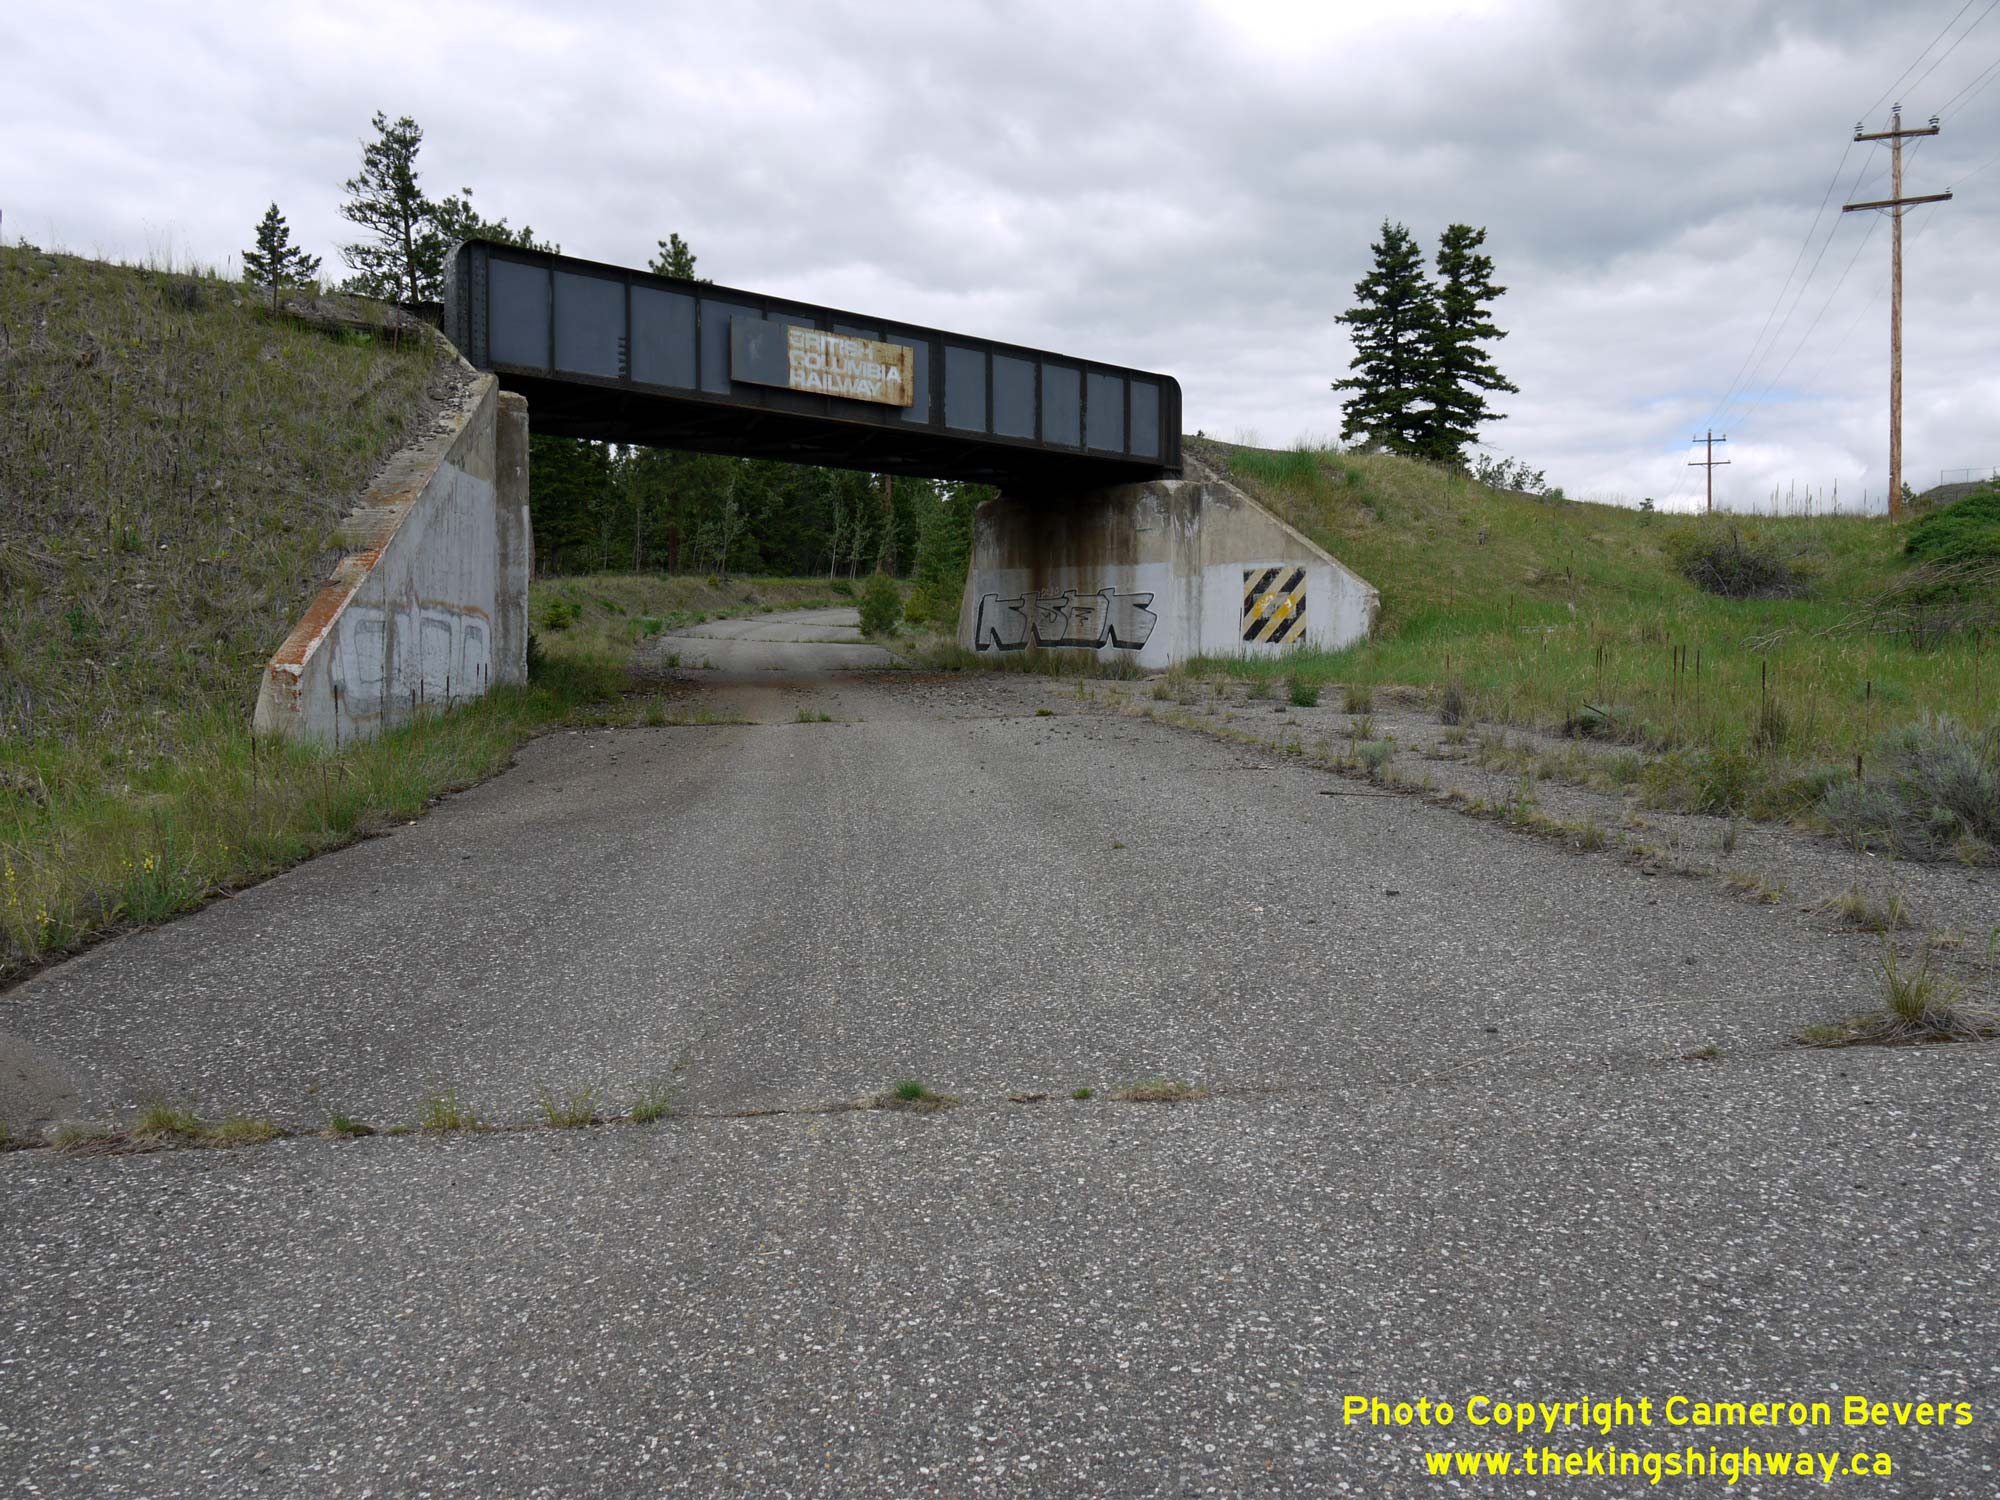
Left - Northern approach to the abandoned railway subway on Hwy 97 north of Clinton. The subway approaches followed a winding highway alignment with poor
sight lines. See an Enlarged Photo Here. (Photograph taken on June 4, 2015 - © Cameron Bevers) Right - View of the abandoned railway subway approach from the south. See an Enlarged Photo Here. (Photograph taken on June 4, 2015 - © Cameron Bevers) 

Left - This great view of a four-lane section of Hwy 97 can be found at Chasm, located about 20 km north of Clinton. To the south, the front ranges of the
Coast Mountains appear in the background. While the scenery along Hwy 97 heading north towards Prince George is more subdued compared to the southern sections of
Hwy 97, there are still some incredible vistas to be enjoyed along the route. See an
Enlarged Photo Here. (Photograph taken on June 4, 2015 - © Cameron Bevers) Right - View from the Chasm Lookout located on a former alignment of Hwy 97. See an Enlarged Photo Here. (Photograph taken on June 4, 2015 - © Cameron Bevers) 
Left - Facing south along Hwy 97 about 6 km south of 70 Mile House. See an
Enlarged Photo Here. (Photograph taken on June 4, 2015 - © Cameron Bevers) Right - Distance guide sign on southbound Hwy 97 at 70 Mile House. See an Enlarged Photo Here. (Photograph taken on June 4, 2015 - © Cameron Bevers) 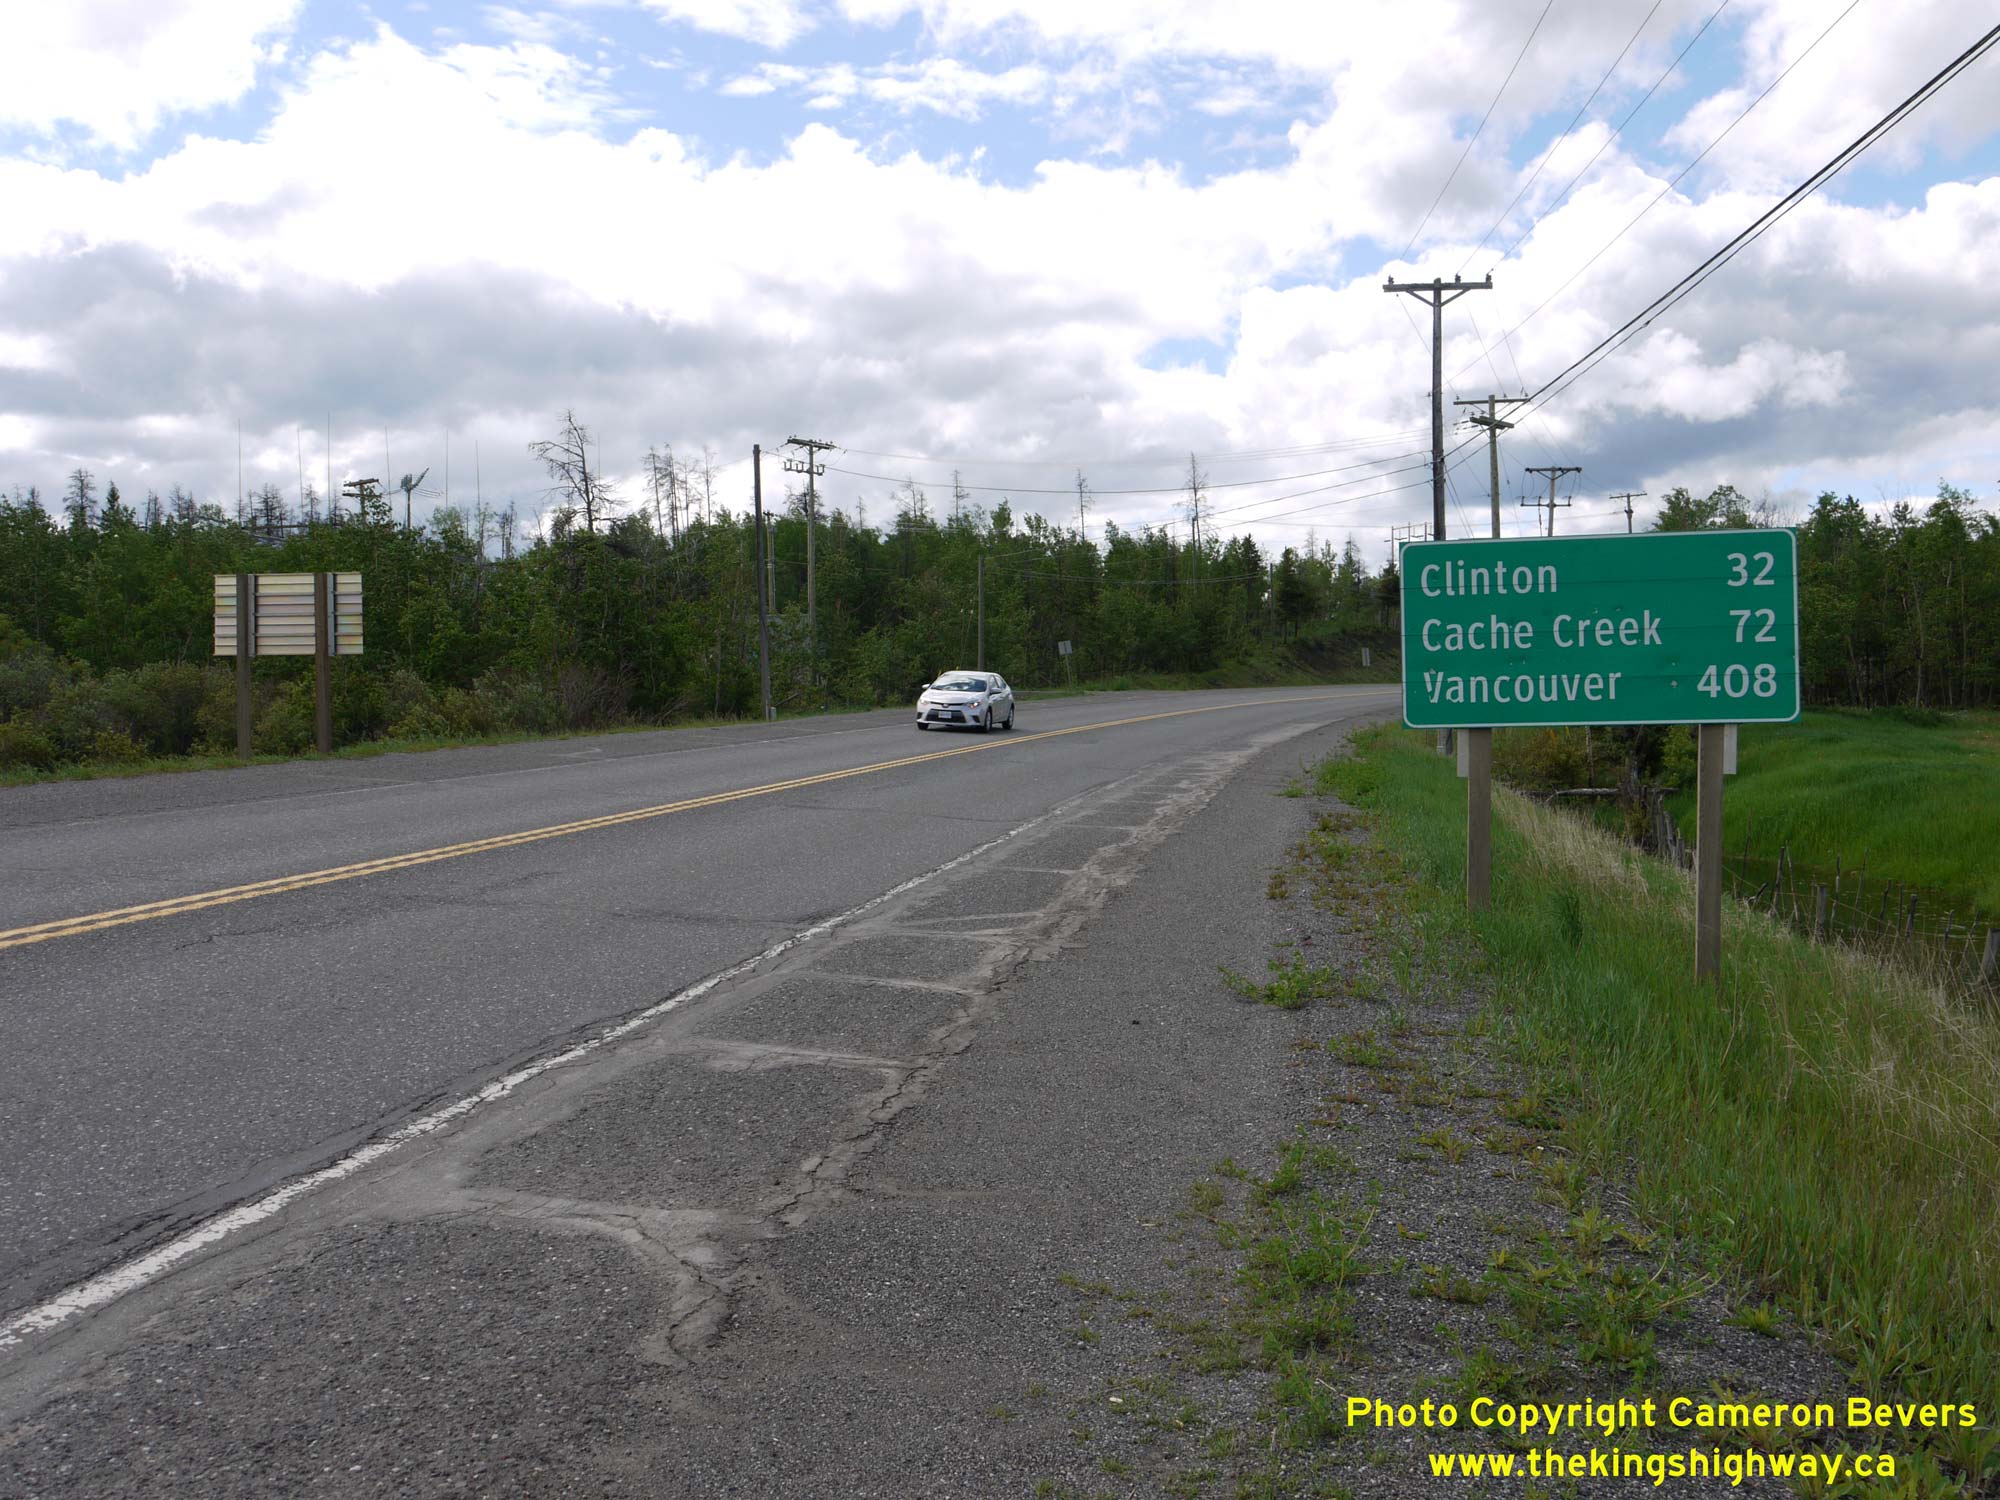
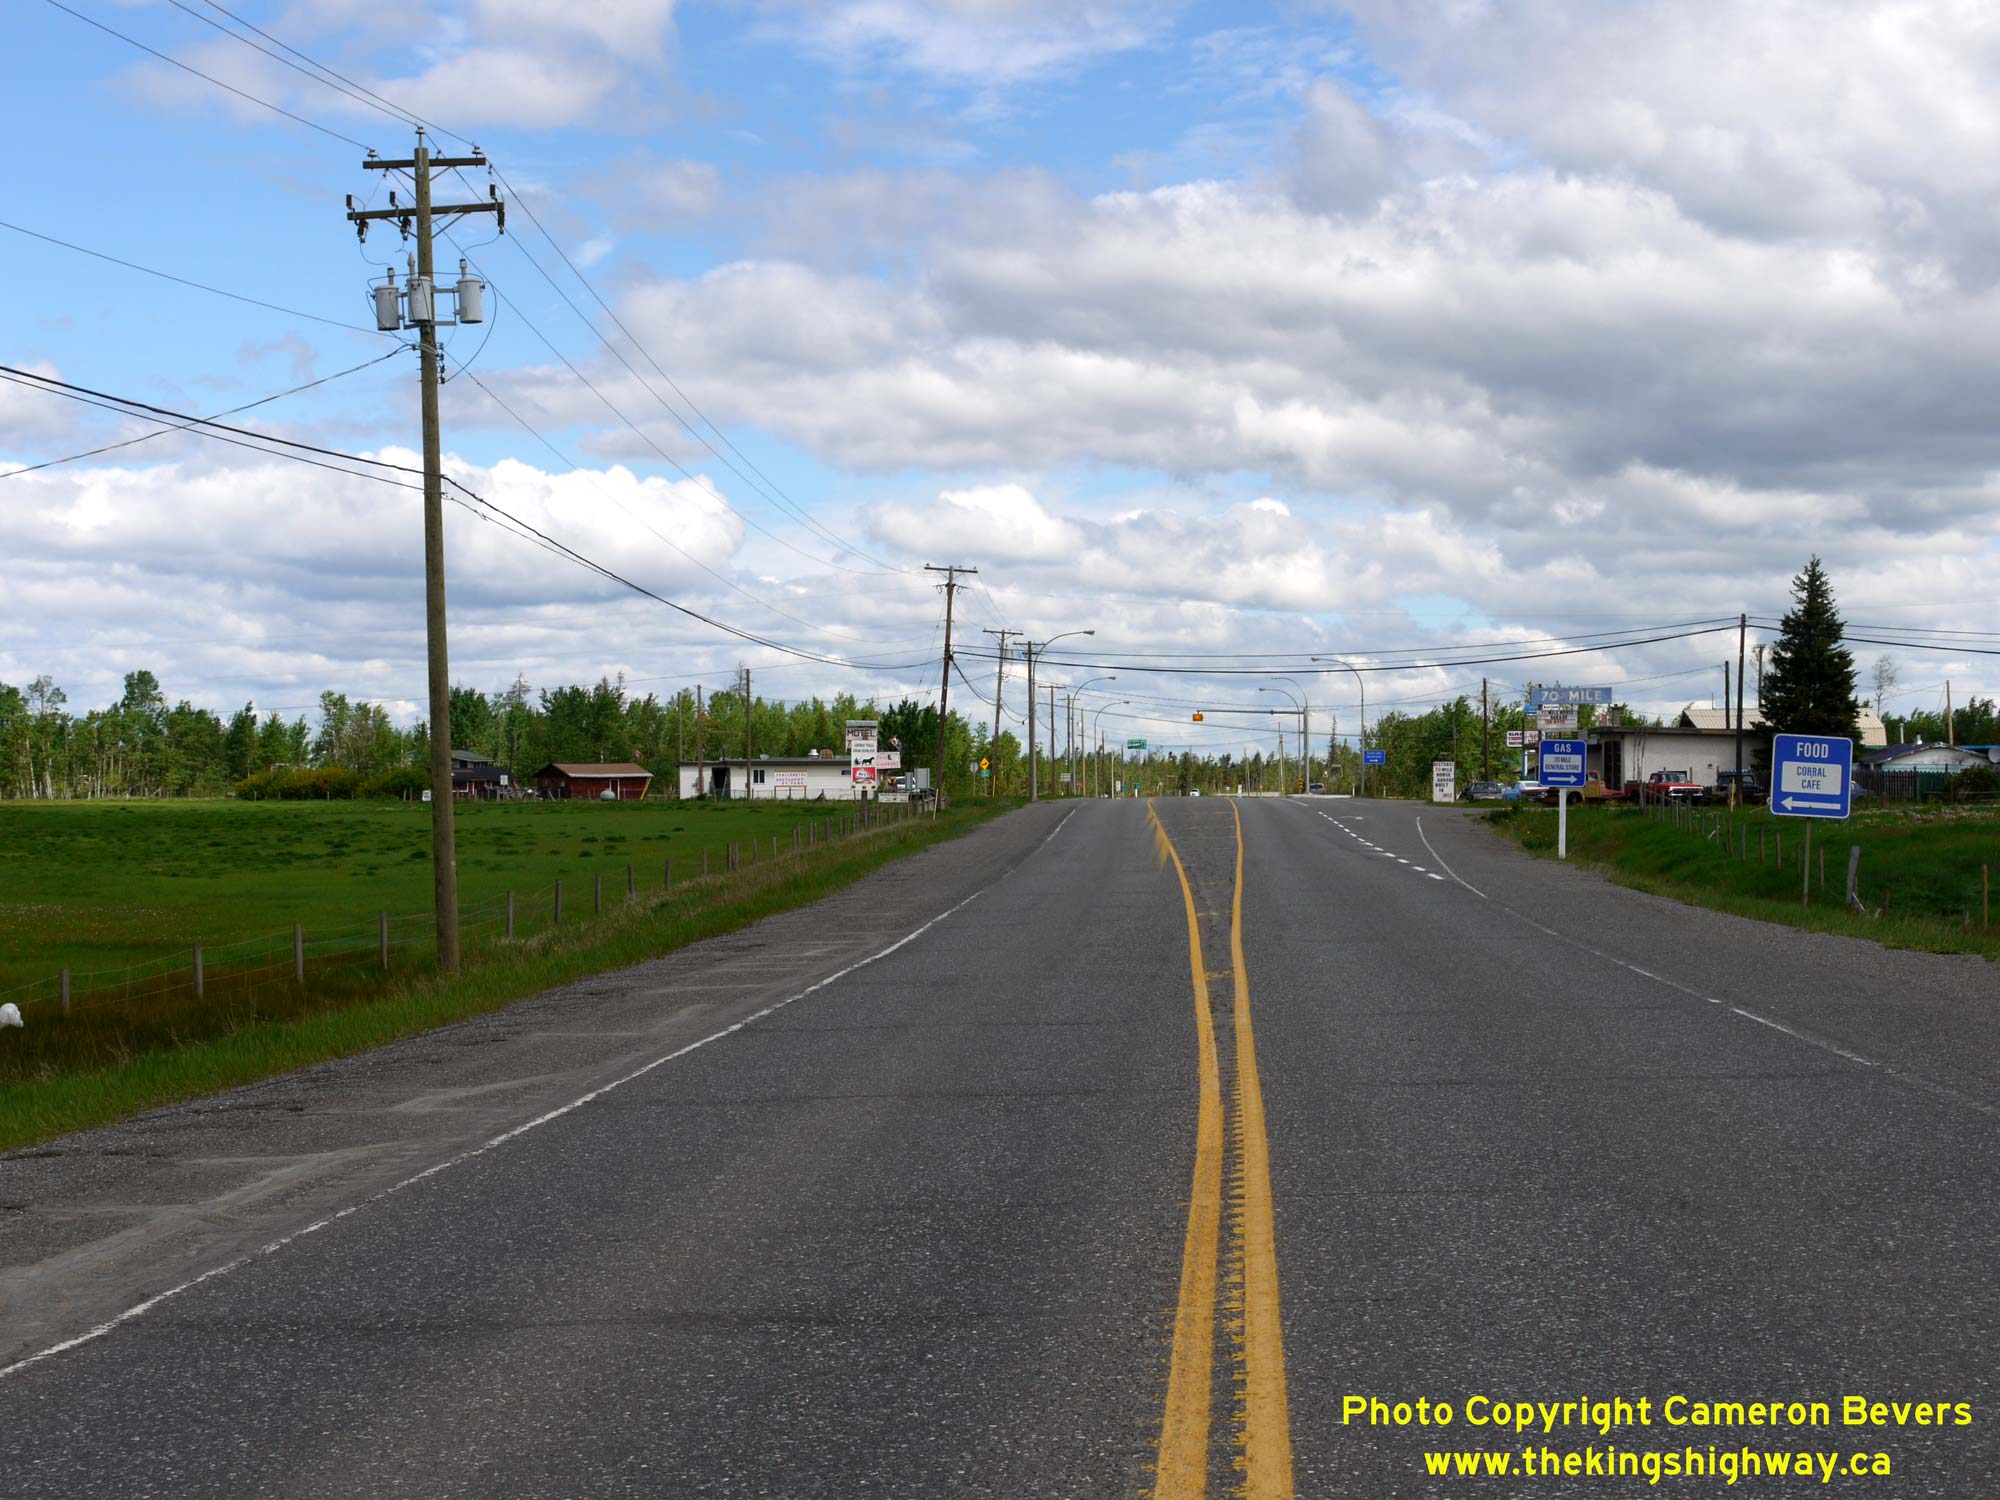
Left - Distance guide sign on southbound Hwy 97 at 70 Mile House. See an
Enlarged Photo Here. (Photograph taken on June 4, 2015 - © Cameron Bevers) Right - Facing north along Hwy 97 at 70 Mile House. Many communities along Hwy 97 are named based on their historical mileage on the gold rush trail of the 1850s. See an Enlarged Photo Here. (Photograph taken on June 4, 2015 - © Cameron Bevers) 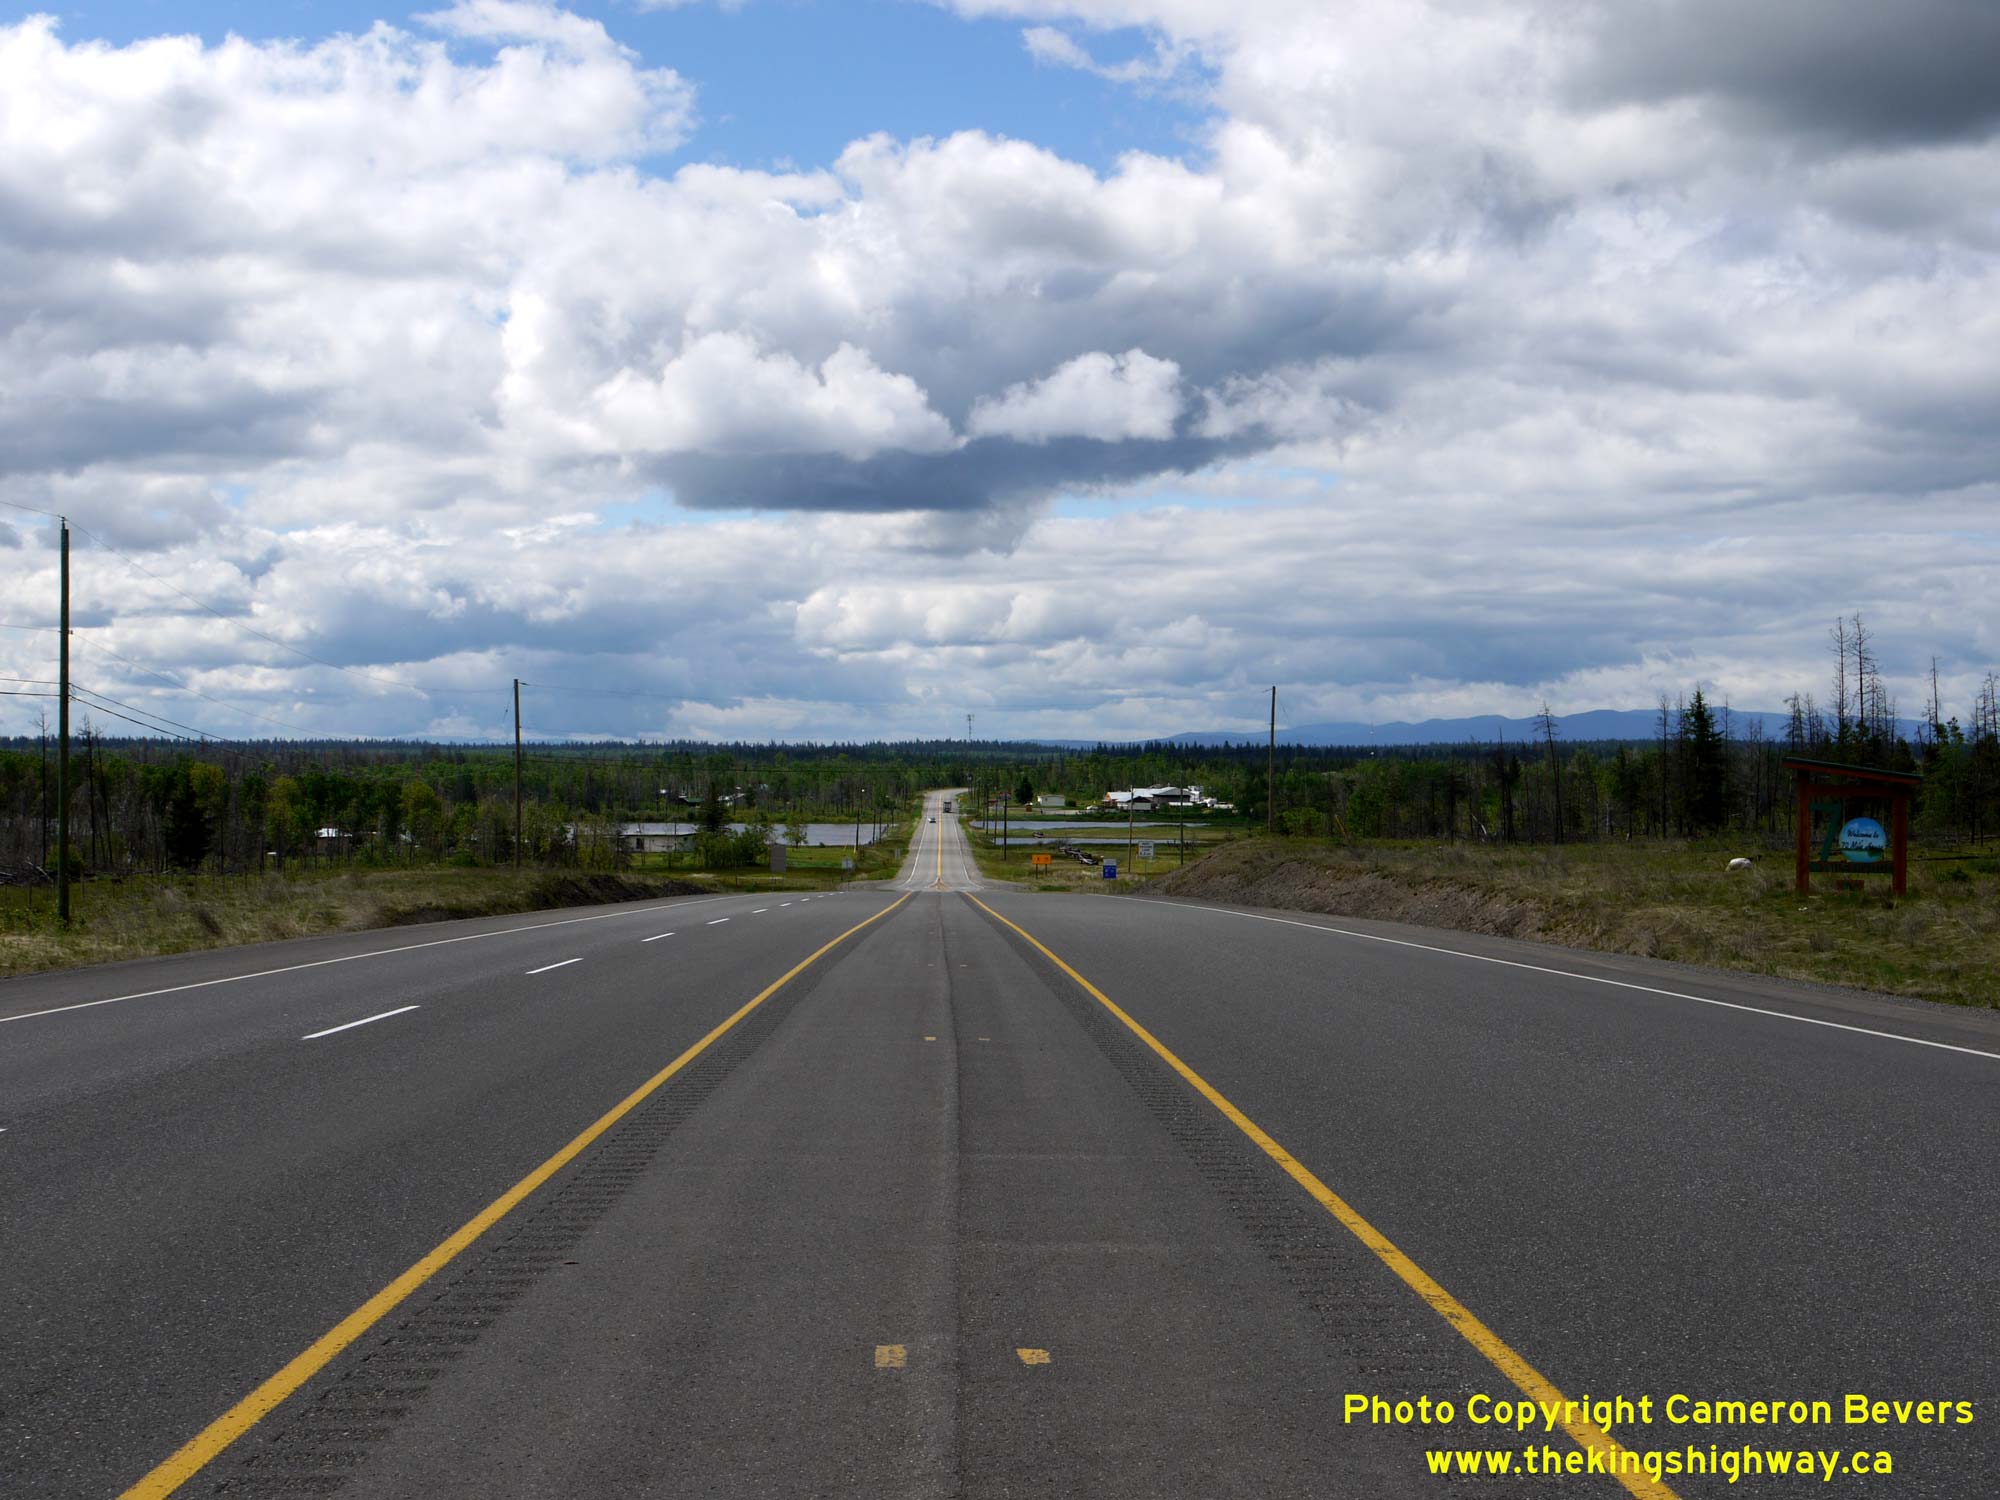
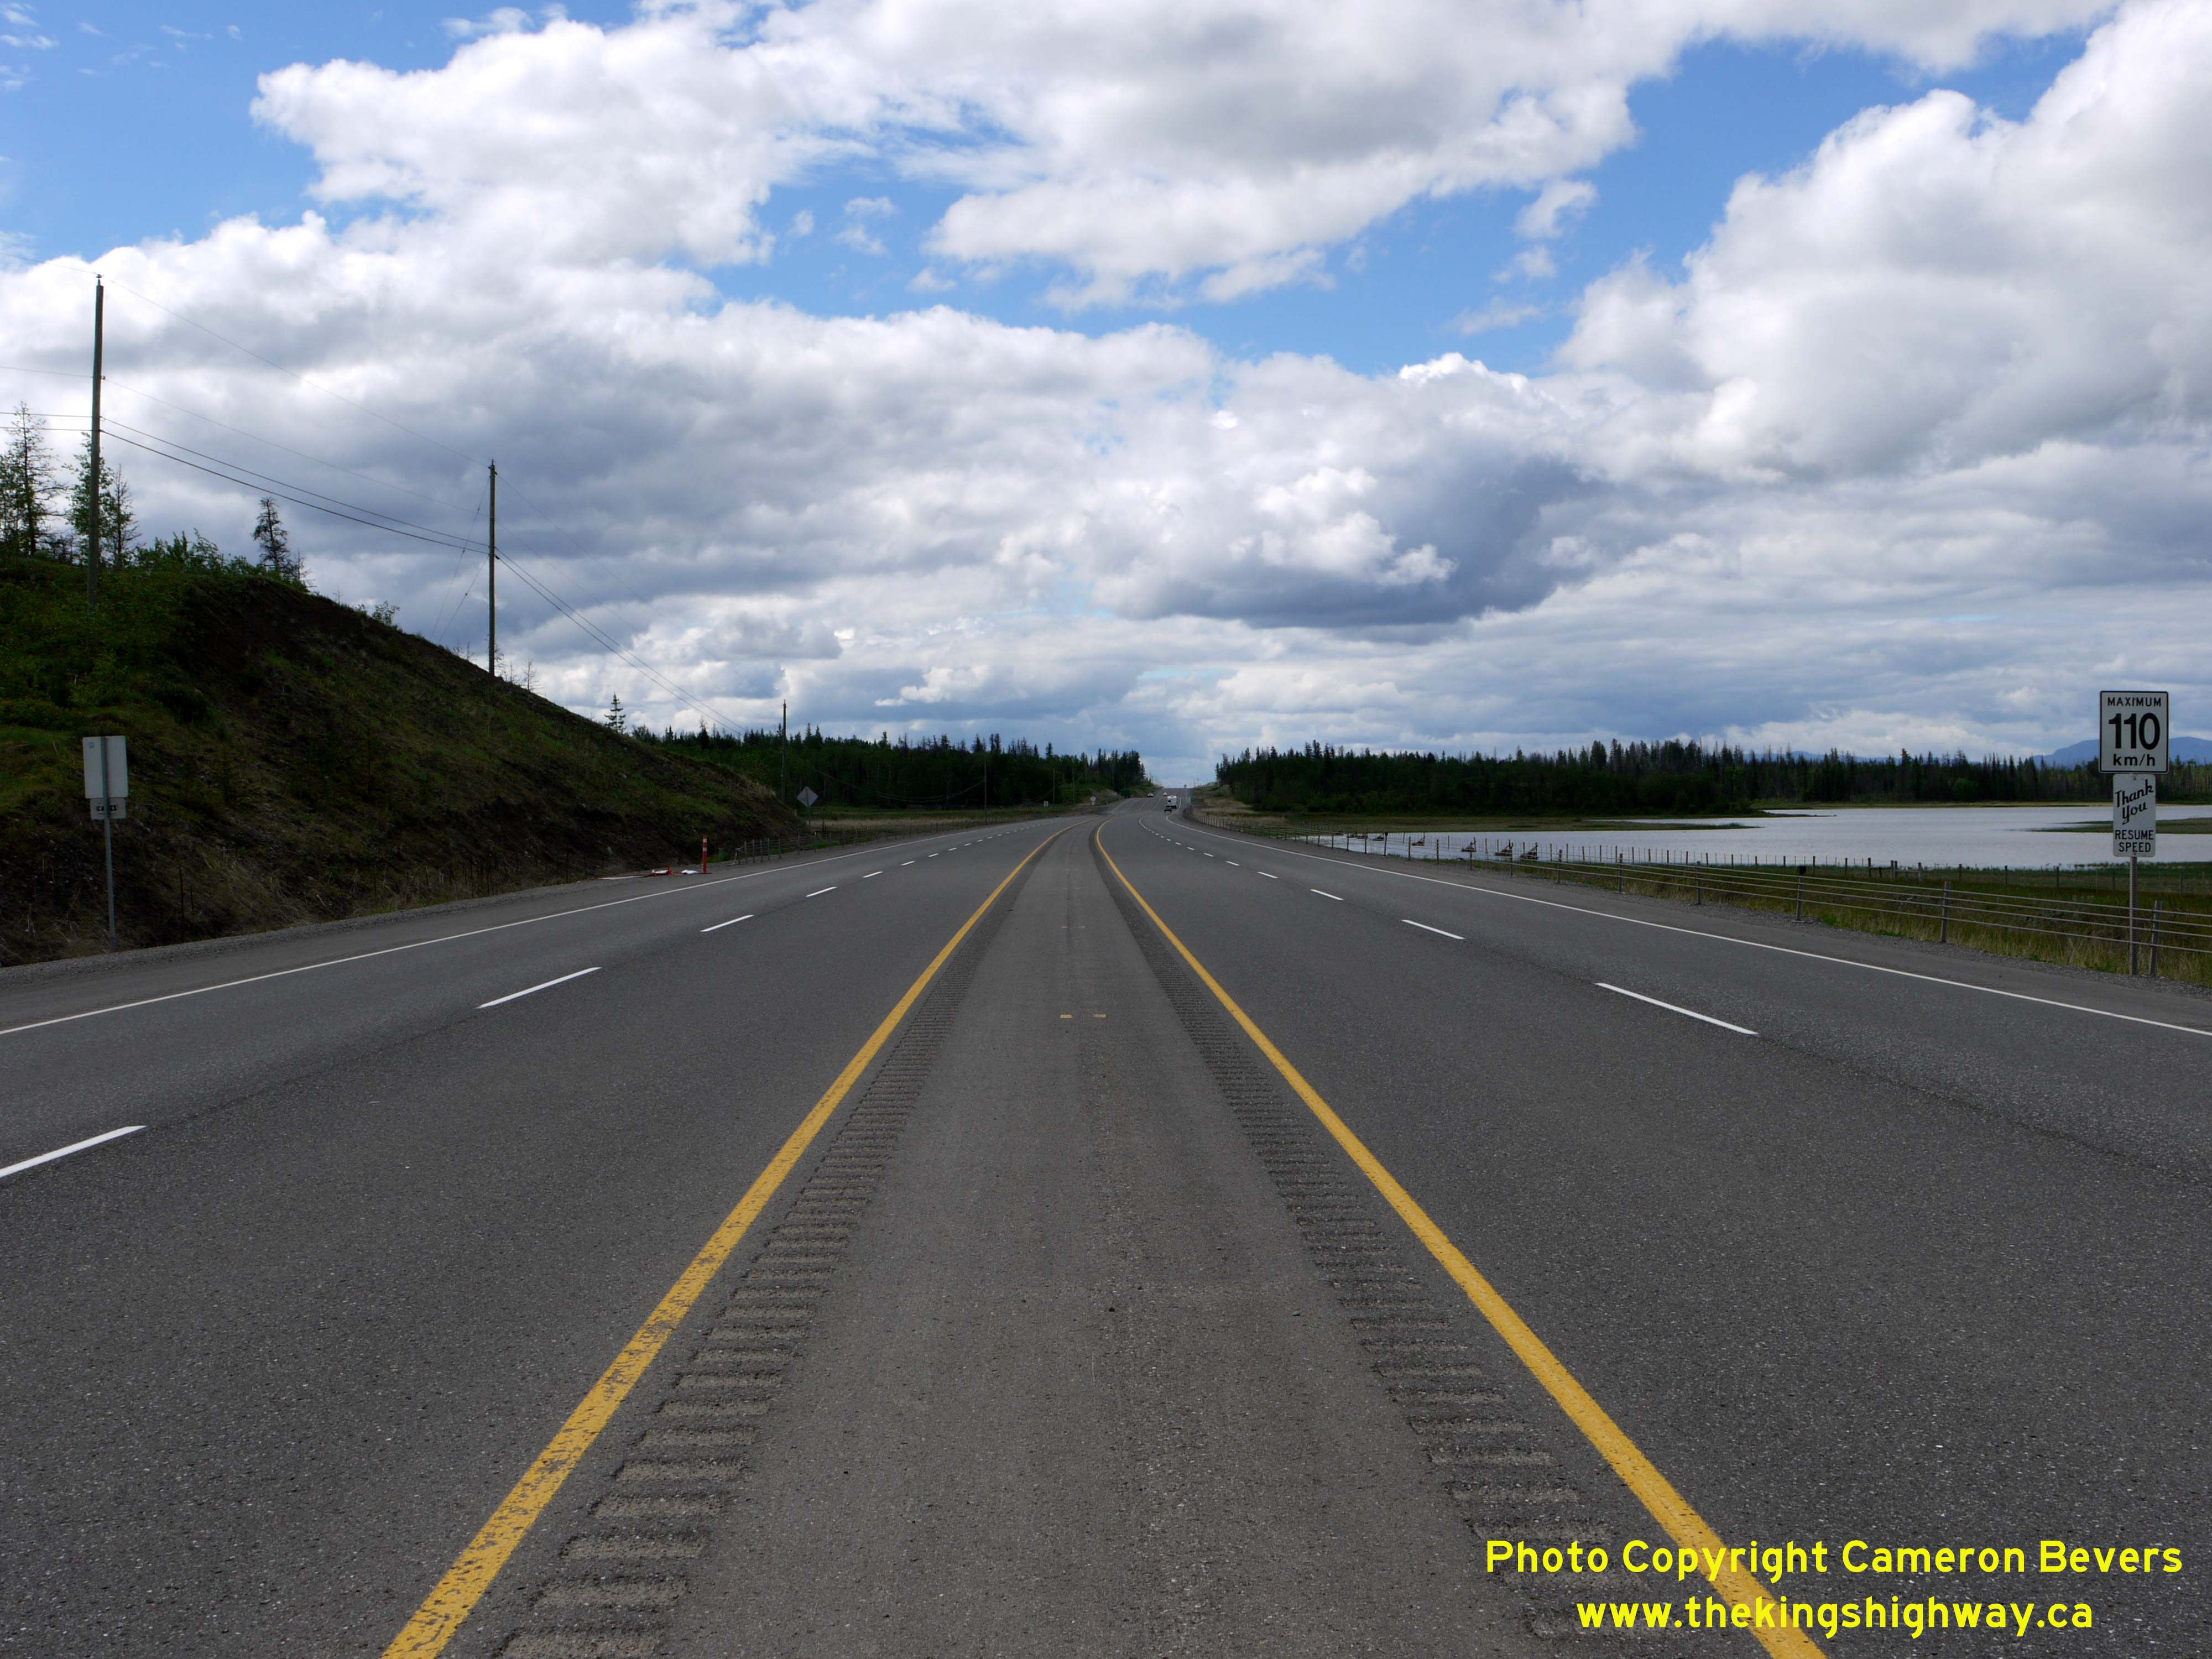
Left - Approaching 70 Mile House on Hwy 97, facing south. See an
Enlarged Photo Here. (Photograph taken on June 4, 2015 - © Cameron Bevers) Right - View of Hwy 97 at Loch Lomond, facing south towards 70 Mile House. Many sections of Hwy 97 have a 110 km/h (approximately 70 mph) posted speed limit. British Columbia is home to Canada's highest posted speed limits, with some freeways in the province having posted speeds of 120 km/h (75 mph). See an Enlarged Photo Here. (Photograph taken on June 4, 2015 - © Cameron Bevers) 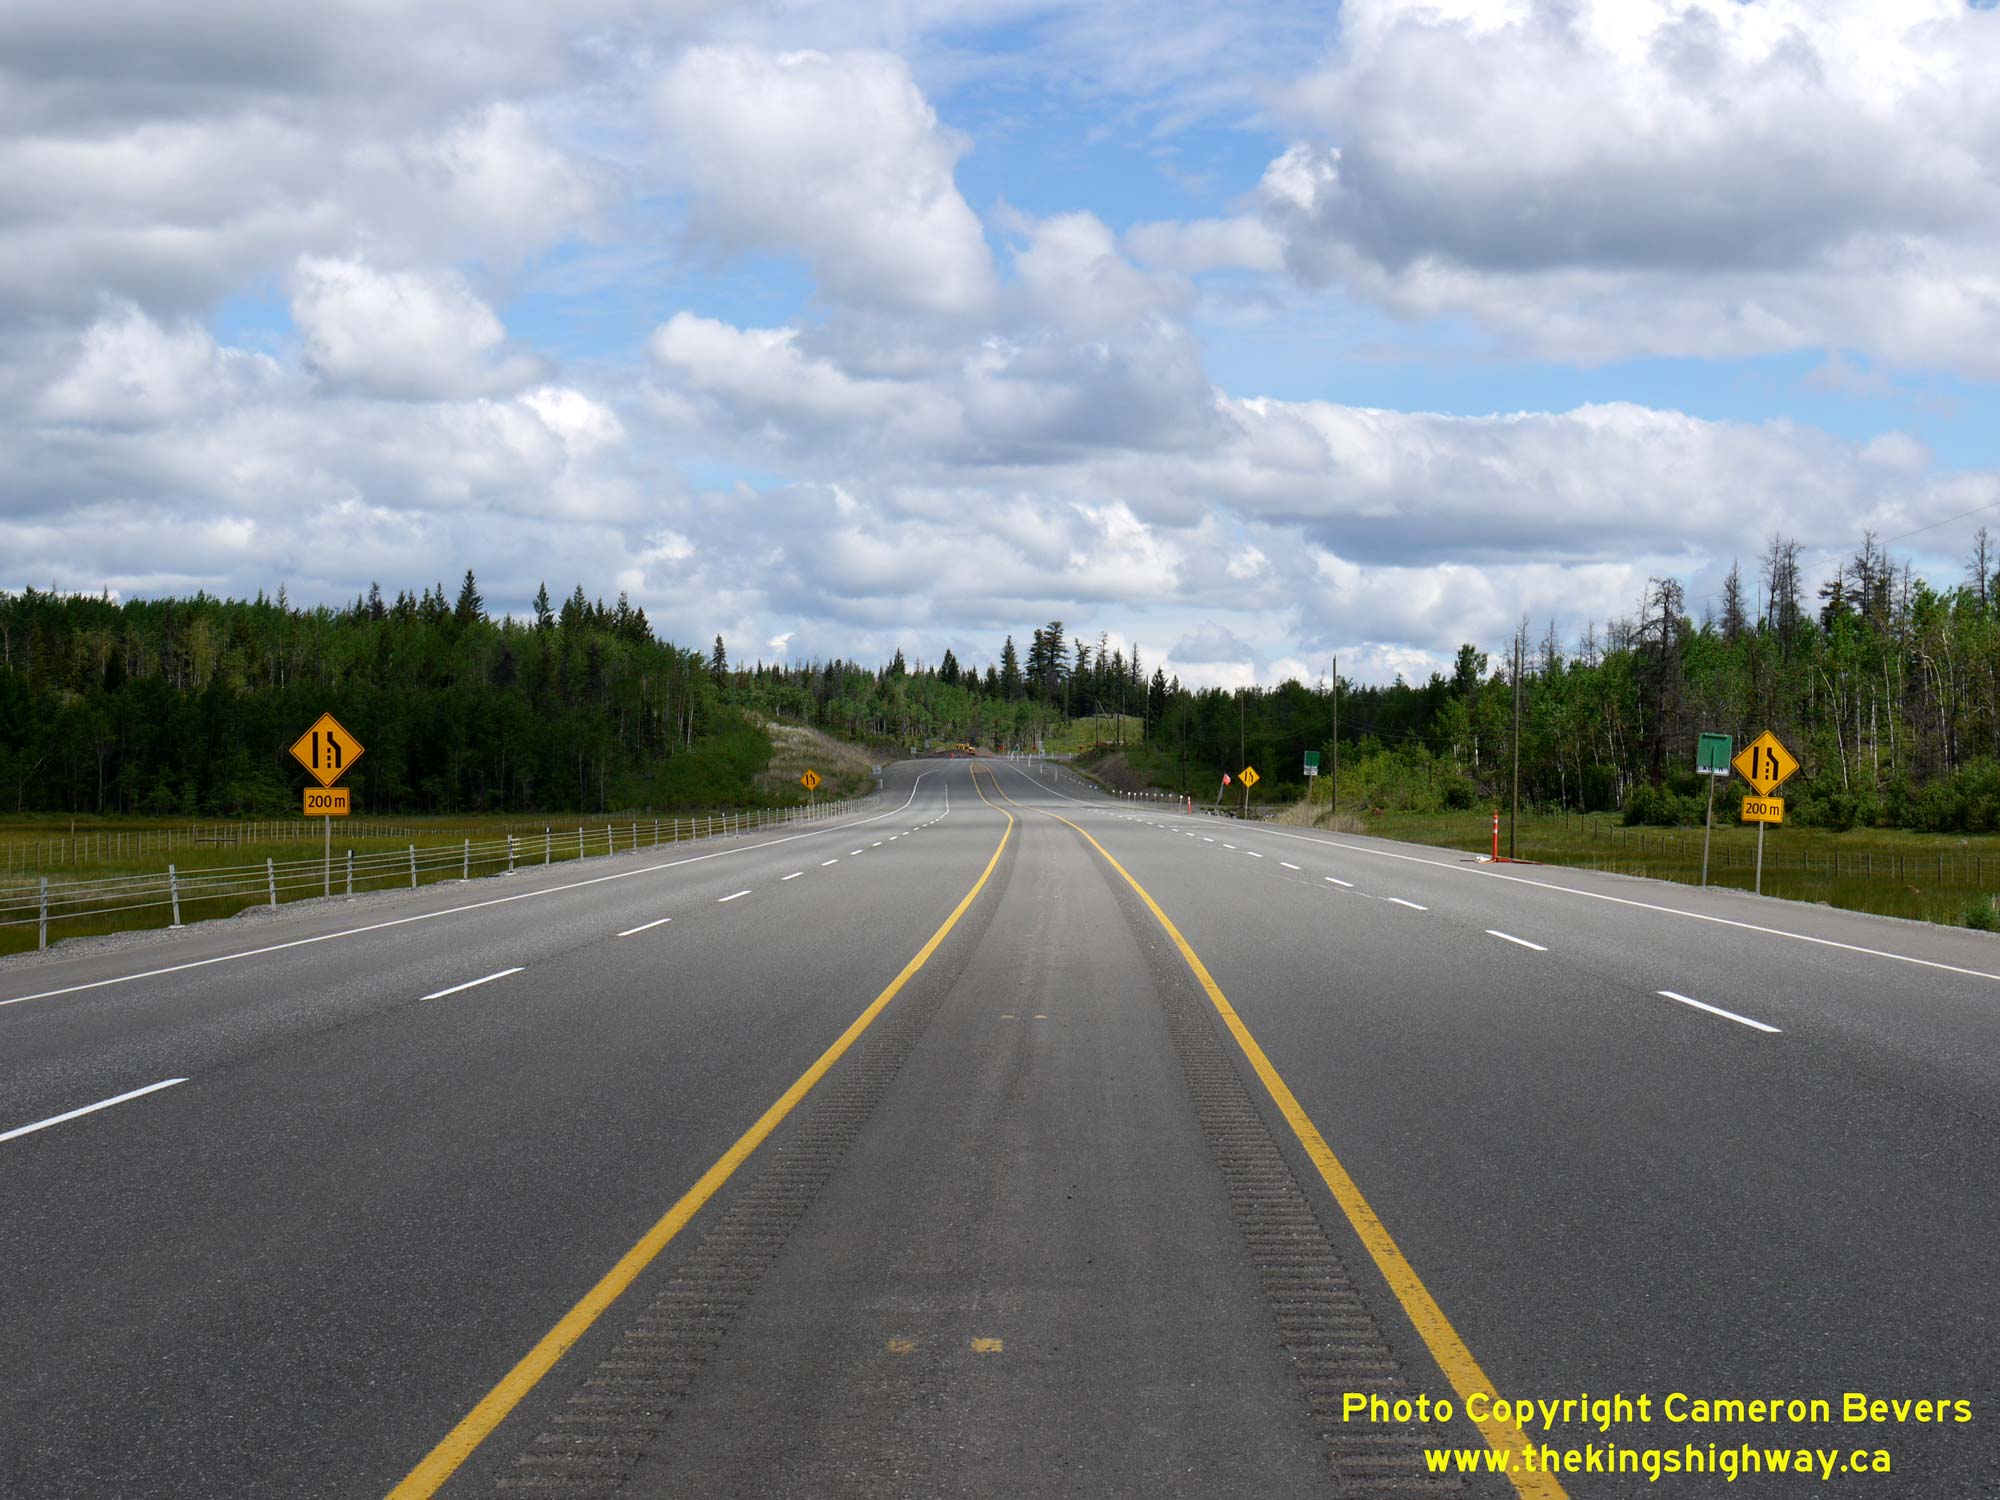
Left - Approaching the end of the four-lane section of Hwy 97 north of 70 Mile House. Due to recent upgrades to Hwy 97, the highway is now a continuous
four-lane route from 70 Mile House to the Hwy 24 Junction, a distance of more than 30 km. See an
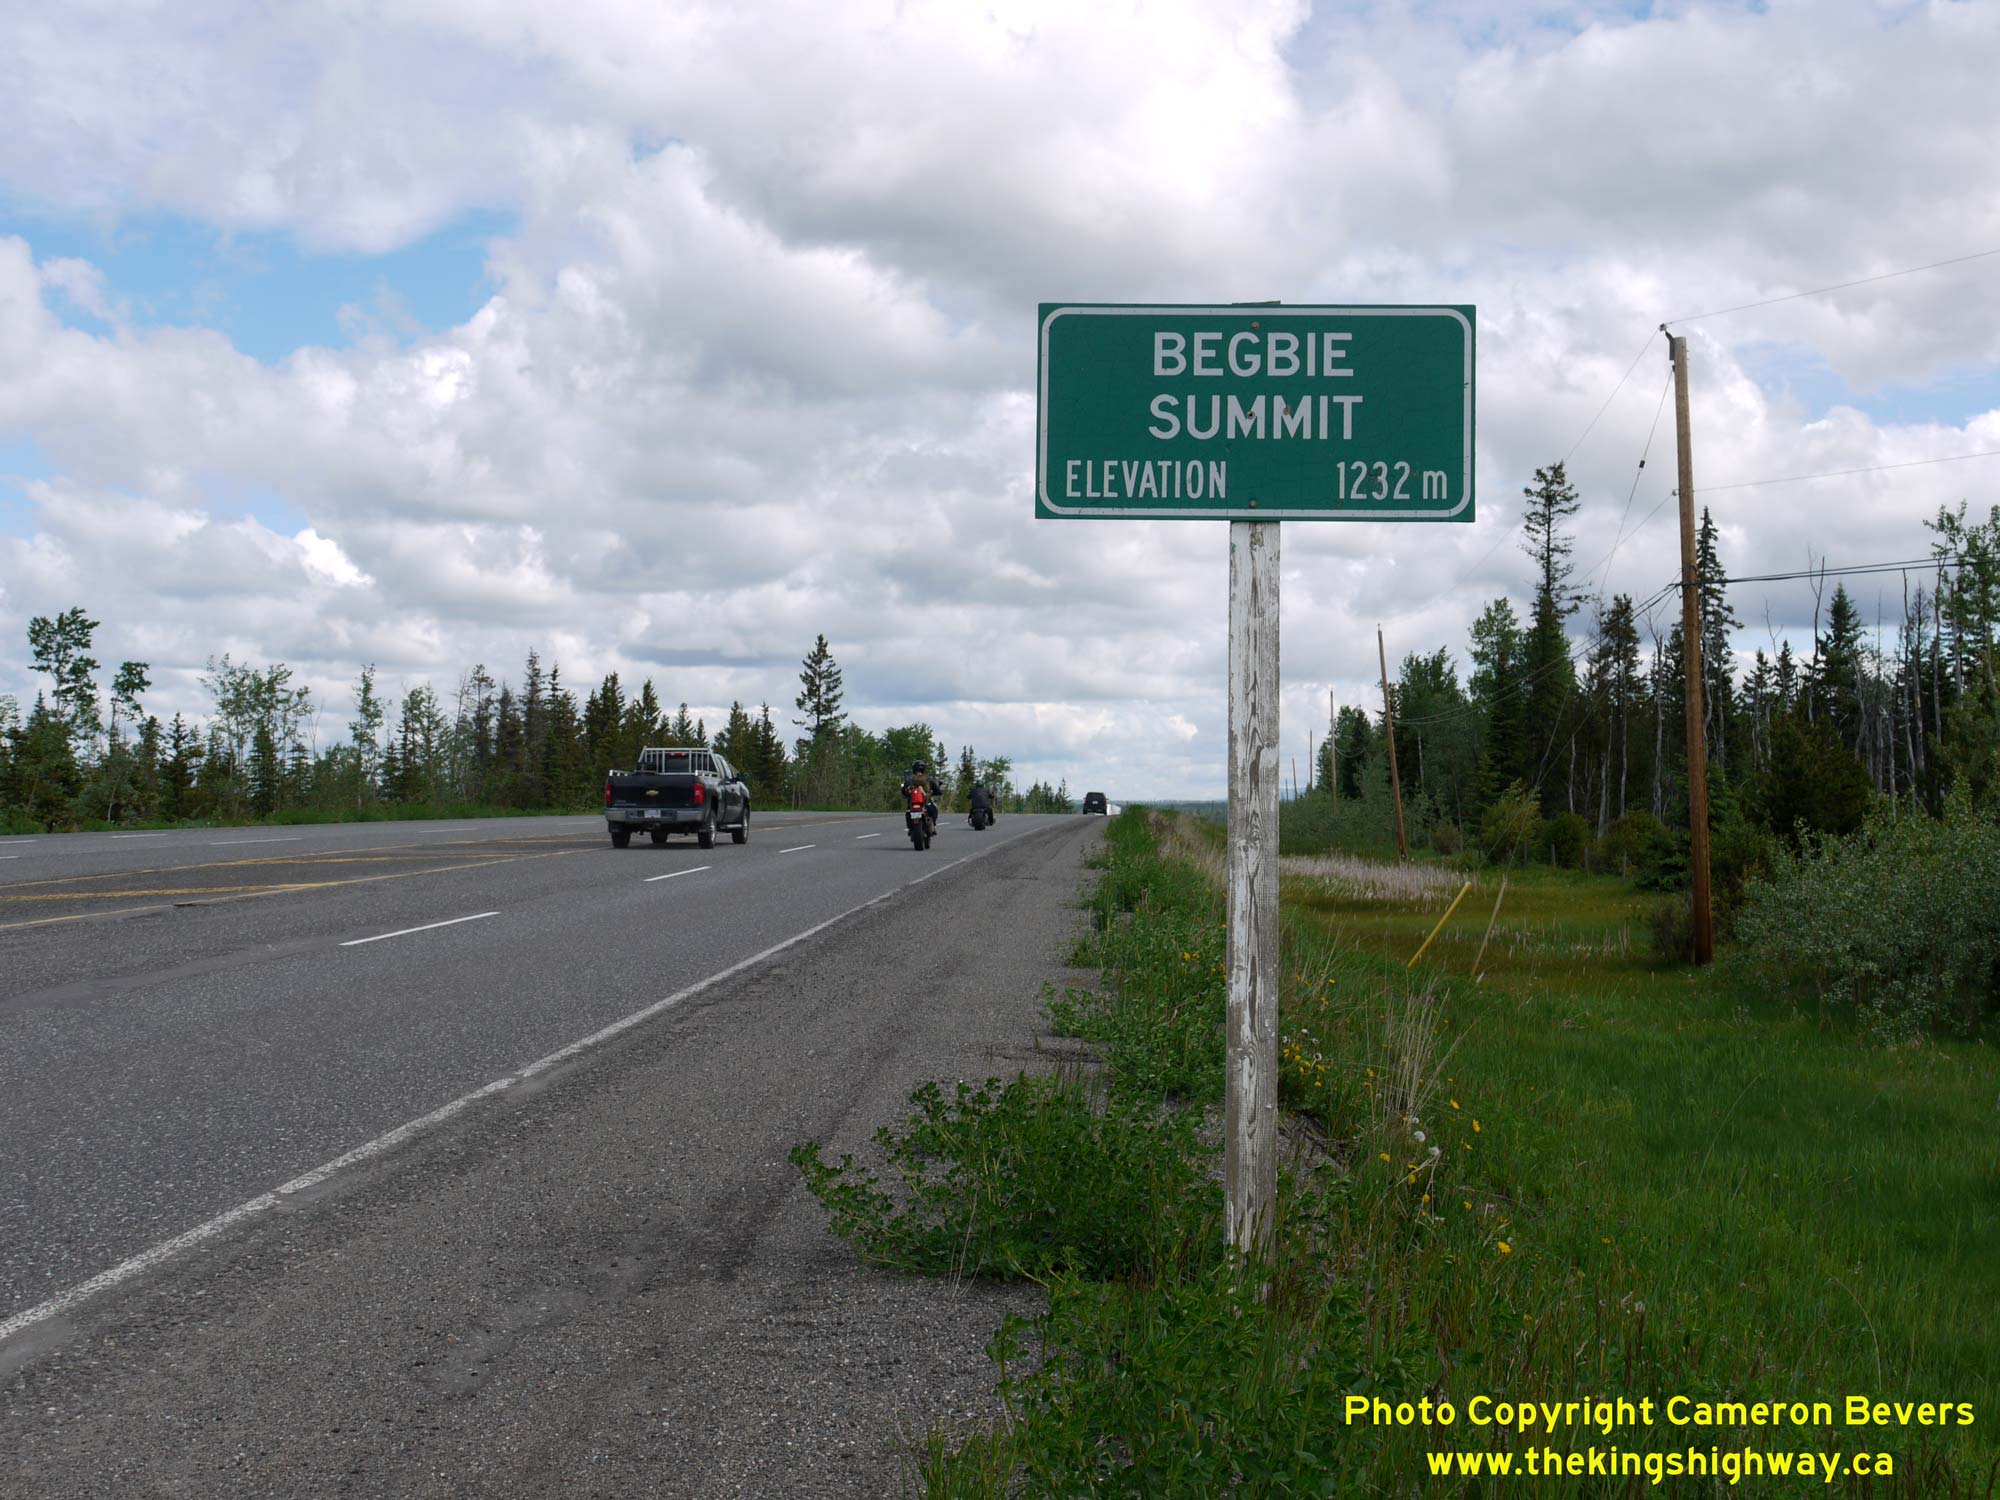
Enlarged Photo Here. (Photograph taken on June 4, 2015 - © Cameron Bevers) Right - Sign on northbound Hwy 97 denoting Begbie Summit, with an elevation of 1,232 metres (4,042 feet) above Sea Level. Although the summit itself along Hwy 97 isn't particularly dramatic, the views from the nearby fire tower are excellent, with sweeping panoramic views of the surrounding region. It is well worth the stop! See an Enlarged Photo Here. (Photograph taken on June 4, 2015 - © Cameron Bevers) 

Left - Southern approach of Hwy 97 at Begbie Summit, facing south towards Cache Creek. See an
Enlarged Photo Here. (Photograph taken on June 4, 2015 - © Cameron Bevers) Right - View of Hwy 97 facing south towards Cache Creek from the Begbie Summit Fire Tower. See an Enlarged Photo Here. (Photograph taken on June 4, 2015 - © Cameron Bevers) 

Left - View of Hwy 97 at Begbie Summit, as seen from the old fire tower. See an
Enlarged Photo Here. (Photograph taken on June 4, 2015 - © Cameron Bevers) Right - British Columbia makes use of these green and white flowerpot shared signs to mark roadside parks and points of interest along the highway network. Begbie Summit was named after Judge Begbie, a 19th Century magistrate who was said to have a propensity to hand down death sentences to criminals caught in the wild frontier towns of the Cariboo Gold Rush. The justice was appropriately nicknamed "The Hanging Judge". Although capital punishment for egregious crimes was permissible up until the 1970s, Canada's last execution actually took place in 1962. See an Enlarged Photo Here. (Photograph taken on June 4, 2015 - © Cameron Bevers) 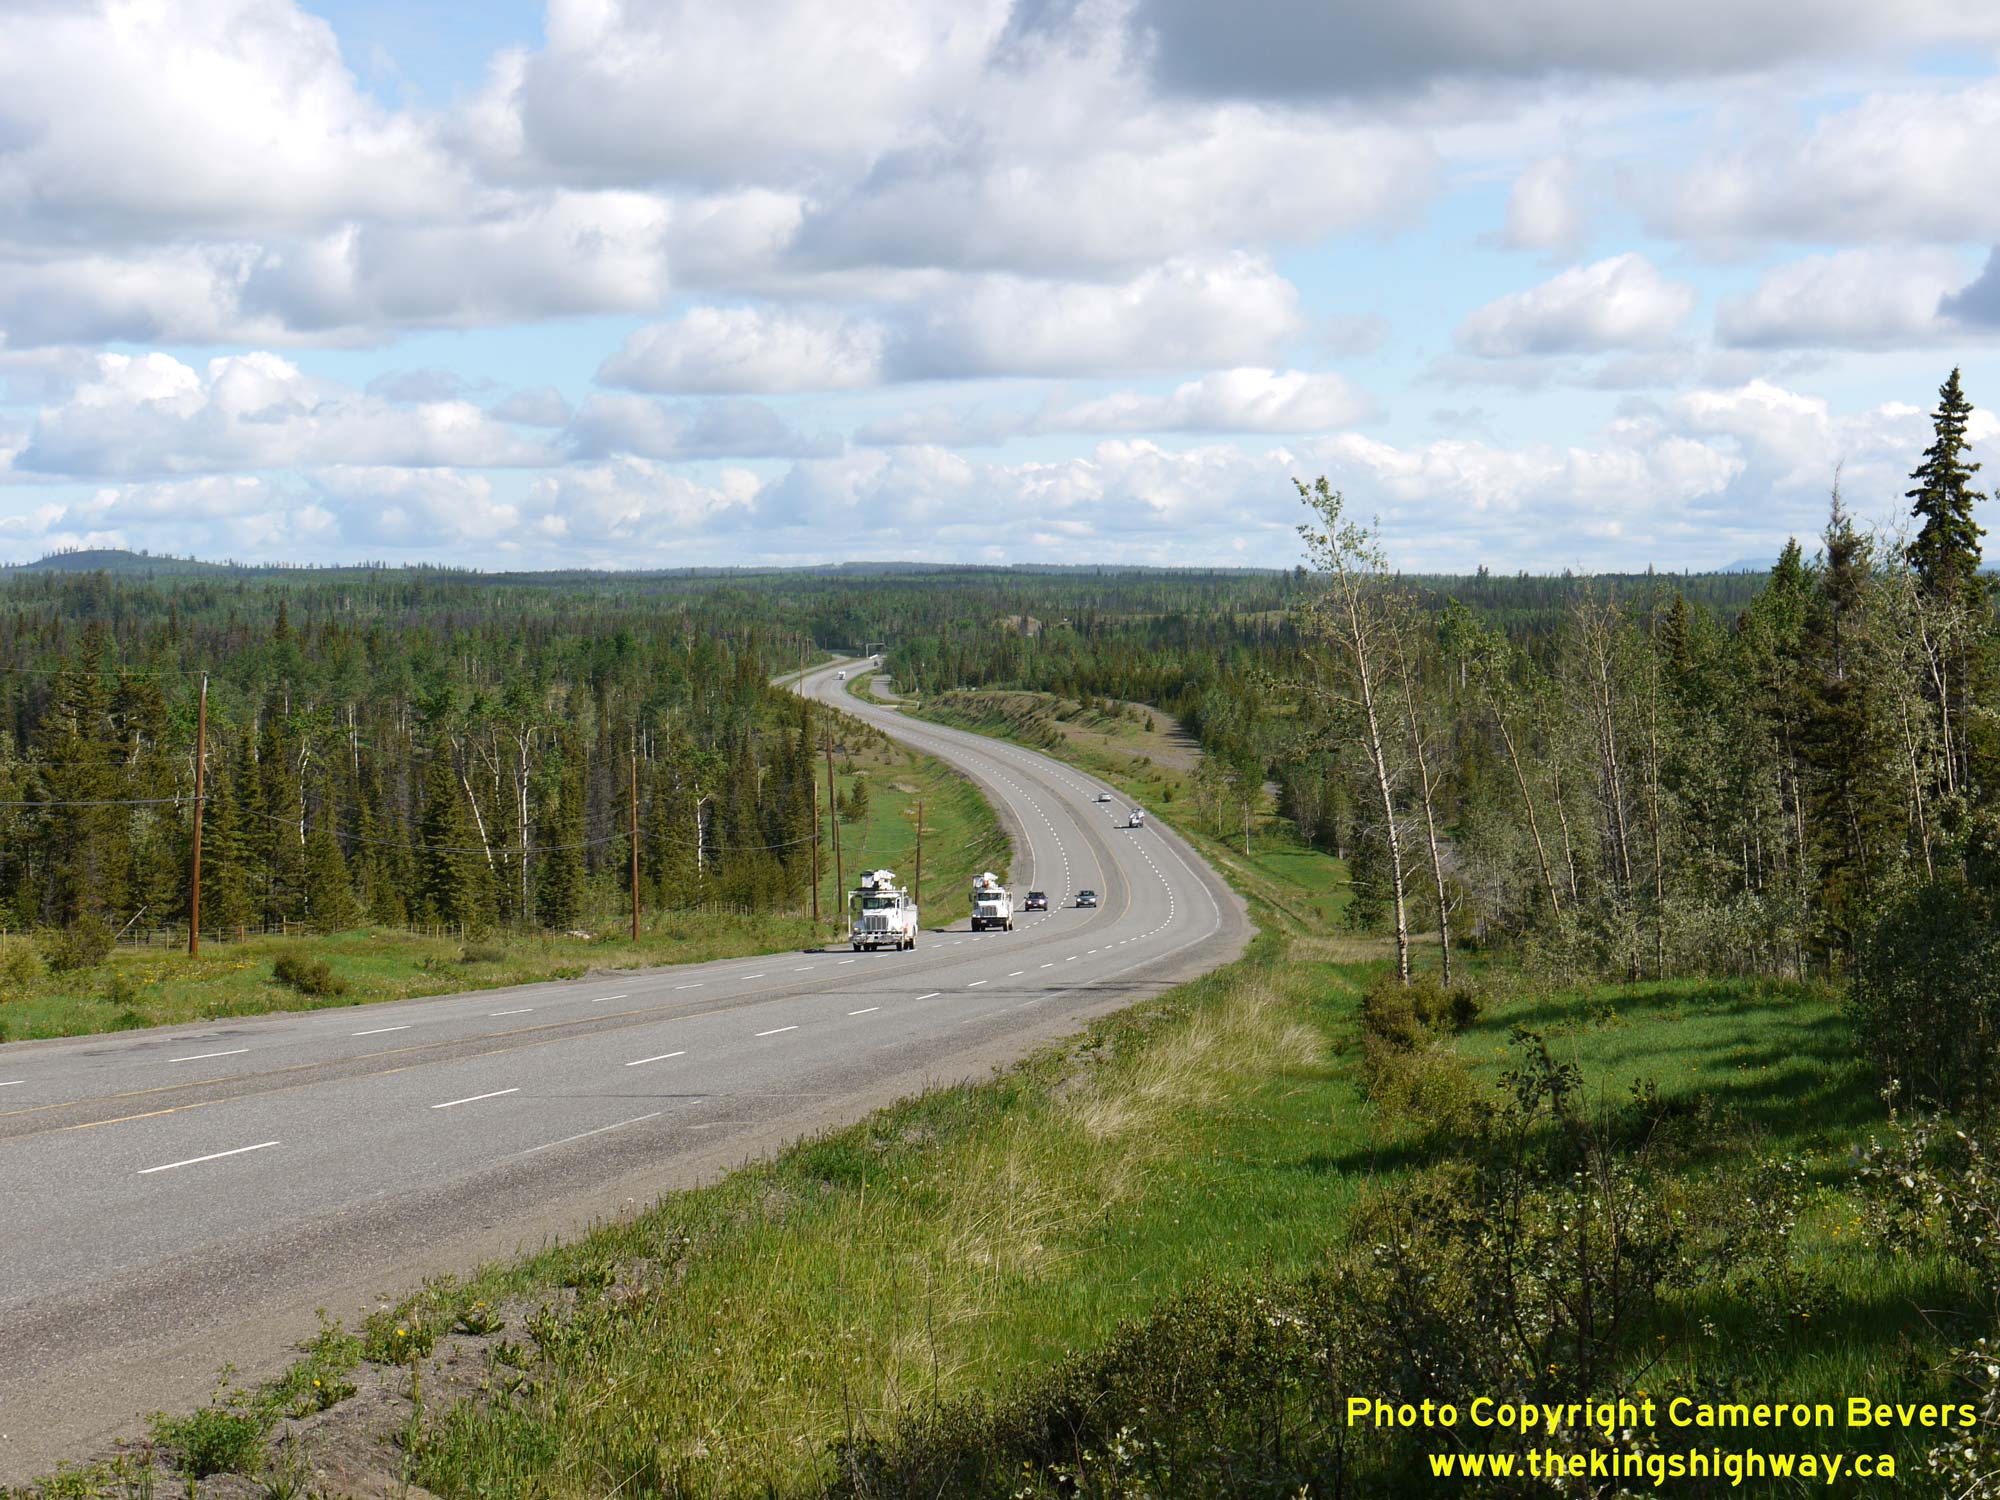
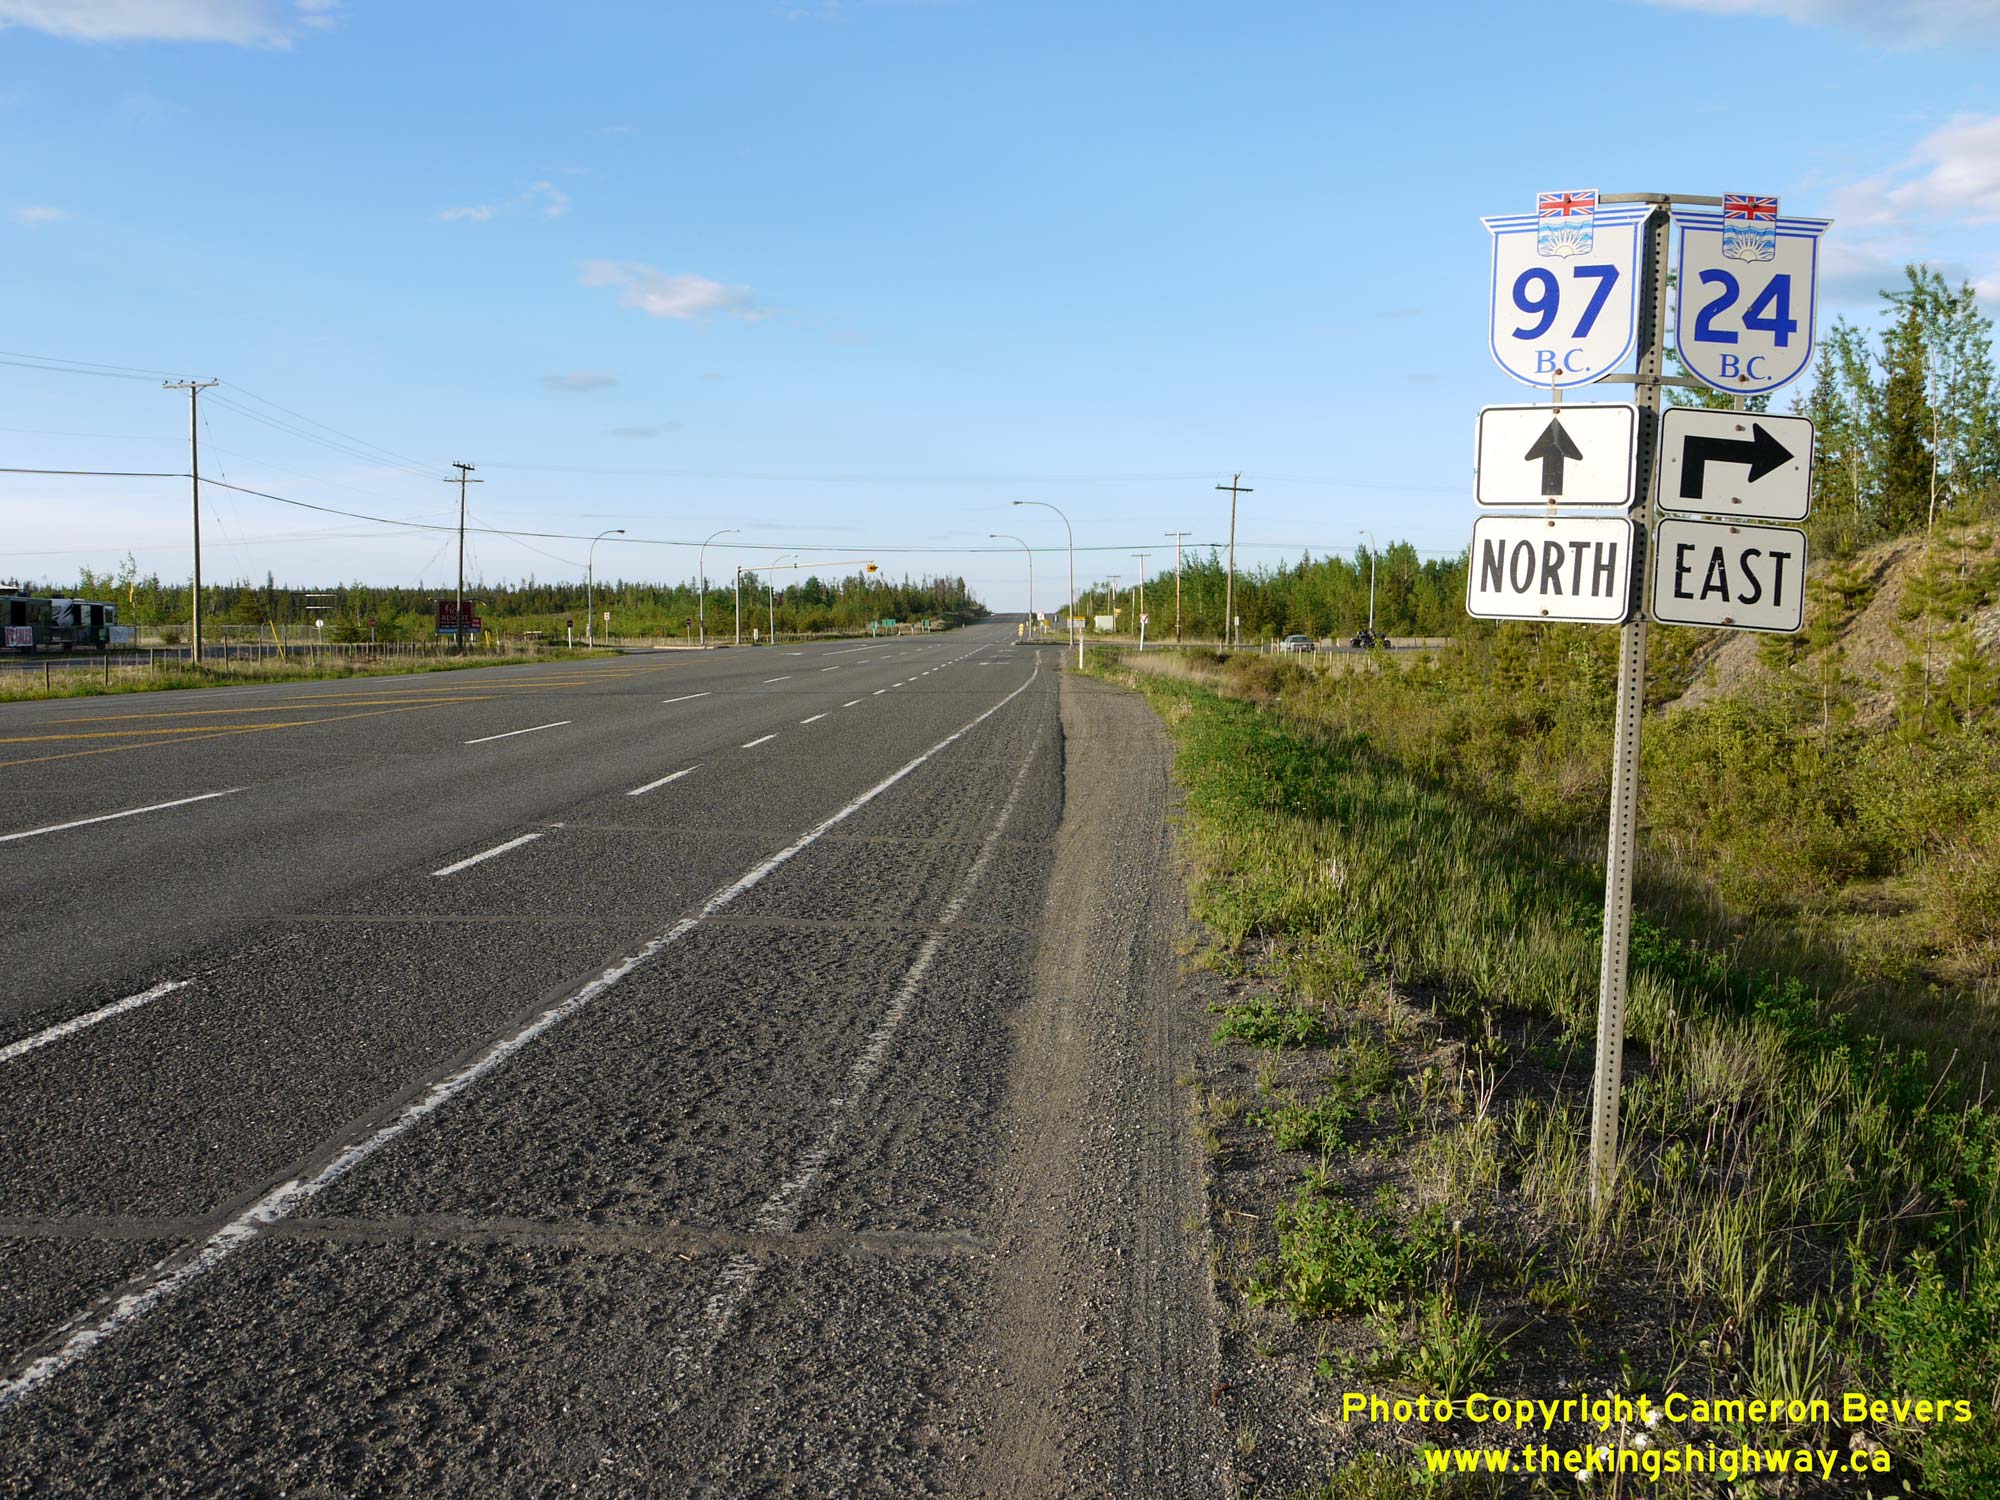
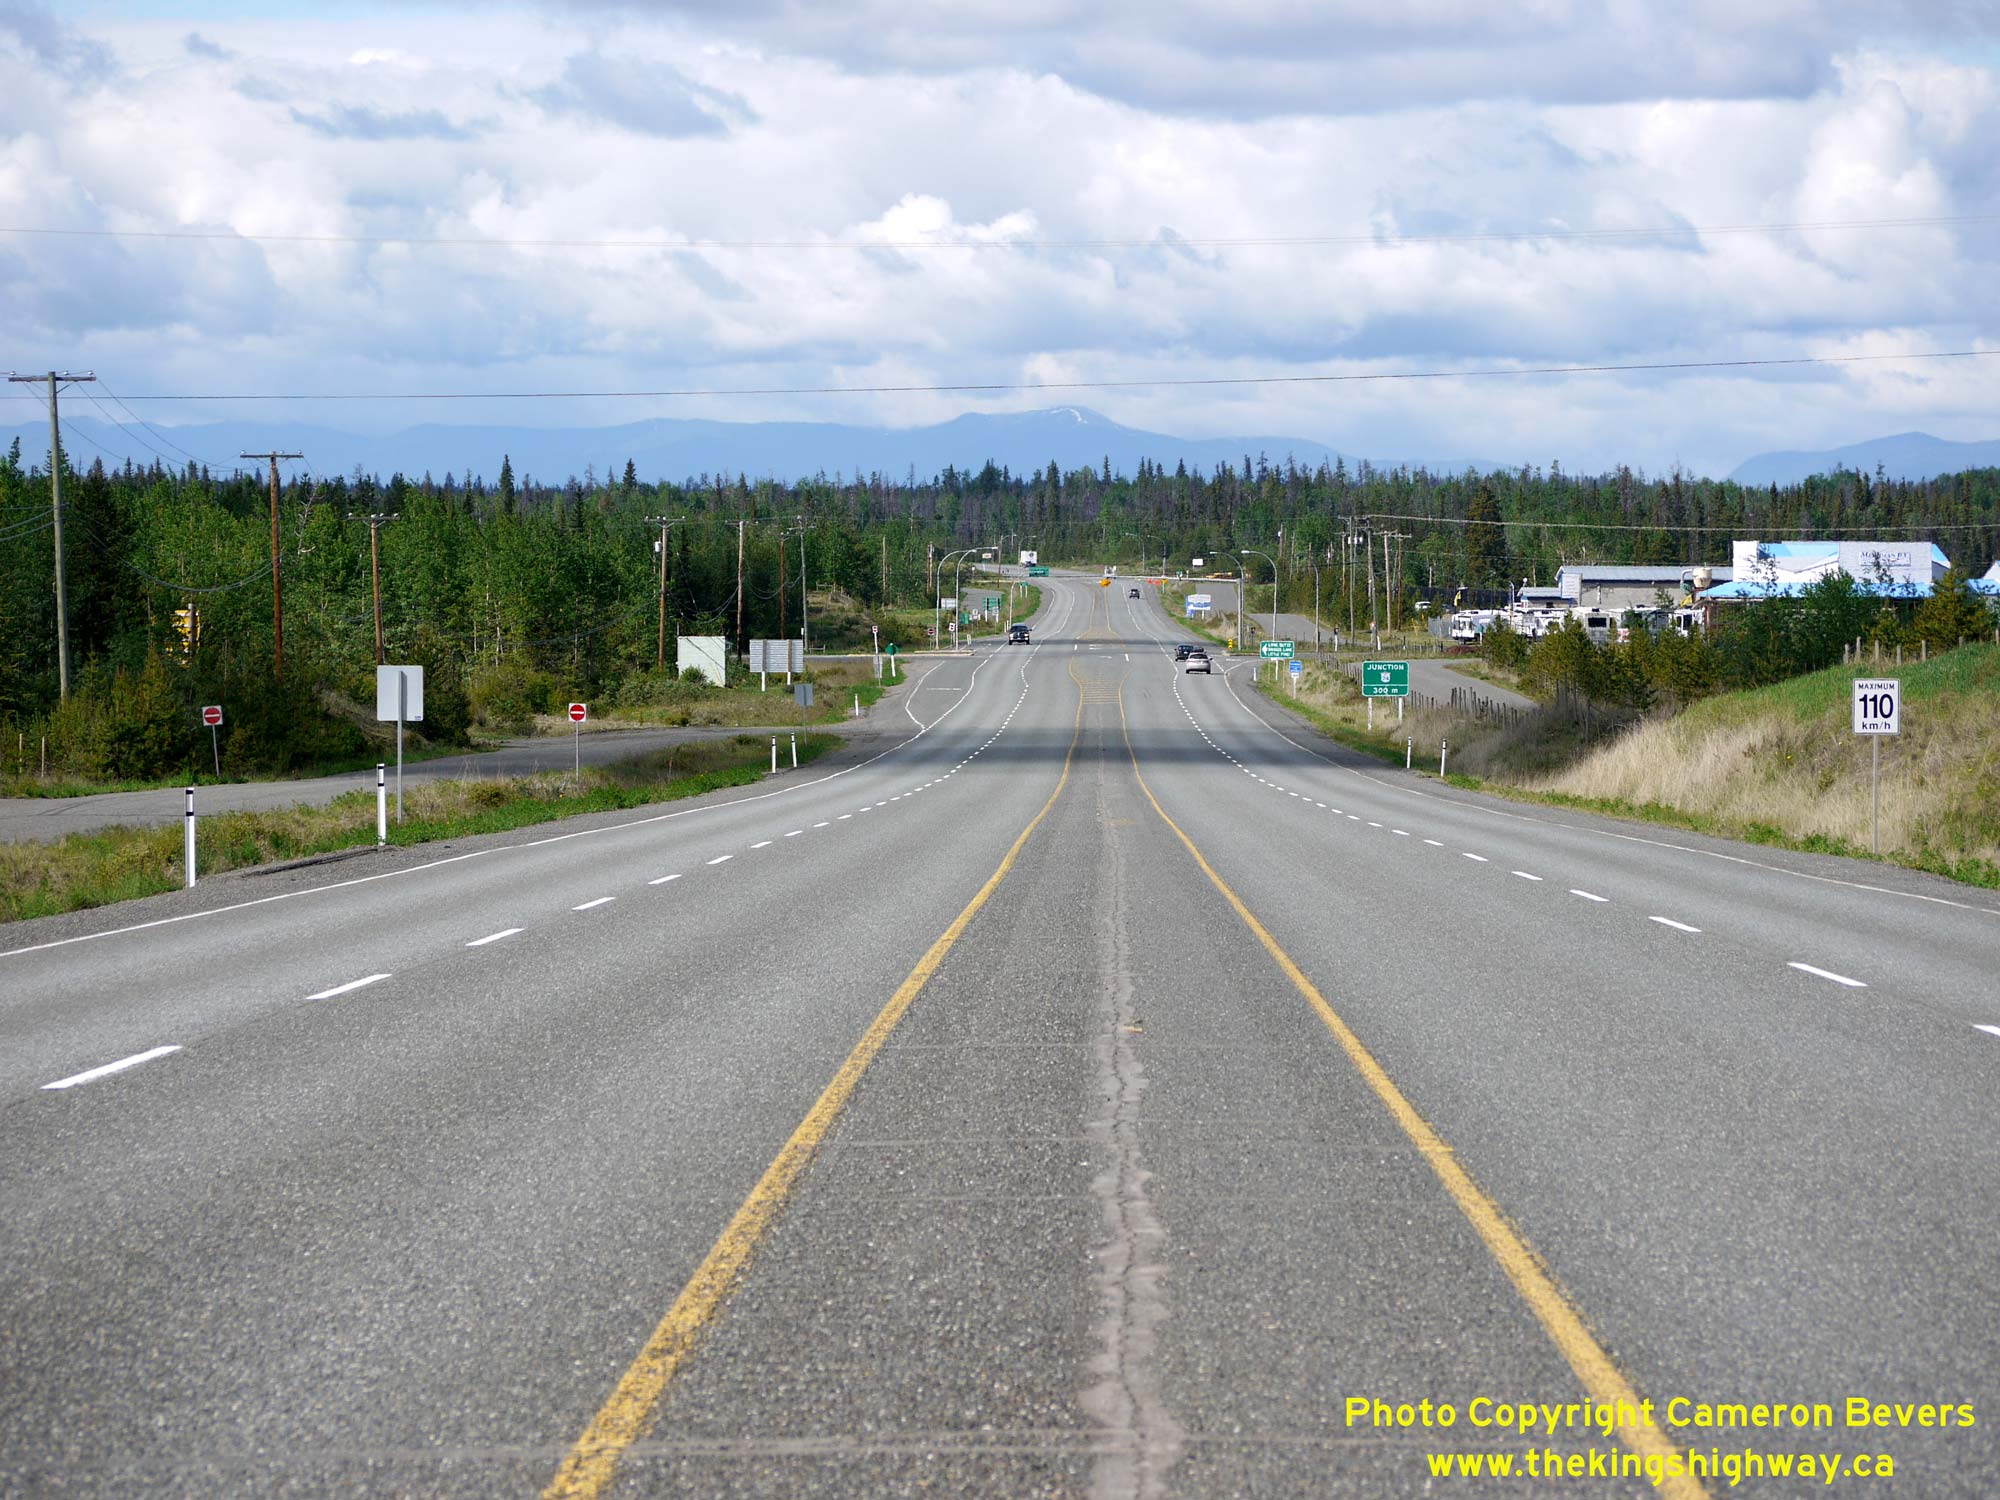
Left - This great view of the northern approach of Hwy 97 to Begbie Summit can be seen from the lookout entrance. See an
Enlarged Photo Here. (Photograph taken on June 4, 2015 - © Cameron Bevers) Right - Junction sign assembly on northbound Hwy 97 approaching the Hwy 24 Junction. These two highways intersect at 93 Mile, located about 10 km south of 100 Mile House. The route of Hwy 24 extends easterly from Hwy 97 for nearly 100 km to Little Fort, where it ends at the Southern Yellowhead Highway (Hwy 5) north of Kamloops. See an Enlarged Photo Here. (Photograph taken on June 1, 2015 - © Cameron Bevers) 
Left - Facing north along Hwy 97 towards 100 Mile House approaching the Hwy 24 Junction. See an
Enlarged Photo Here. (Photograph taken on June 1, 2015 - © Cameron Bevers) Right - Approaching the western terminus of Hwy 24 at the Hwy 97 Junction. See an Enlarged Photo Here. (Photograph taken on June 4, 2015 - © Cameron Bevers) 
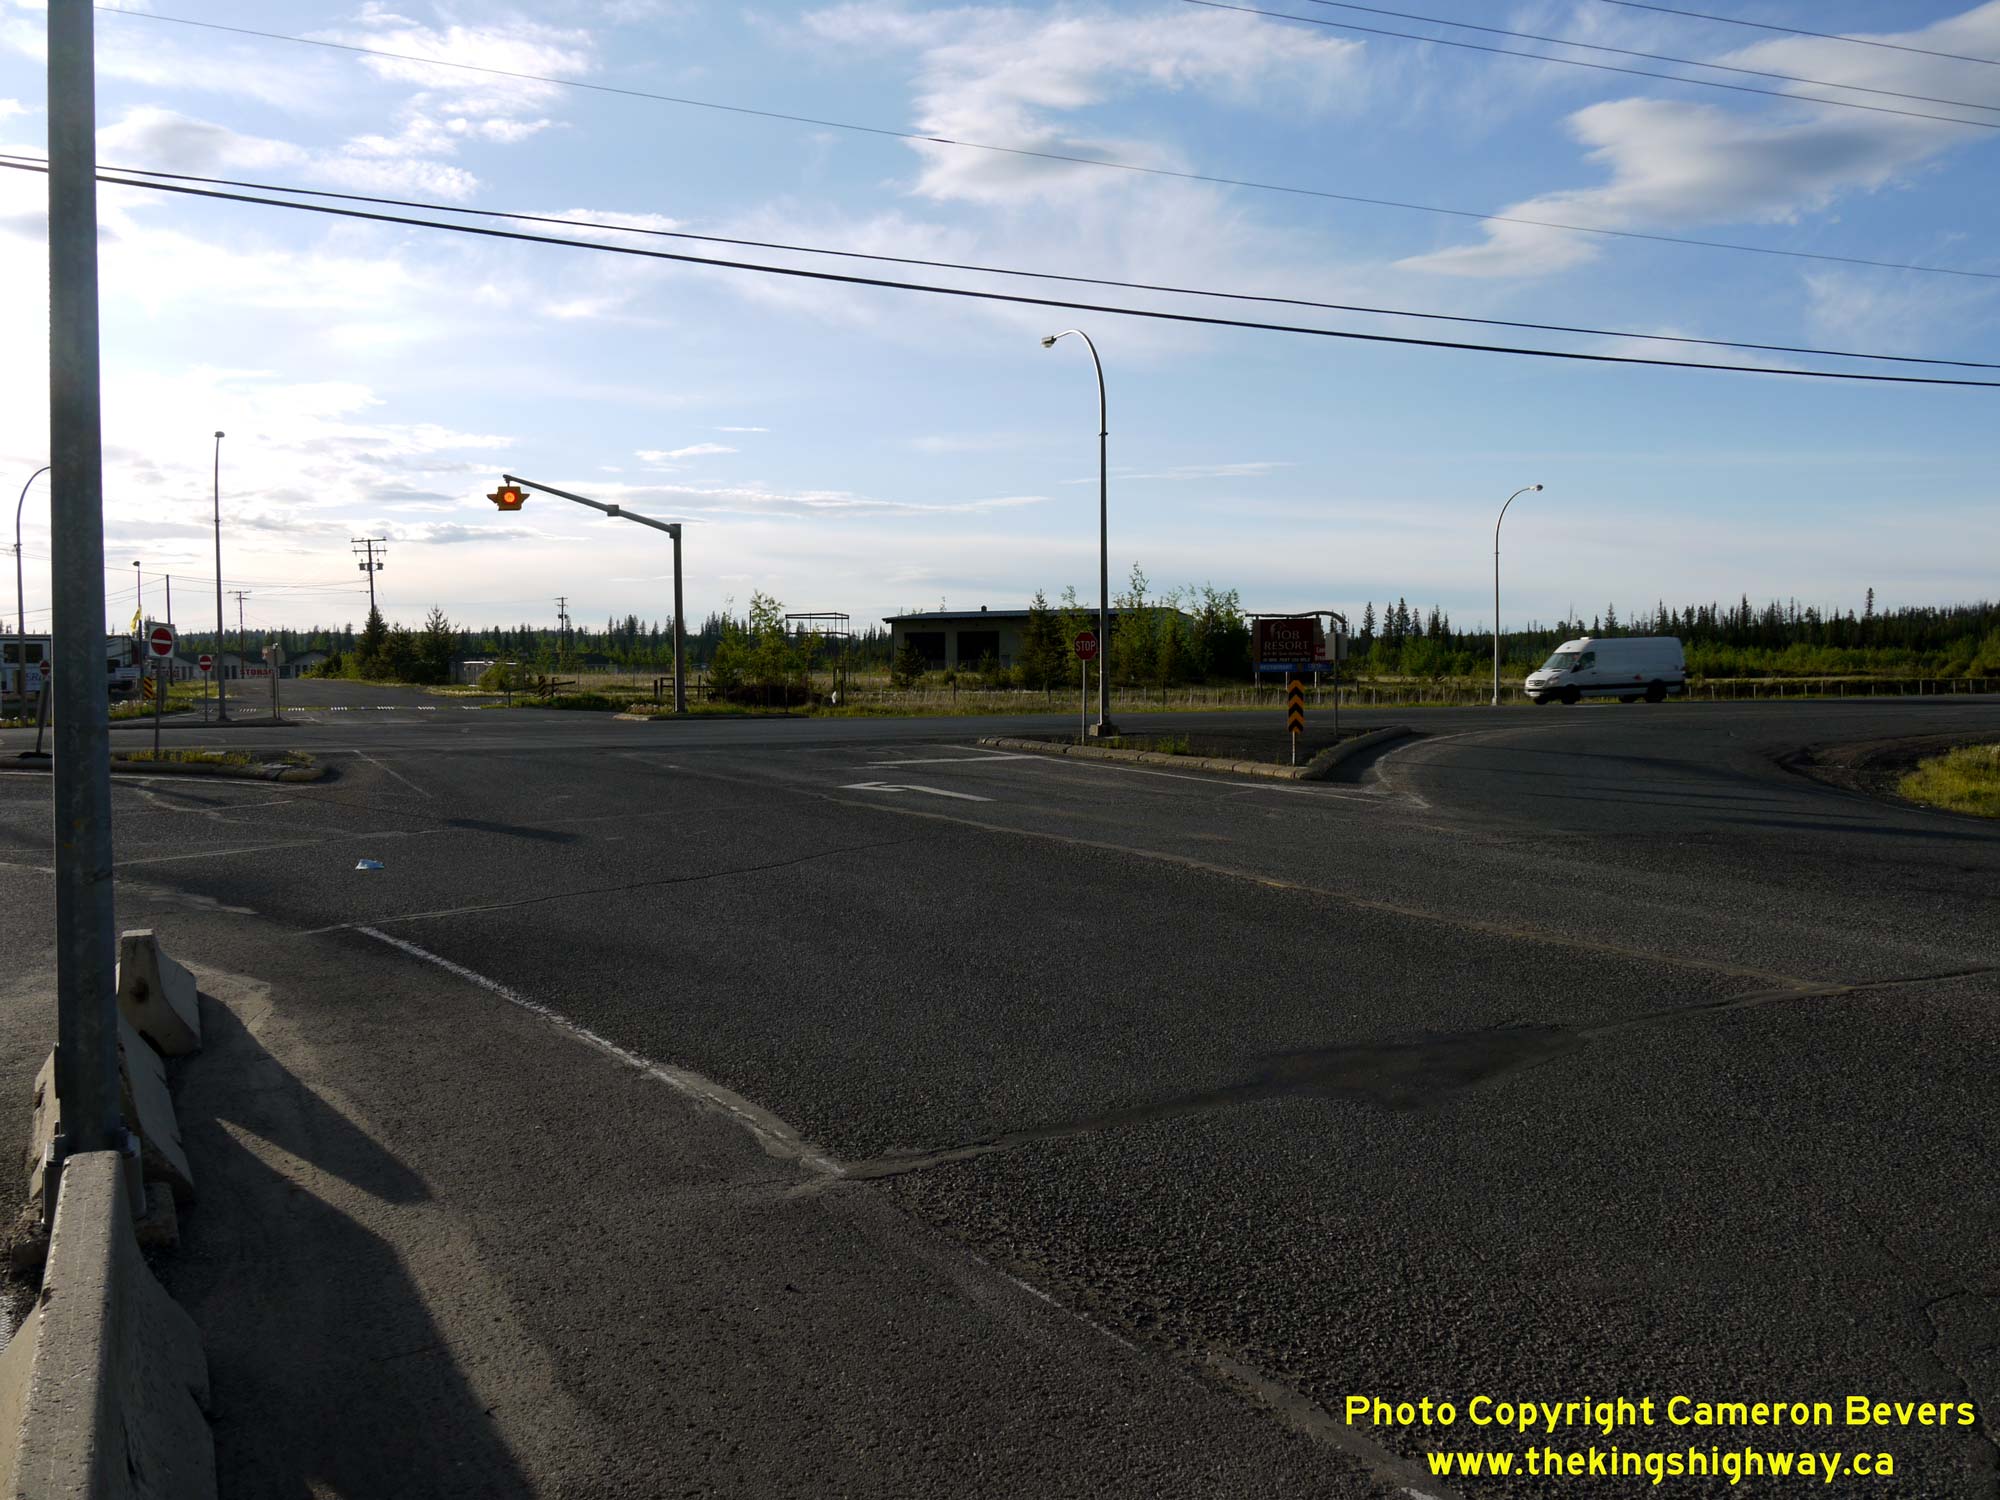
Left - Facing south along Hwy 97 towards Cache Creek from the Hwy 24 Junction. See an
Enlarged Photo Here. (Photograph taken on June 1, 2015 - © Cameron Bevers) Right - Western terminus of Hwy 24 at the Hwy 97 Junction at 93 Mile. Apart from the highway junction itself, there are not a lot of notable features at 93 Mile. See an Enlarged Photo Here. (Photograph taken on June 1, 2015 - © Cameron Bevers) 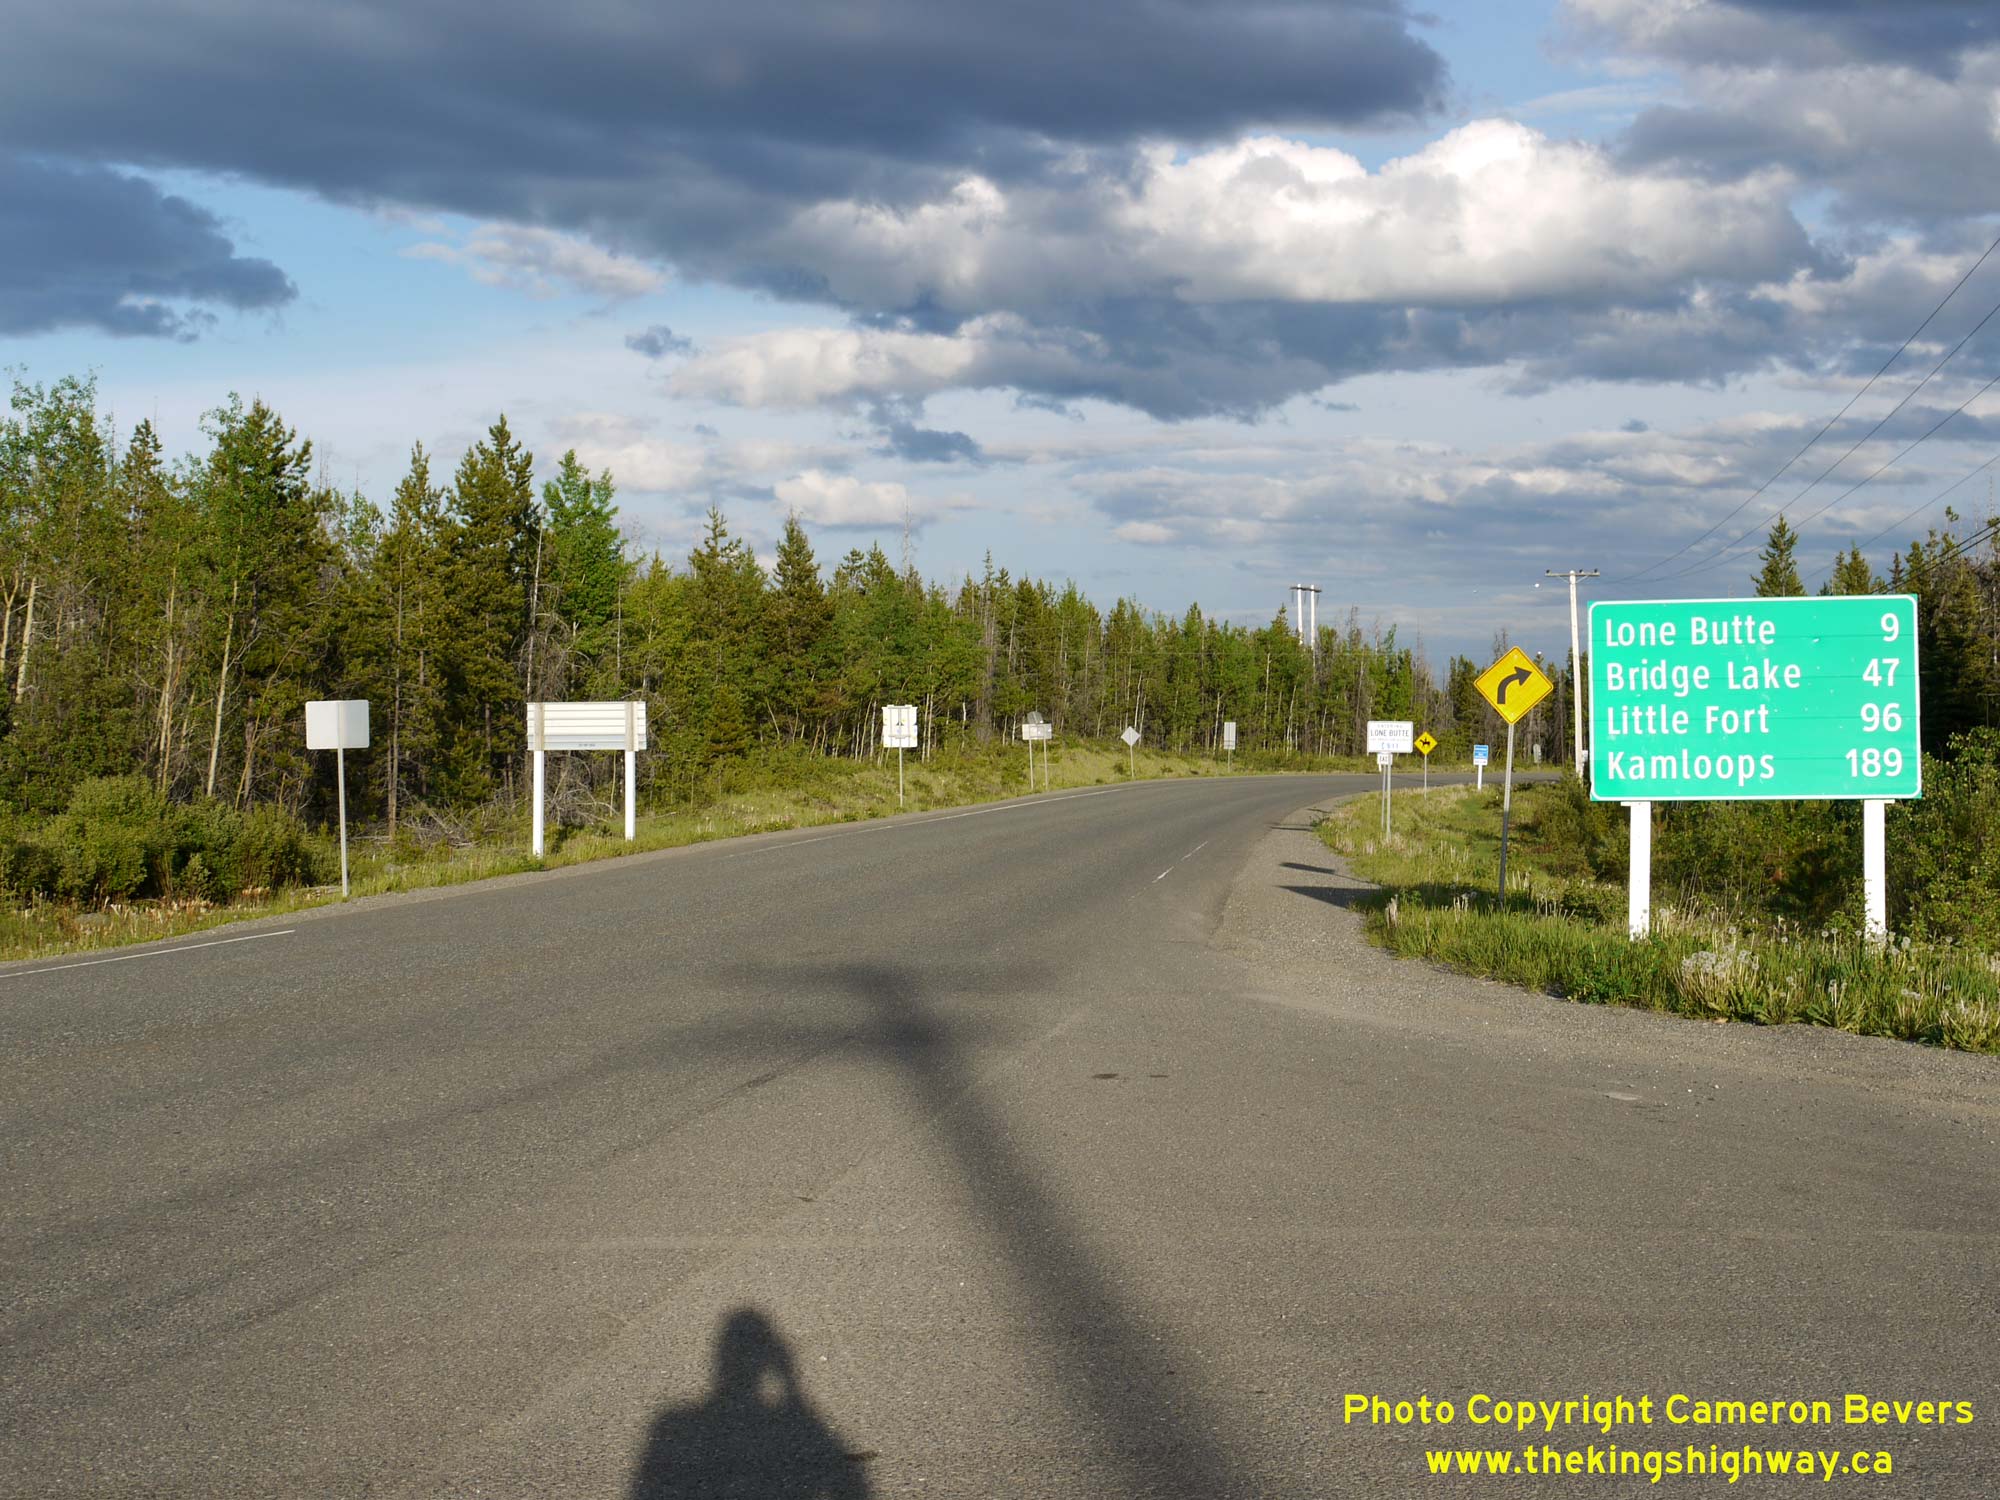

Left - Distance guide sign on eastbound Hwy 24. Although Hwy 24 ends at Hwy 5 in Little Fort 96 km ahead, motorists can reach Kamloops via the Southern
Yellowhead Highway (Hwy 5). It is actually slightly shorter distance-wise for motorists to use Hwy 24 and Hwy 5 when travelling between 100 Mile House and Kamloops,
versus using Hwy 97 via Cache Creek. See an Enlarged Photo Here. (Photograph taken on June 1, 2015 - © Cameron Bevers) Right - Facing east along Hwy 24 from the Hwy 97 Junction at 93 Mile. See an Enlarged Photo Here. (Photograph taken on June 1, 2015 - © Cameron Bevers) 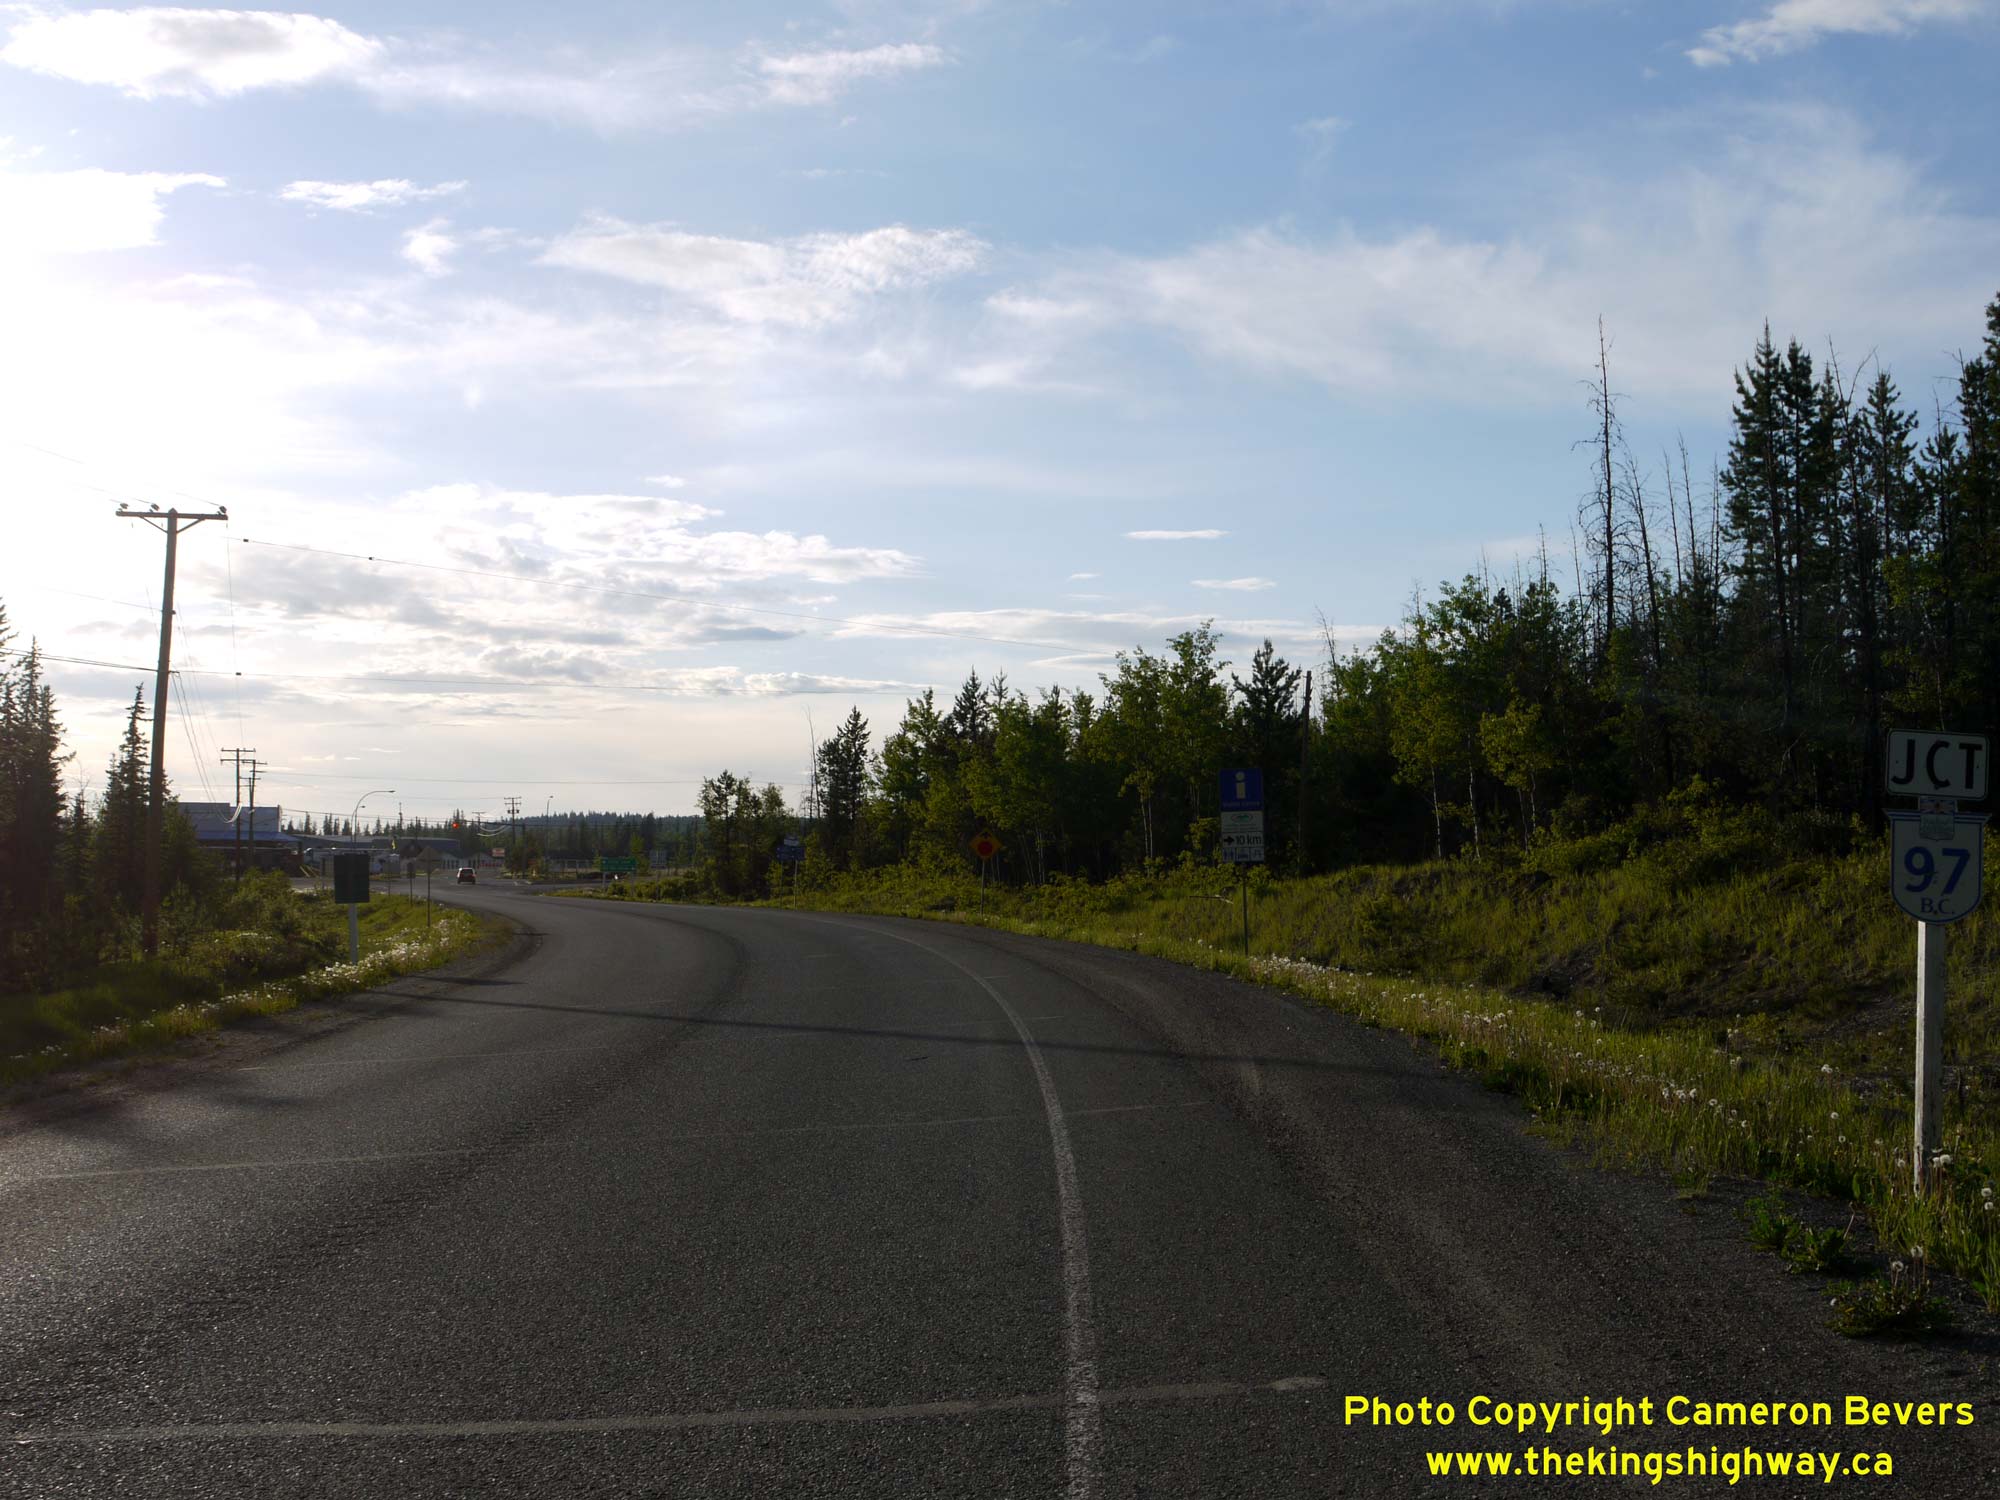

Left - Approaching the western terminus of Hwy 24 at the Hwy 97 Junction at 93 Mile. See an
Enlarged Photo Here. (Photograph taken on June 1, 2015 - © Cameron Bevers) Right - View of Hwy 97 facing north towards 100 Mile House from the Hwy 24 Junction. Note the interesting Merge warning sign at right, which uses text rather than graphics to indicate that the lane is ending. See an Enlarged Photo Here. (Photograph taken on June 1, 2015 - © Cameron Bevers) 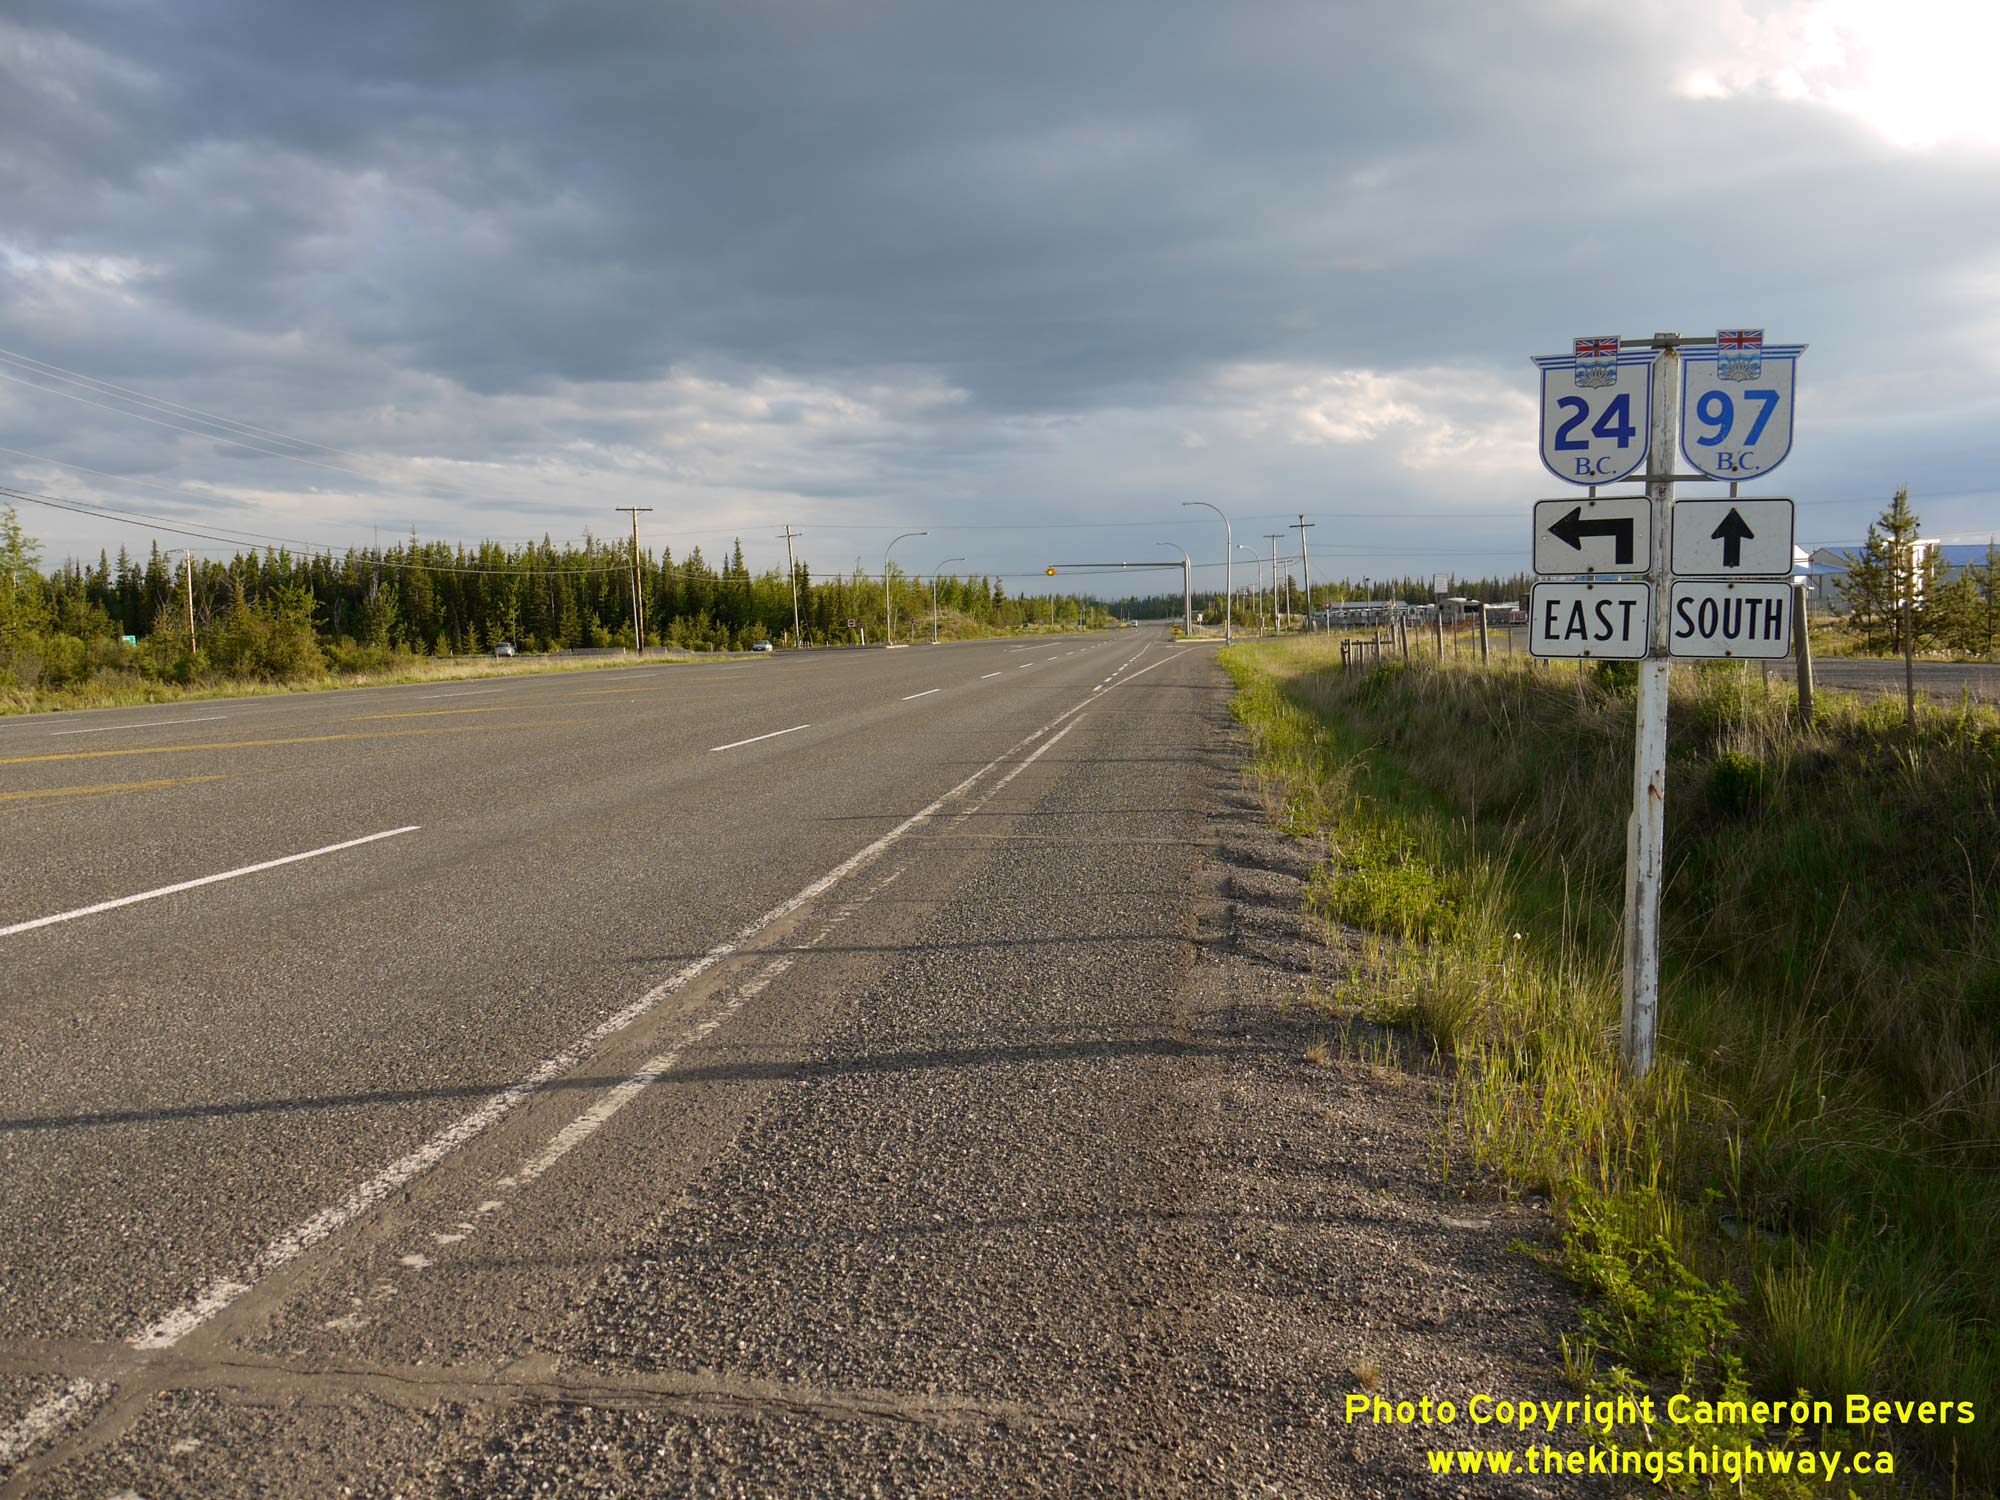

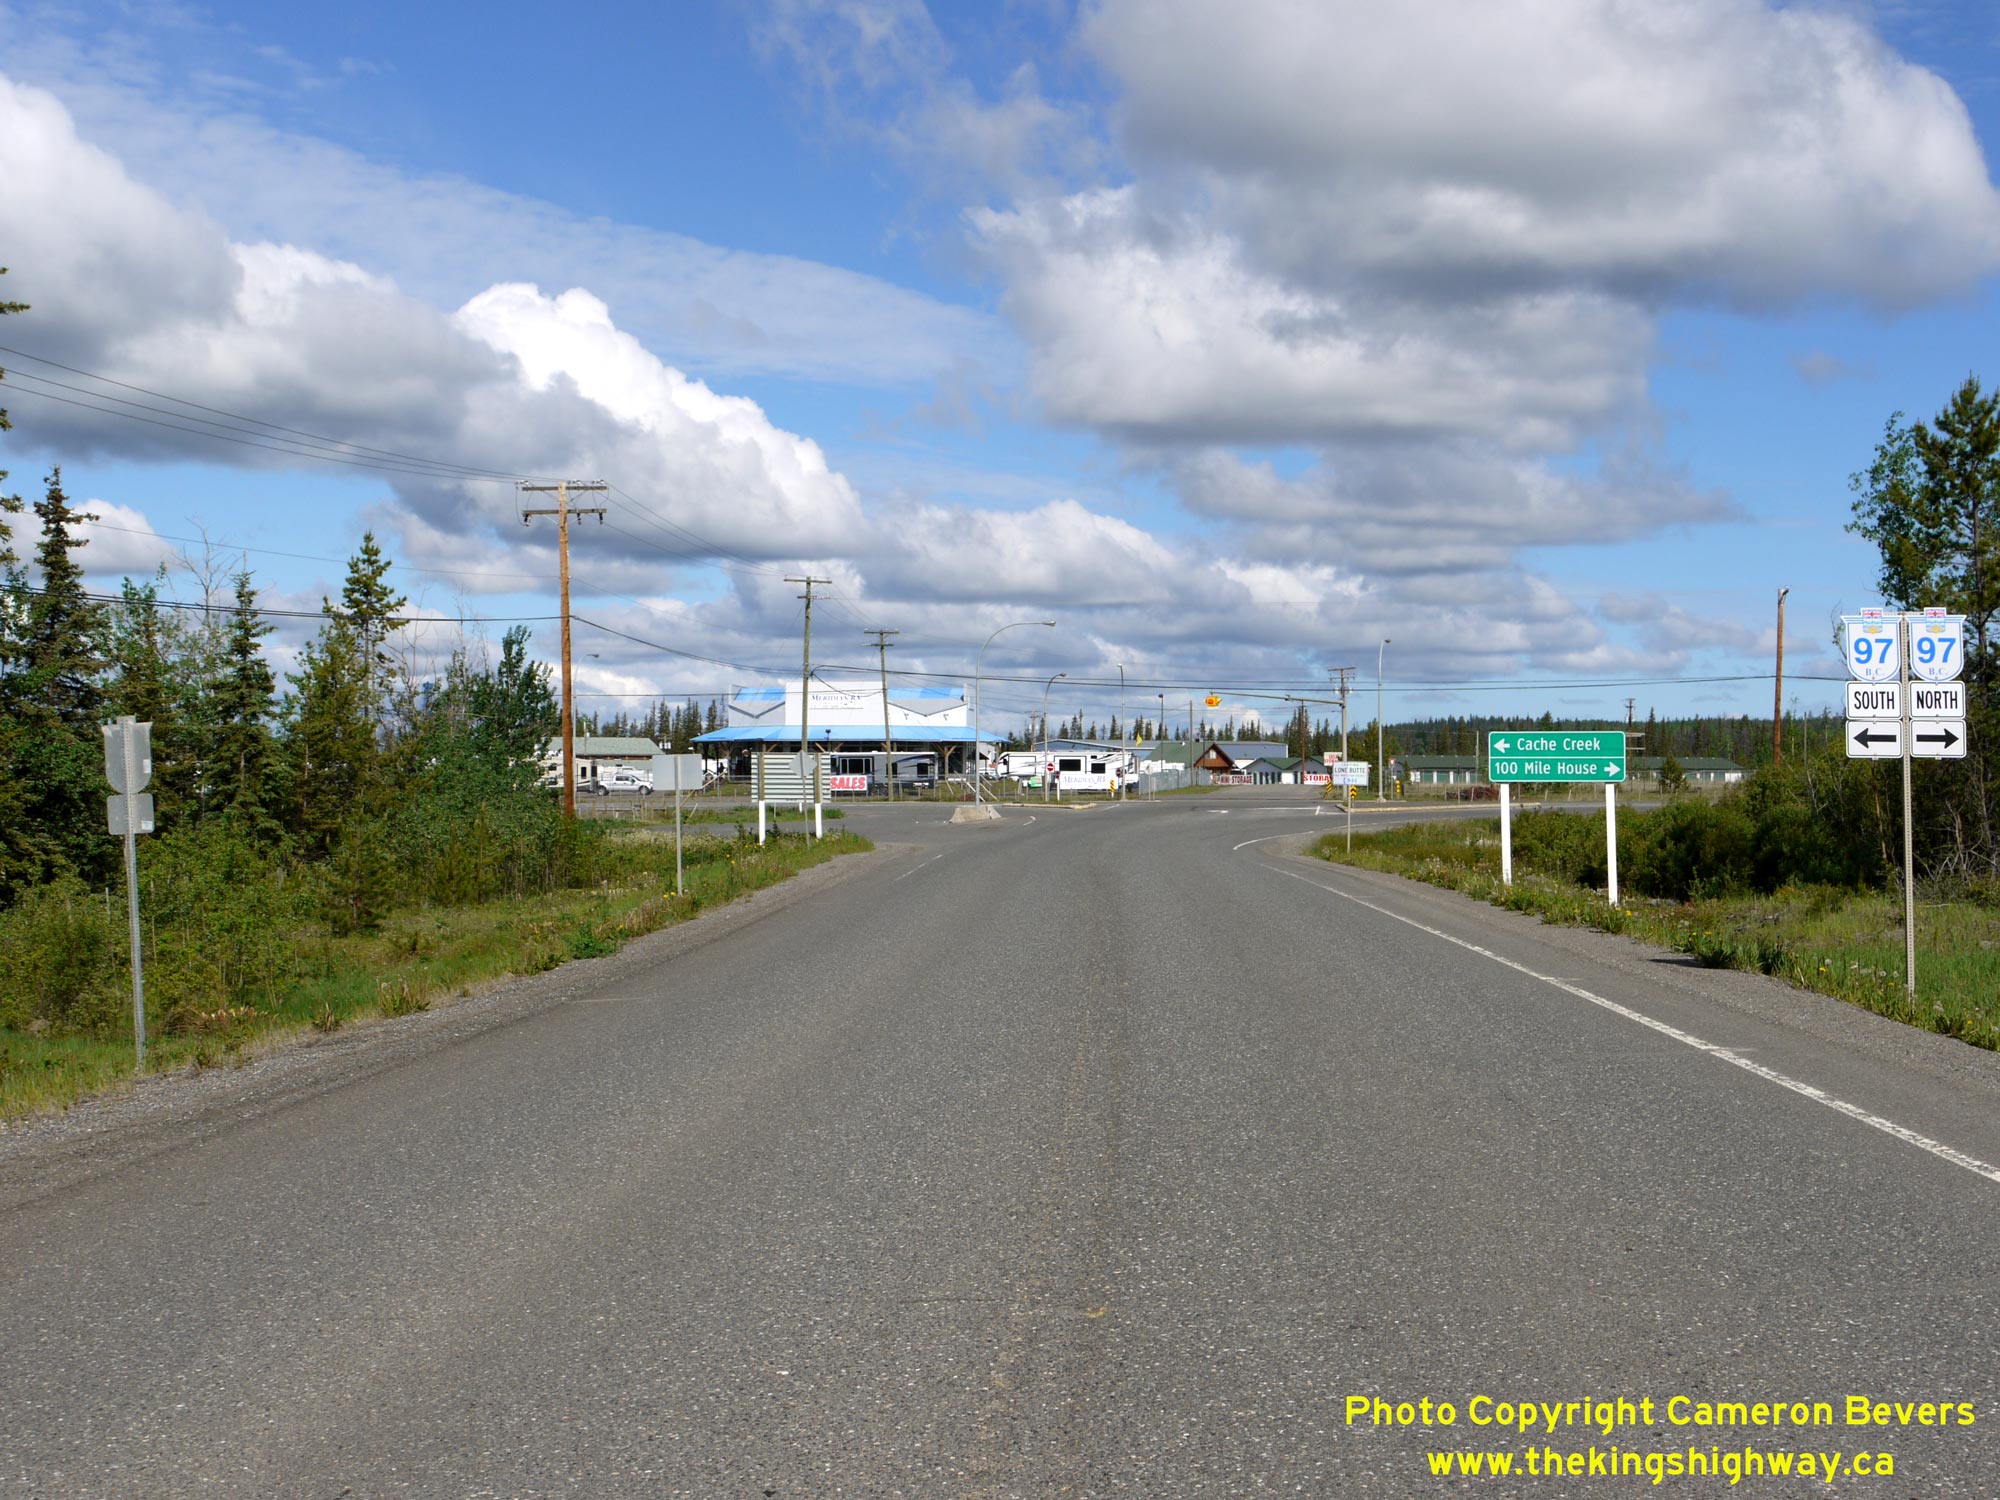
Left - Junction sign assembly on southbound Hwy 97 approaching the Hwy 24 Junction at 93 Mile. See an
Enlarged Photo Here. (Photograph taken on June 1, 2015 - © Cameron Bevers) Right - Approaching the Hwy 24 Junction on Hwy 97, facing south at 93 Mile. See an Enlarged Photo Here. (Photograph taken on June 1, 2015 - © Cameron Bevers) 
Left - Green guide sign on southbound Hwy 97 marking the upcoming Hwy 24 Junction. See an
Enlarged Photo Here. (Photograph taken on June 1, 2015 - © Cameron Bevers) Right - Facing south along Hwy 97 towards the Hwy 24 Junction at 93 Mile. See an Enlarged Photo Here. (Photograph taken on June 4, 2015 - © Cameron Bevers)
Continue north along BC Highway 97 from the Highway 24 Junction to Quesnel (Future Page) |
|---|
Links to Adjacent BC Highway Photograph Pages:
Back to BC Highway 41 Photos /
British Columbia Highways Photo Index /
On to BC Highway 97A Photos
Ontario Highway History - Main Menu / Vacation Highway Photos - Main Menu Website contents, photos & text © 2002-2026, Cameron
Bevers (Webmaster) - All Rights Reserved / Contact Me
|
|---|